How to make Sockeye Salmon Nigiri and Sashimi
This past August I've caught a number of Fraser River Sockeye Salmon with friends and family. And since that time we've all been enjoying Salmon in a variety of different ways (e.g. Sockeye Ceviche). The traditional Japanese sushi style of Nigiri and Sashimi is easily my favorite way to eat Salmon. In fact, if I had to give my 3 top meals Sushi would be there.
This page will outline the simple ways in which I prepare Nigiri and Sashimi. I'll outline how I choose this fish for Sashimi and what sections of the fish I like for each of these Sushi styles and why.
Quick summary of ingredients you'll need:
- Sockeye Salmon Fillet
- Sushi Rice
- Rice Vinegar
- White Sugar
- Fine Salt
- Soy Sauce
- Wasabi paste
- Sushi Ginger (Gari)
Note: Amounts and preparation details below.
Sockeye Salmon Preparation and Amount
The Sockeye salmon used in this meal (and video) I caught 12 days earlier. I filleted the fish and marked my Food Saver bag that it would be for "Sashimi" because of the strong fat lines and very dark red color flesh. I kept the fillet in my deep freezer for those 12 days.
Important: The salmon needs to be flash frozen OR kept in the freezer for at least 10 days, this will ensure worms or parasites will be killed.
I removed the fish from freezer and thawed out in my fridge until it was ready to be prepared. Once thawed out, I pulled all the pin bones out (you can see this in the next image). To pull the pin bones I recommend using some tweezers, but if you don't have those needle or regular pliers can work as well.
For this meal I used 2/3 of a single Salmon fillet (I'm guessing it was around 16-20 ounces of meat). If you're doing a large meal, I'd recommend using 8-12 ounces of uncooked salmon per person.
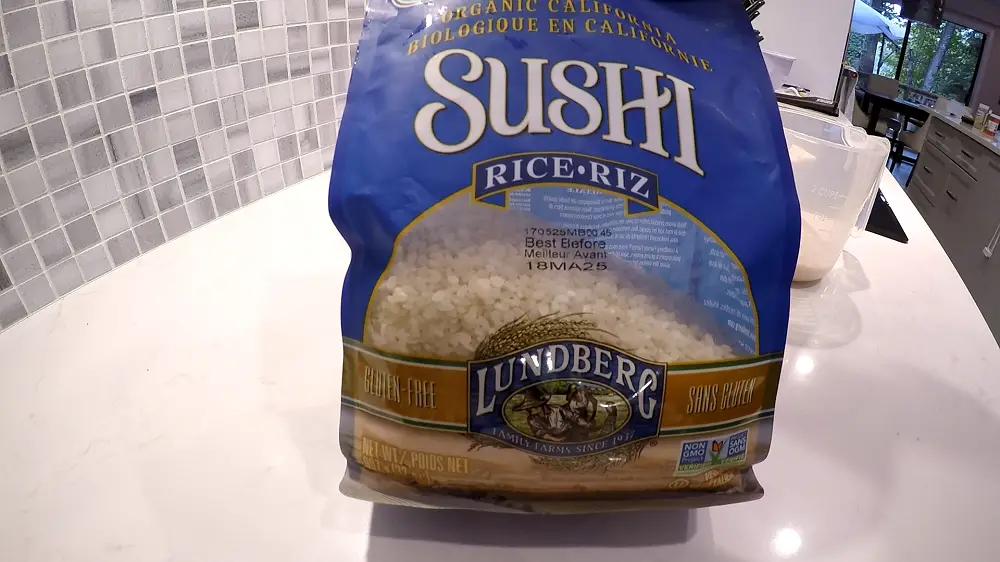
What Type of Rice and How much to use
For the rice, ensure you are using Sushi Rice which is essentially a short-grain rice that has the correct balance of starches to keep the rice sticking together after its been cooked.
1 Cup of sushi rice will make approximately 3-4 rolls (obviously depending on size). A good rule of thumb is use 1 cup of rice for 2 people.
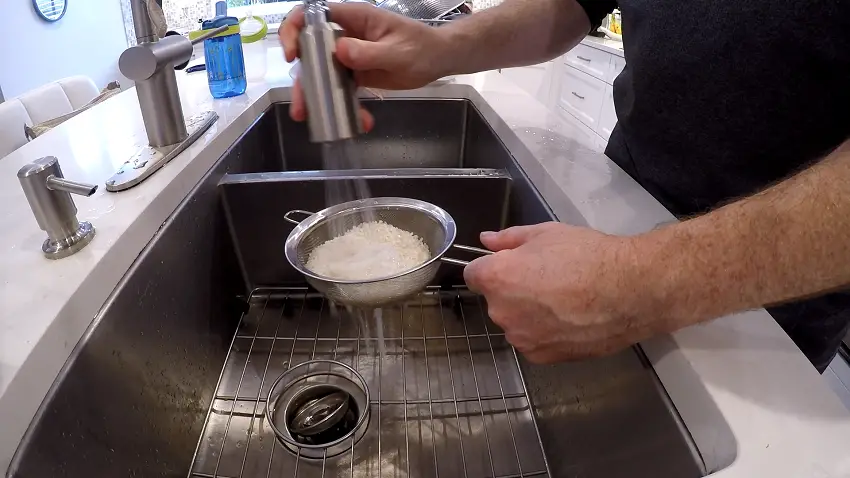
How to make your Sushi Rice
Important: These instructions below are generic for preparing Sushi rice. If these differ from the instructions on your Sushi Rice bag be sure to follow those instead as not all rices are the same.
- Rinse the rice for 1-2 minutes (so you no longer see the starch coming out)
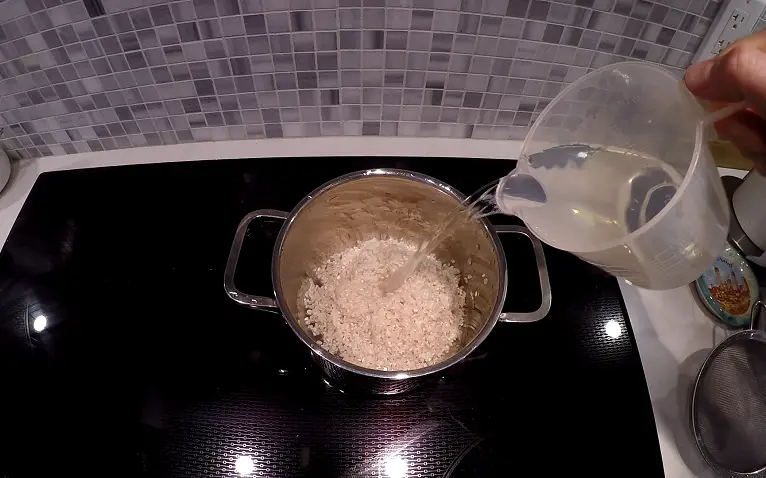
- Water to Rice ratio is 1.25 : 1 (e.g. 1 cup of rice to 1 1/4 cups of water)
- Put rice and water into a pot and set to boil, mix once or twice until boiling
- Once the water is boiling, reduce heat for 10-15 minutes
- Rice is done once the water is gone from the bottom of the pot (or test with a fork)
Dump Rice from Pot into Bowl
This next step is important and that's removing the rice from the pot and dumping it into a plastic or wooden bowl. You only want the best rice from the pot, and what I mean by that is the rice that is not burnt, damaged or sticking to the bottom of the pot. The way to get the "best rice" is to simply dump the pot over wooden/plastic bowl give it a little shake or pat and any of the rice that falls in will be considered the "good rice". Do not scrape the bottom of the pot to include the excess as this include damaged rice which will not hold up as well. Yes, this may be a bit wasteful but its something to consider when you're doing your initial rice amount calculations.
Next we add the sweet vinegar mix...
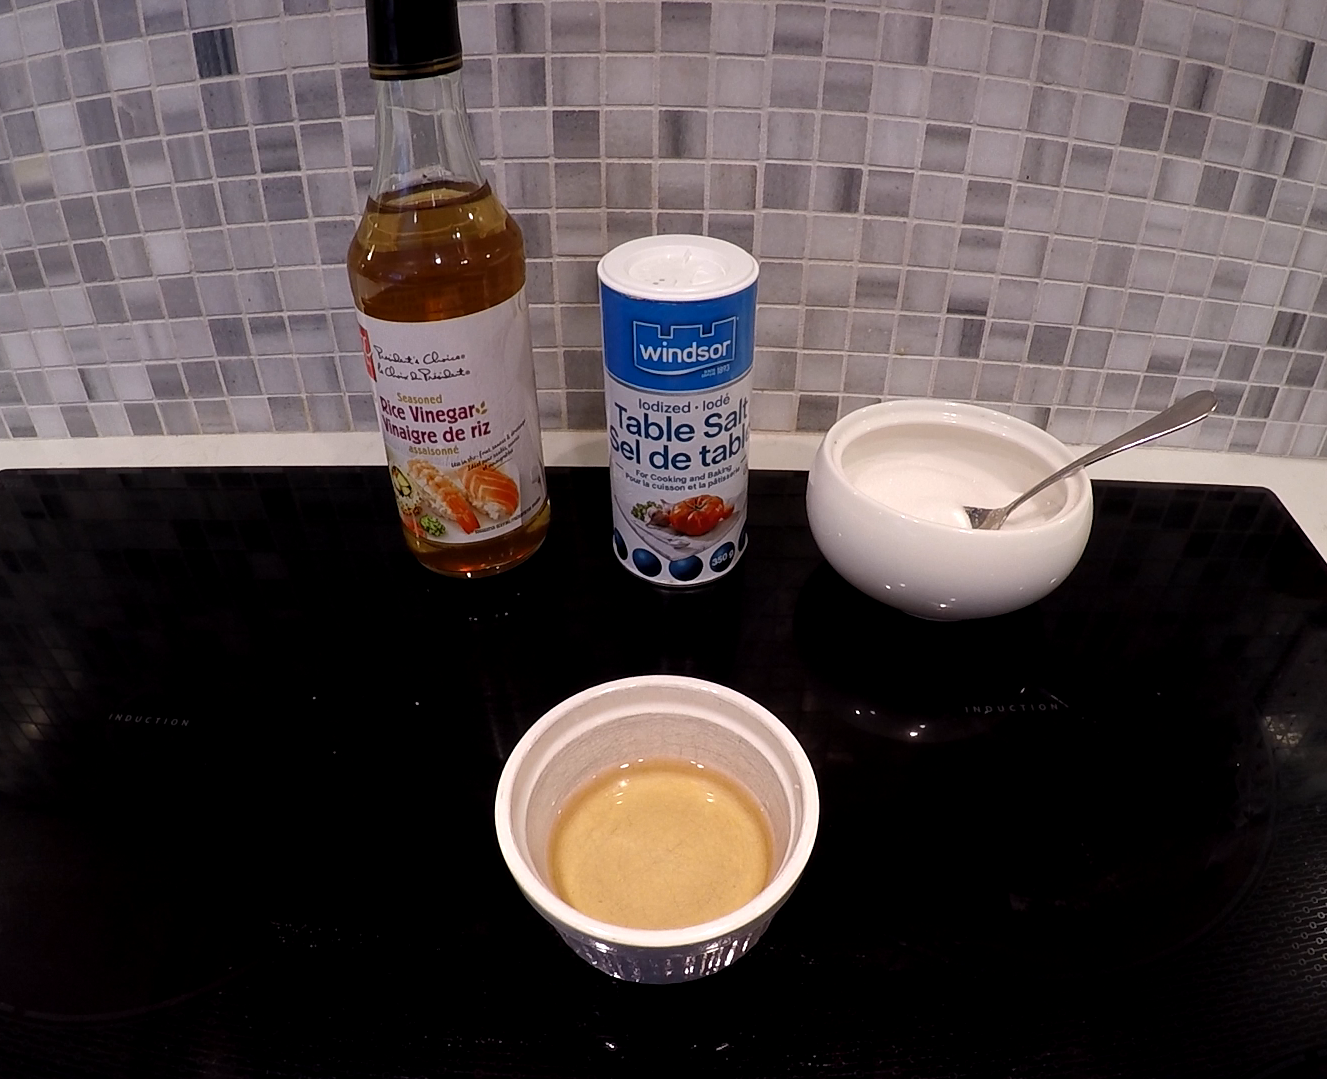
How to make Sweet Vinegar Sushi Mix
These measurements are for 2 cups of uncooked sushi rice. However, the vinegar mix amounts is subjective to taste as I've used this amount with 1 cup of rice as well.
- 1/2 cup of Rice Vinegar
- 2 teaspoons of white sugar
- 2 teaspoons of fine salt
Instructions: Add the ingredients into a small glass bowl (something microwave friendly). Put bowl into microwave for 10 seconds. Mix all the ingredients until dissolved.
Pour the sweet vinegar slowly all over the rice. Use a wooden spoon to mix gently using a cutting motion. The cutting motion is a gentle up and down movement with the spoon verses a scooping motion, this mixing technique will again reduce any damage to the rice. We're talking perfection people, perfection I say! 🙂
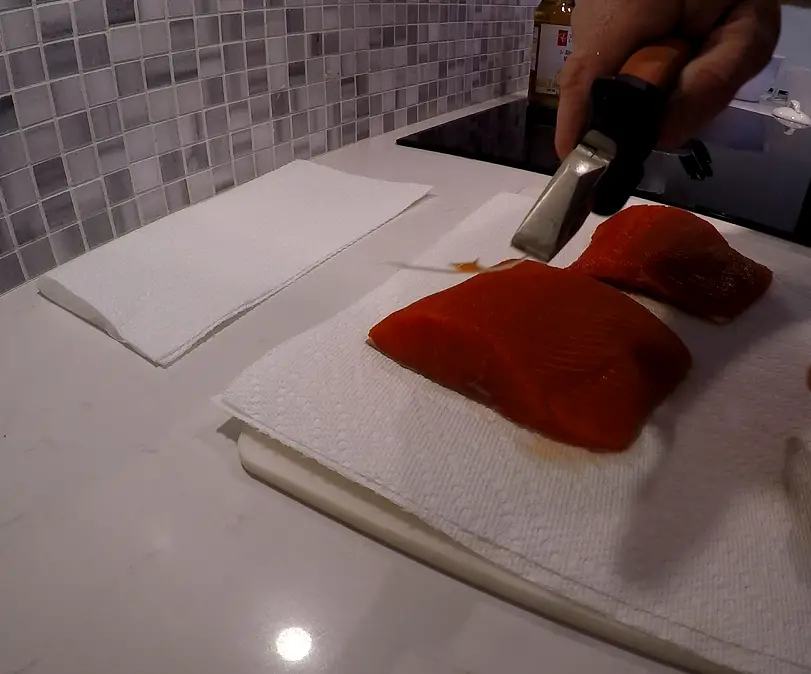
Different Sockeye Salmon Cuts: Belly and Loin sections
I'm not a Sushi Chef but I've certainly filleted my fair share of fish and I've come to know what sections and cuts of the fish I love the most. Here are my favorite sections and recommended cuts for the various pieces of sushi:
- The Belly is the thinnest section of the fillet and has the fattiest section of meat. Fish store most of their fat content in their bellies and it's evident by the larger white fat lines throughout this section. I like to use the belly for thin cuts to be placed on top of the rice, aka. the Nigiri pieces.
- The Loin middle is the strip just above the belly. This is my favorite section for Sashimi, it's a little more firm but still has decent sections of fat. On a side note, the 1-2 inch section above the belly always turns out to be the tastiest piece when I smoke my salmon.
- The Loin top is the strip along the top (along the spinal cord, aka the shoulders of the fish). This section will have the lowest amount of fat and is evident by the thin white fat lines (if at all). This is a great section for Sashimi or small chunks to be added to your rolls.

Cutting thin slices off the belly section for Nigiri.
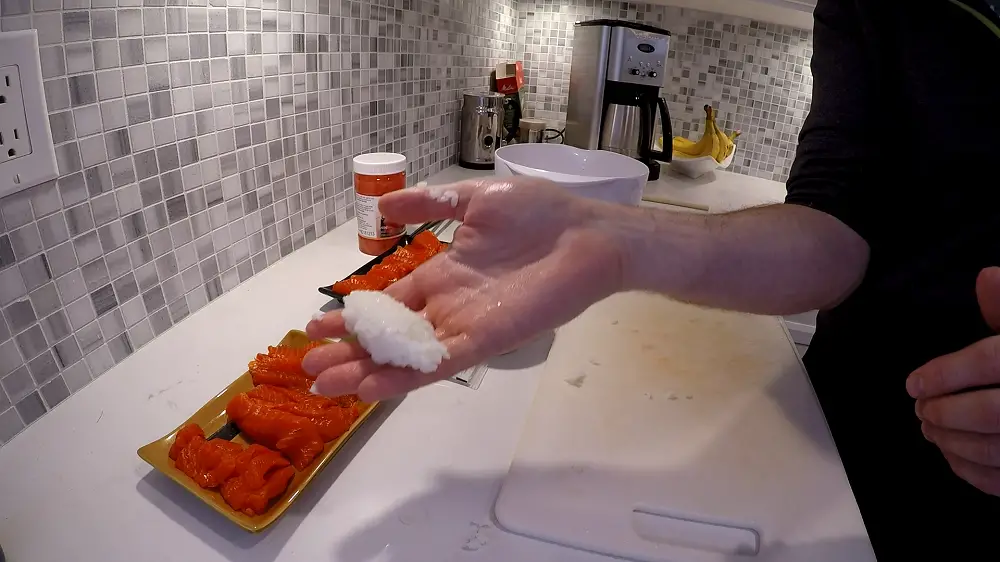
Rolling the Sushi Rice for Nigiri
Before you start playing with the rice, ensure you have a hand rub to dip your hands into and coat your hands before handling the rice. This rub will reduce the amount of rice sticking to your hand and provide another coating on the rice. The hand rub is simply to coat your hands a few times, here is as simple mix:
- 1/2 cup of water
- Couple drops of vinegar
It's time to get messy, grab a small handful of rice that easily sits in the palm of your hand. This amount of rice will make up the Nigiri piece so grab an amount that could be eaten in one bite. I recommend going smaller than larger, nothing worse when there is too much rice in Nirgiri piece or roll!
Clench your fist tight with the rice in it and the rice should begin to stick together. Clench your fish a few times so that will begin to give it a little long cylinder shape in your hand. Now I'm sure Sushi chefs could provide insightful tips on how best to finalize the molding, but I say harness your inner child and like Play-Doh form it however you'd like! The final shape you're aiming for is a rectangle with a rounded top.
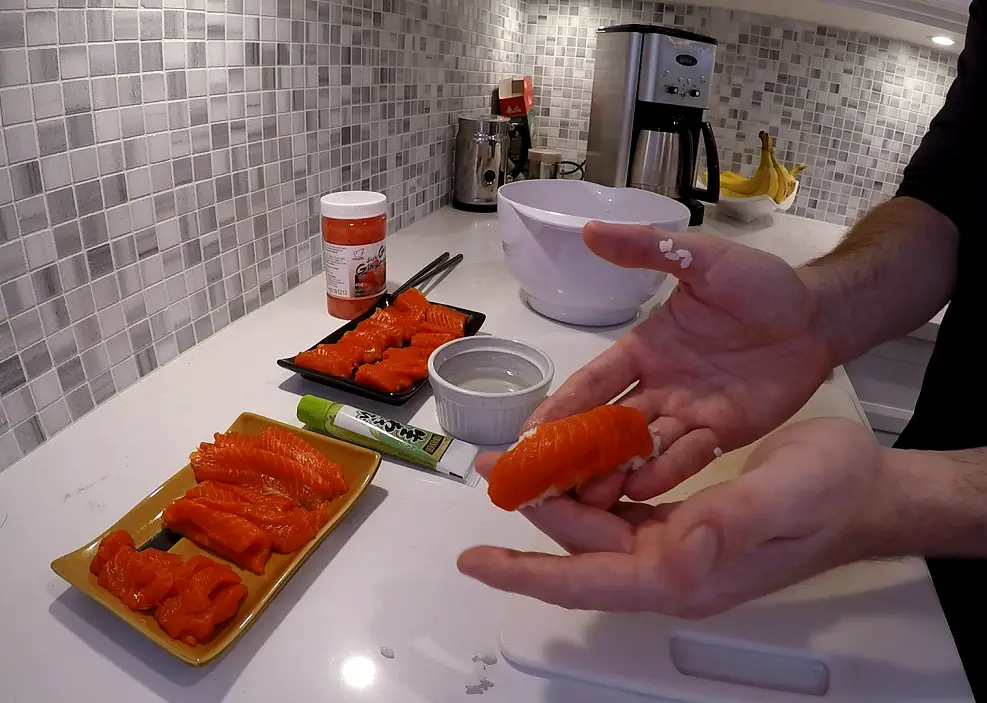
Adding the Salmon to the Rice
Take your thin cut piece of salmon in one hand, and with the other hand get a dab of Wasabi paste (use as much or little based on how spicy you want it). Spread that dab of wasabi onto the bottom section of the salmon (hidden section that will sit on top of the rice).
Now gently place the salmon on top of the prepared rice piece. You can do some more molding of the salmon to the edges of the rice if the salmon is cut thin enough. If it's a thicker piece of salmon you won't be able to do this, and may have to push the salmon a little firmer onto the rice piece.
Done! Place that single piece on a nice Sushi plate and repeat the process! Dip in Soy Sauce and Wasabi mix and you're eating like a king!
Walk through video: How to Make Sockeye Salmon Nigiri and Sashimi
In this video I walk through the steps articulated above. Also have a taste test at the end. Would love your feedback. Cheers!
My name is Jesse, thanks for checking out this tip page on preparing Salmon Sushi. If you have any questions on this recipe or instructions feel free to reach out to me. Additionally, if you have any other ideas or methods in how you prepare Nigiri or Sashimi, I always love learning and trying new ideas, reach me on the contact page. Cheers! Jesse
Additional Tips


")


")


