Bottom Fishing Rigs
There are dozens of bottom fishing rigs to use. This tip outlines 4 setups that can be interchangeable where you could exchange the weights, hooks, baits, etc. between the setups. For example, you could replace the slinky weight from Setup #1 with a cannon ball weight from Setup #2. Or you could use weights that are not included on these diagrams such as pyramid, dipsey, diamond, cattail or sputnik sinkers, etc. Think about the type of bottom you're fishing and choose your weight based on that (more below). These setups can be used in any type of water: salt and fresh water, current, tide and still waters.

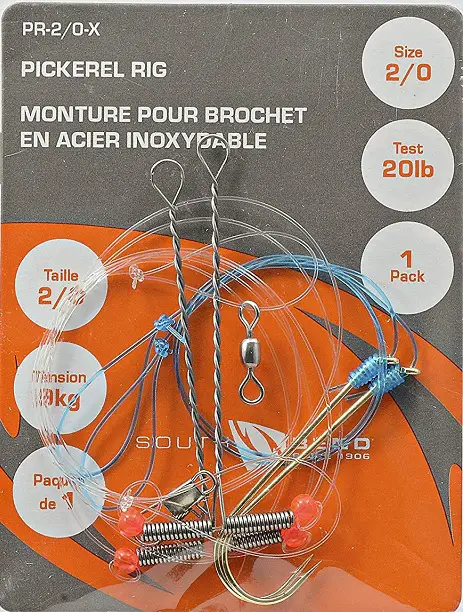
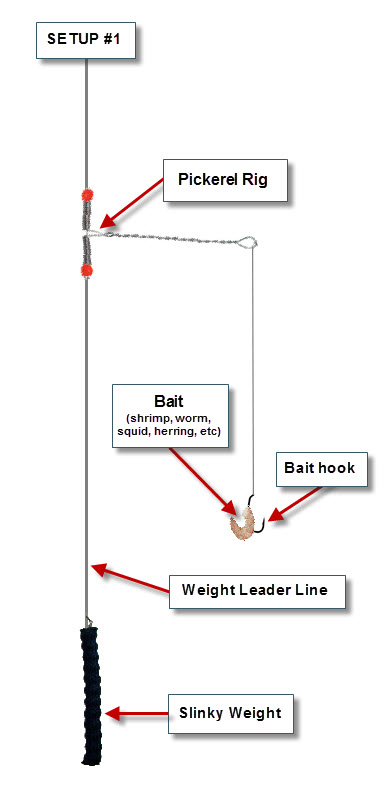
Setup #1 - Pickerel Rig
This fishing setup is geared so that the angler will continually cast and retrieve a metal/plastic lure. This is most often targeting fish in the upper to middle sections of the water.
Pickerel Rig: A pickerel rig is essentially a light separator wire that creates space between the weight leader and the leader to the hook/bait. This space prevents tangles between the two leader lines. The pickerel wire rotates around the line and is held in place by 2 beads on the top and bottom. The rotating setup enables the bait to move naturally in the current or tide.
This setup rig mimics the metal spreader bar (Setup #3) but the components or hardware are much lighter. The wire is bendable and ultralight specifically designed for light biting fish vs. a metal spreader bar which is geared for larger heavier fish.
Note: In this diagram there is only 1 wire separator but most pickerel rigs will come with 2 separators so you can fish 2 baits at once.
Weight Leader Line: There are 2 leader lines in the diagram the one that connects to the hook/bait (lure leader line) and the other that connects to the weight (weight leader line). The weight leader line should always be lighter than the pickerel rig line, because if you ever get snagged up on the bottom the weight line should break vs. the pickerel rig or mainline. This means you'll only loose your weight and not the pickerel rig and bait/lure.
Leader Line (to lure): The leader line that comes off the pickerel rig to the bait or lure must be shorter than the weight leader line. This is very important as it will ensure you're fishing off the bottom. Additionally, it's recommended that the leader weight should be less than the pickerel rig but this isn't the biggest concern as it's not touching bottom so shouldn't often get snagged up.
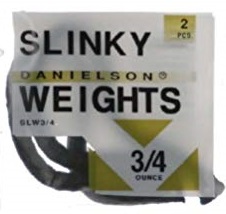
Slinky Weight: A slink weight is essentially a bunch of little lead balls inside a parachute chord sleeve. These slinky's come in a variety of different weights, the longer the slinky the heavier they are (aka. more lead balls). Because of the parachute chord these slinky's bendable and "floppy", as a result they rarely snag up. In fact I'm a big fan of using slinky weights when drift fishing in the river as they rarely get hung up in the rocks or bottom when moving through the water. I've found the same benefits when using these in tidal settings with moving currents and in/outgoing tides.
Demonstration: Bottom Fishing with Setup #1
Here is a video from my BCFJ YouTube channel outlining Setup #1. In the video I catch Flounder, Greenling, Sculpin and Crab. I also give an overview of the pickerel rig (Setup #1) and how I'm fishing it. Enjoy!
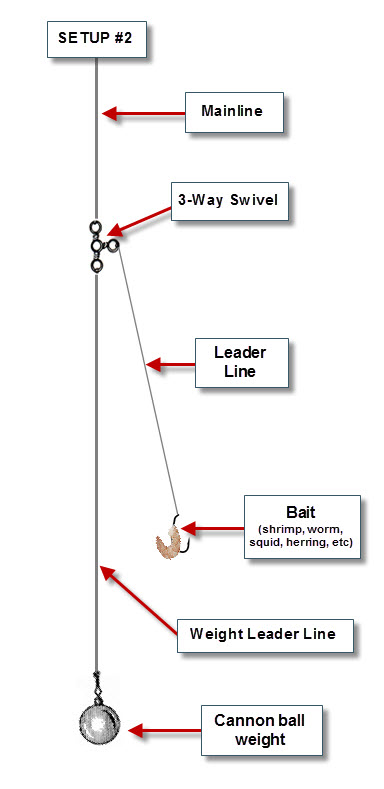
Setup #2 - Basic Bottom Rig with 3-Way Swivel
This is the easiest bottom fishing rig to setup as you only need a 3-way swivel to split the weight from the hook leader lines. It's essentially the mainline connected to a 3-way swivel, then two leader lines holding the weight and other the hook/bait. The only negative to this setup is that it's more prone to line tangles between the two leader lines. The remainder of the setup principles from setup #1 apply.
3-Way Swivel: Similar to the standard 2-way swivel it connects the mainline to the leader but has an additional eye that enables a second leader line. Swivel sizes should align with your fishing line weight, check the 3-way swivels packaging as it should outline a maximum weight in pounds.
Weight Leader Line: This is the longer of the 2 leader lines that connects the weight to the 3-way swivel. The reason this longer than the other leader line is to ensure the weight sits on the bottom and the bait fishes just off the bottom. Additionally, it's important to ensure the leader line weight is less than your mainline weight, this way if you snag up on the bottom you'll only loose your weight and not the rest of the setup.
Leader Line: This is the shorter leader line connects the hook to the 3-way swivel. This line must be shorter than the weight leader line to ensure your bait is not sitting on the bottom. For this short leader I recommend using fluorocarbon which is invisible in the water and has a less stretch will be a better indicator when you're getting bites.
Hook: I like to use a single octopus, bait or worm style hooks.
Bait (E.g. Prawn, Shrimp, Squid, Worm, Octopus, etc.): You can use any type of bait on the bottom so feel free to experiment. I would recommend matching the food sources naturally found in the environment but then again a random change up never hurts when fishing is slow. When using bait on a bait hook you don't need a giant piece, I like to use smaller pieces that cover the hook (and not much bigger).
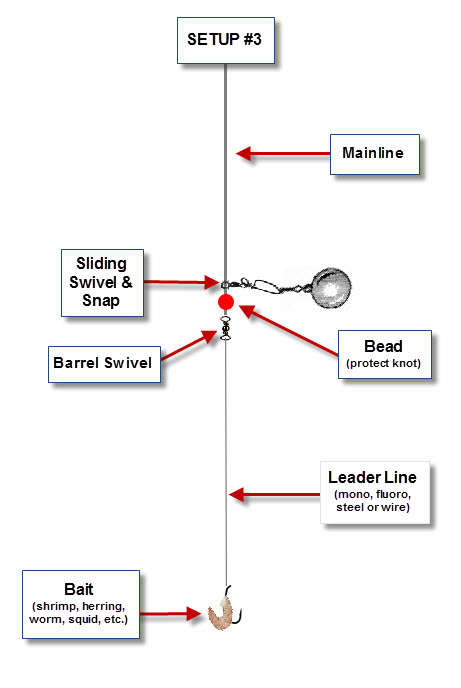
Setup #3 - Bottom Rig with a Sliding Weight
This is one of my favorite bottom setups, it's very similar to setup #2 except that the weight slides up & down the mainline. The best advantage of this setup is that when the fish bites the bait it will not feel (or pull) the weight as the mainline is sliding through it. Additionally, this provides a better sensitivity to your rod tip as you're not feeling the weight but line straight to the bait/fish.
This is the setup I use for Dogfish and Sturgeon fishing. Of course with Sturgeon you're using a larger sized weight than the one in the diagram.
Sliding swivel & snap: These are essentially a barrel swivel with a snap or duo-lock attached. The snap piece is important as it allows you to change out your weight size quick and easy. The swivel component slides up and down the mainline.
Bead: The only purpose for this bead is to protect the knot that connects the mainline to the leader line. With a sliding swivel and weight on the mainline it will slide down and hit the knot and could lead to a break off. The bead helps protect this knot against that.
Weight: You can use any weight here as long as it has a way to connect to the swivel & snap. For bottom setups, I like disc or ball weights as I've found they don't get hung up as much as pyramid weights.
Leader Line: Depending on what species of fish you're targeting will dictate what leader line you should use. If I'm bottom fishing for sharks or other toothy species, I'll use a steel leader. If I'm fishing for Sturgeon I use Dacron. If your fishing for smaller finicky fish or very clear water, I'll typically use fluorocarbon.
Hook: I prefer a circle or octopus hooks with this bottom setup. Because this is sitting directly on the bottom I don't like using longer bait hooks. I prefer something the fish and take and chew on as there is often less of a hook set with this setup but more one the fish hooking themselves.
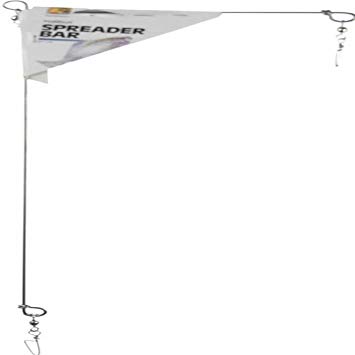
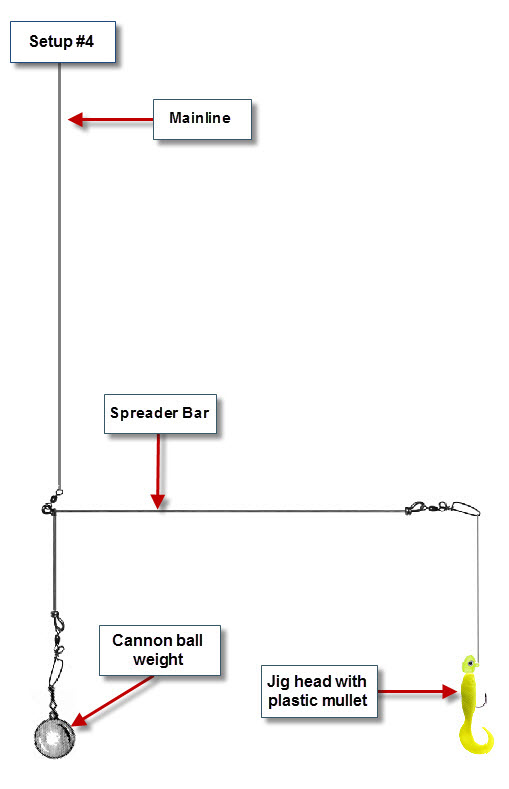
Setup #4 - Spreader Bar Bottom Rig
UPDATE: For a detailed breakdown, check out the new Spread Bar Tip page. It goes into full details of the setups and lures.
This is similar to setup #1 but on steroids. The metal bar spreader is heavier and stronger to avoid bending vs. the lighter wire separator in setup 1. This setup is geared for larger bottom fish like halibut, cod, haddock, ling, rays, etc.
Spreader bar: These are the stainless steel arms that separate the weight from the hook/bait. The spreader comes in an L-shape, the diagram red arrow is pointing to the longer section of the L-shape. The top of the bar is tied directly to the main line and the shorter arm connects to the weight, the longer arm connects to the leader line and hook. These bars usually come with a clips on both arms so you can quickly connect the weights and leader lines.
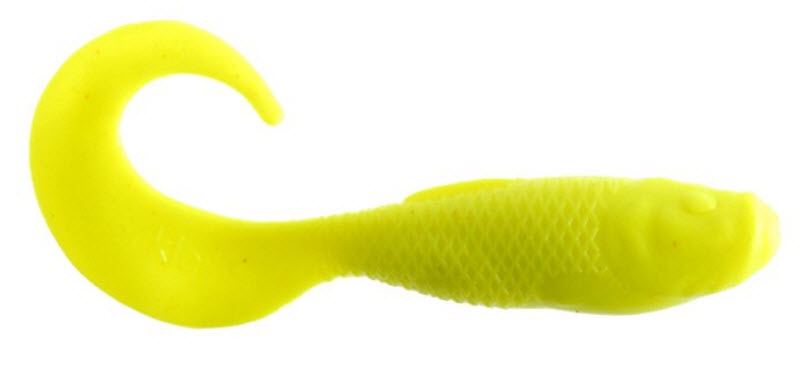
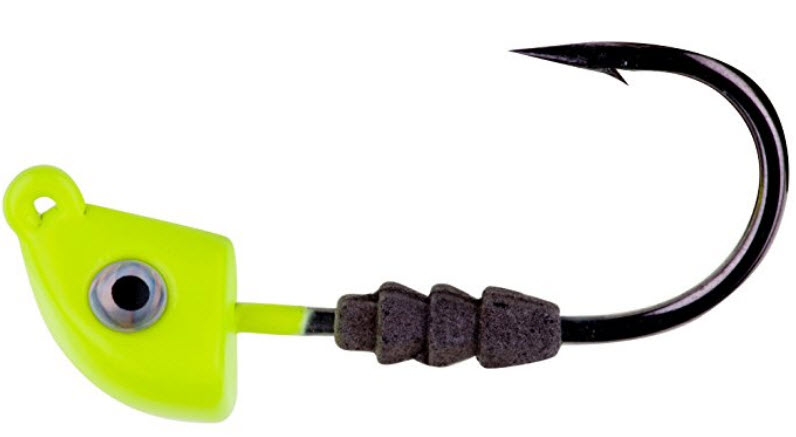
Jig head & Plastic: Depending on the type of species you're targeting you could try using large jigs, bait or both. For example, large heavy jigs are commonly used for deep sea halibut and lingcod fishing.
Leader Line: The leader line connecting the spreader to the jig or hook should be a heavy line. The weight of your line should be matched to the species you're targeting, especially if you're targeting the "toothy" fish you may want to consider titanium leaders.
Weight: Use whatever will get your rig to the bottom. If you're in a current and want the bait to move along the bottom use a cannon ball or round weight. If you're looking to hold on the bottom and not have much movement use a pyramid or sputnik weight. These post up well in sand or soft bottom with current.
For full breakdown of Spreader bar setups, weights, leaders and lures see Halibut & Lingcod Bottom Setups