Freshwater Salmon Fishing Gear Starter Kit
My buddy Brett sent me a text, “So I looked at your website but didn’t see the large, obvious post for a newbie like me: ‘Freshwater salmon fishing gear starter kit'”. Well Brett, this one’s for you and any other fishing newbie.
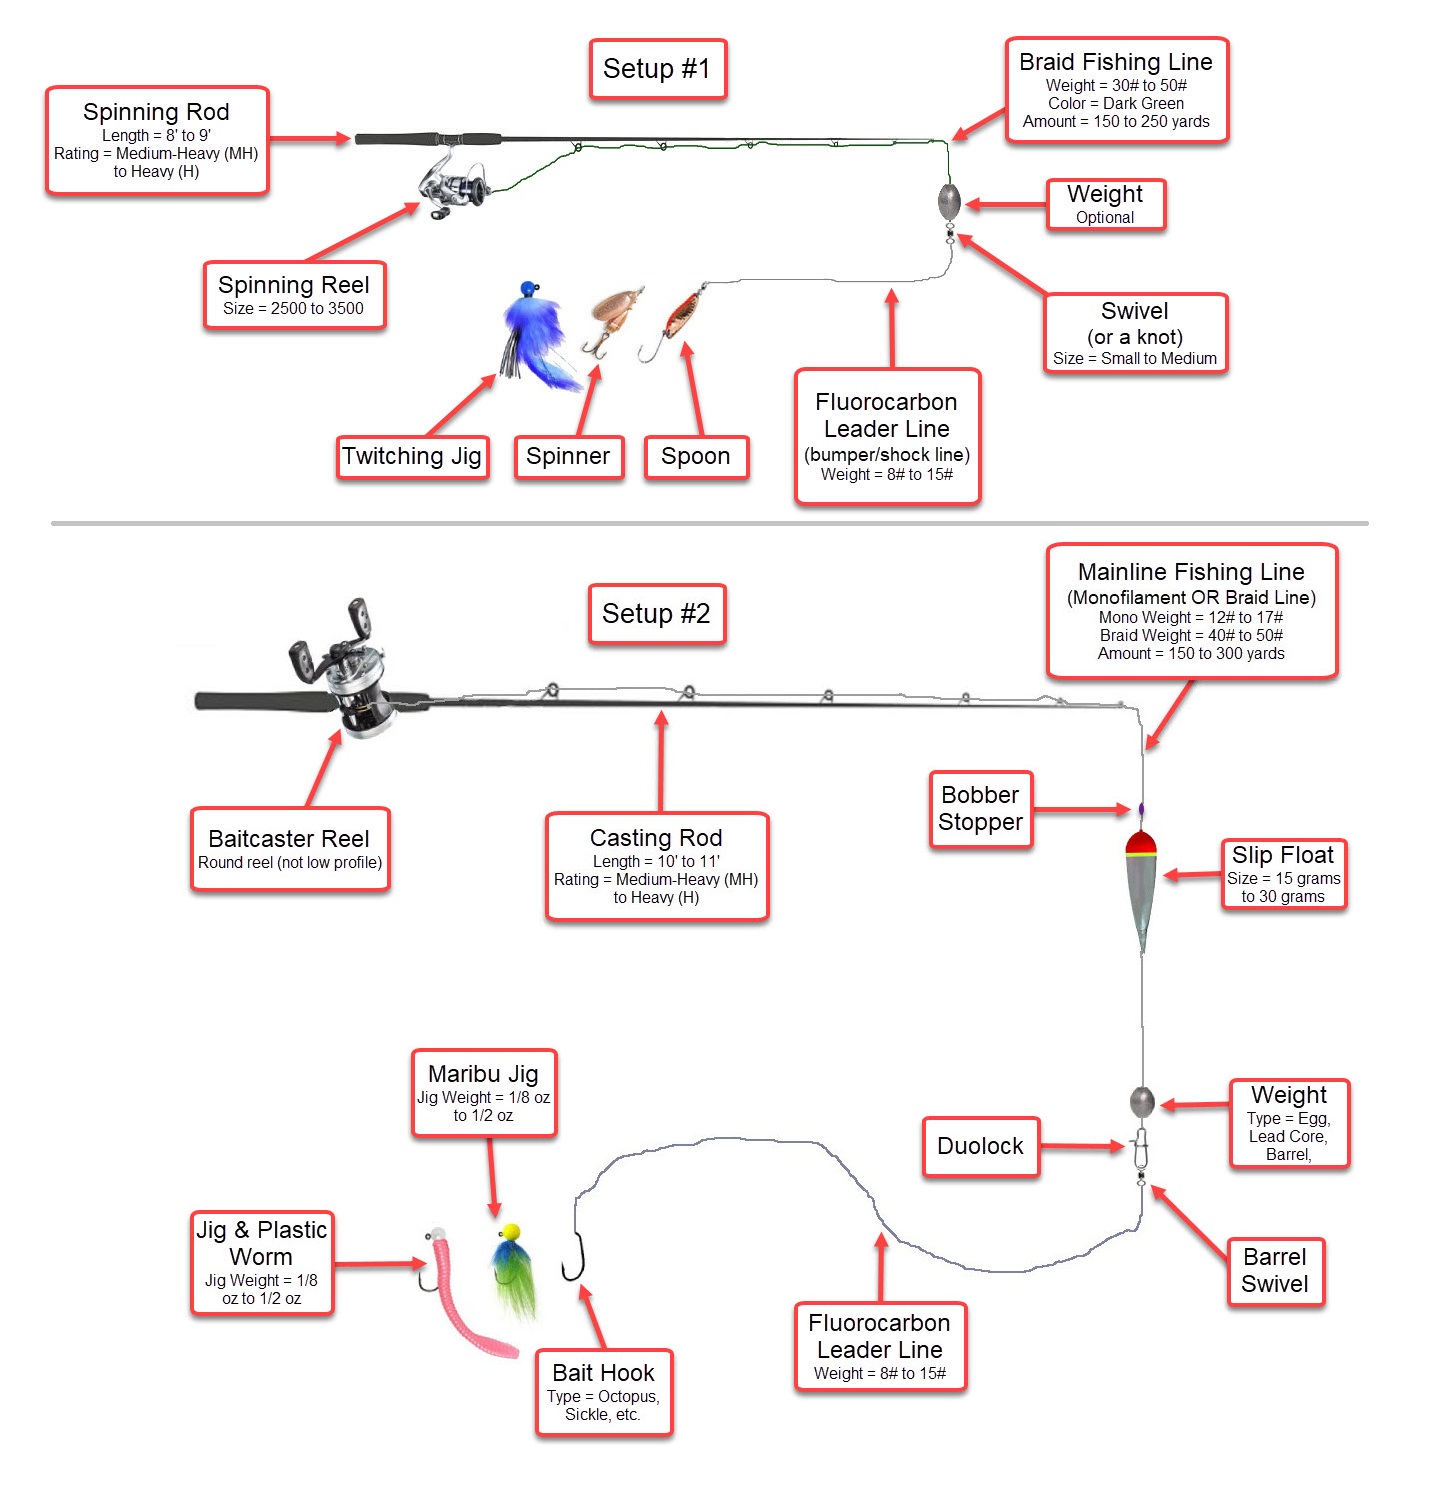
This article walks through a starter kit which includes basic gear you’ll need but has a focus on 2 basic salmon setups. Either of these 2 setups will get you fishing for salmon, steelhead and most river fish in short order. The great thing about these setups is they can be interchangeable with the gear between them. Lastly, I’ll detail a good starter tackle bag and ideas on gear packing.
Setup #1 – Casting, Jigging and Retrieving
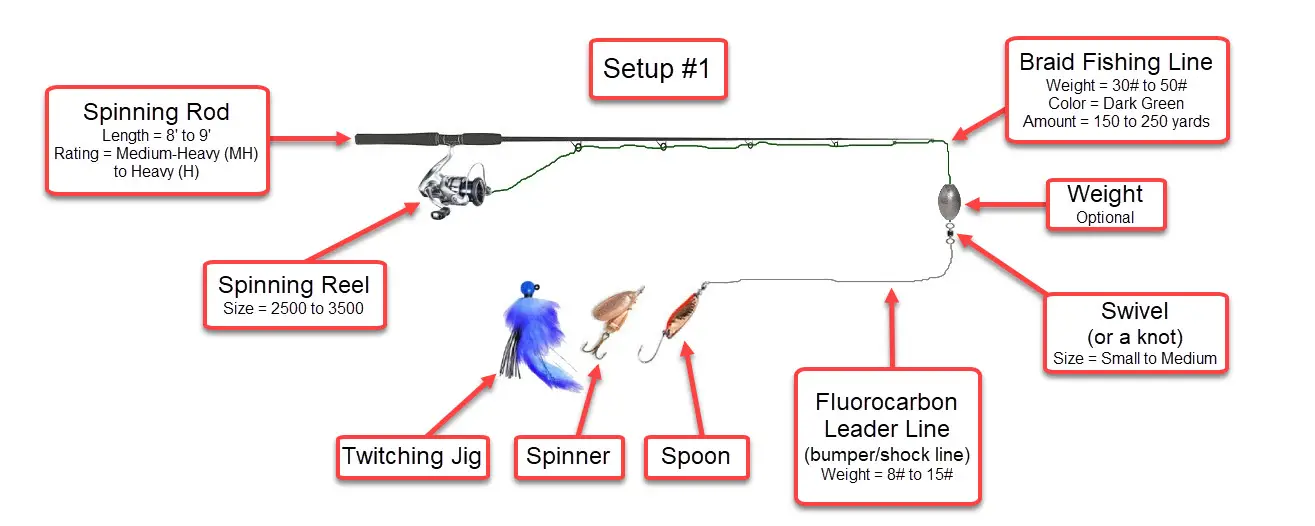
This setup is designed so that the angler will cast and retrieve a metal or plastic lure. The retrieval is constant with a slow to fast pace and you can include jigging up motions. I’ll explain retrieval more below and in attached demonstration videos.
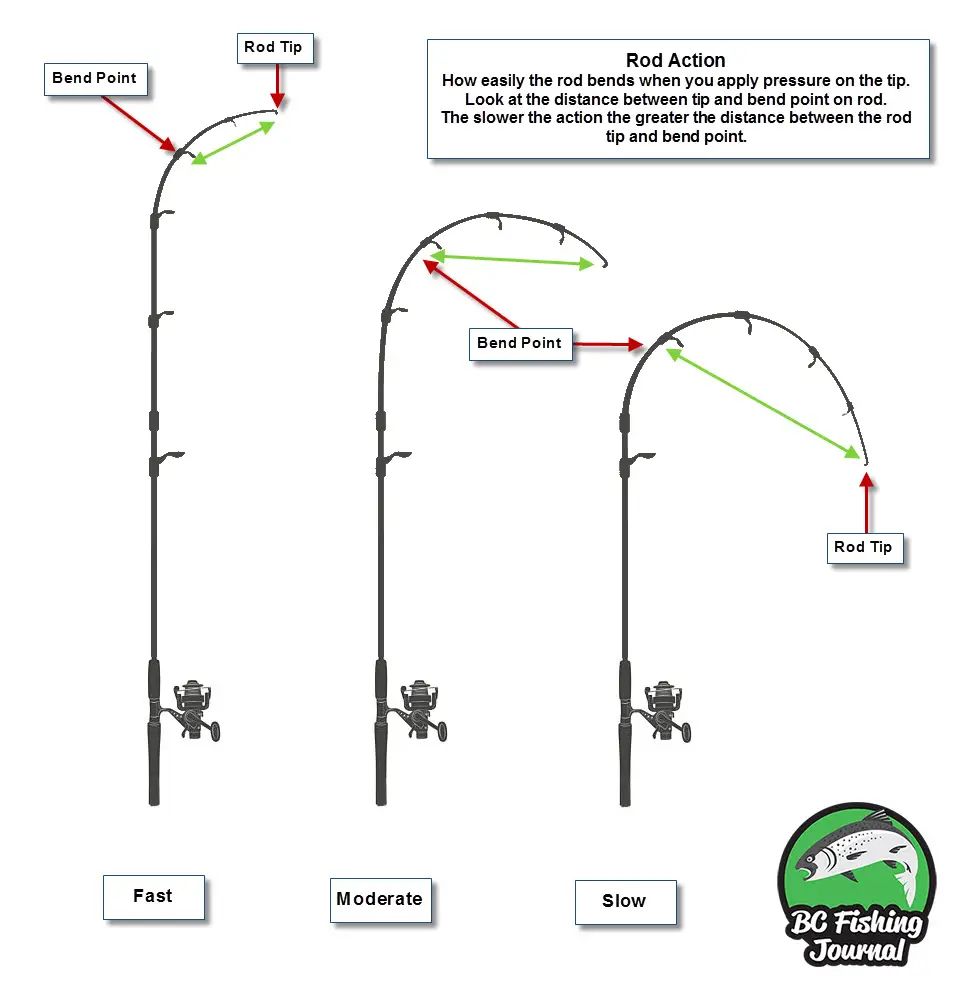
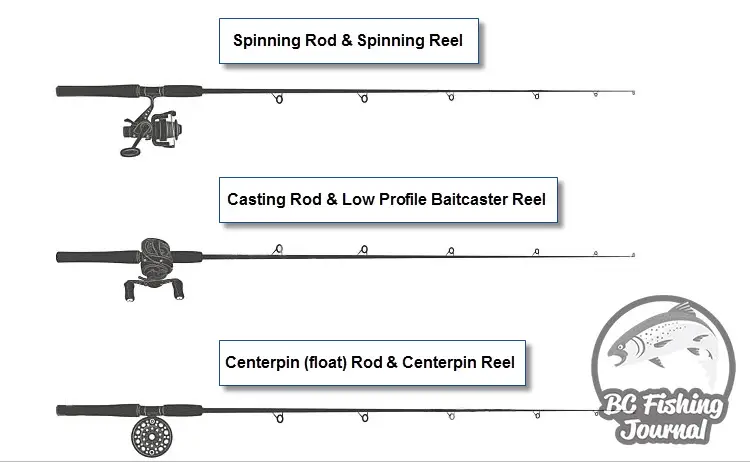
Spinning Rod: Because we’re focusing on Salmon and Steelhead for these setups we want a rod with some backbone. The ideal size would be around 8′ long, or something in the range of 7’6 to 9′ in length. Make sure to get Medium-Heavy (MH) to Heavy (H) rod power. The ideal action is a Fast action, you can have Fast to Moderate. The action essentially refers to the size in the bend of the top of your rod and how fast it’ll recover to a straight position (see the Rod Action diagram below). This fast action provides a more controlled twitching movements of your bait and reduces the amount of bend so it’s not launching your bait up in the water column. As a side note, these action and power/weight ratings can be found on the base of the rod just above the grip handle.
Spinning Reel: I would recommend a spinning reel in the model sizes of 2500 (25x) to 3500 (35x). Some manufacturers have different sizing numbers, so the 25-35 numbers may not always be exact (30x, 300, 3000, etc). I personally like the smaller range of the size (e.g. 25x or 2500) as it’s lighter, will still hold enough line and it won’t cause you any arm fatigue in holding/casting all day. Once you get into 3500, 4000+ model sizes it gets heavy and is simply overkill. One important note, if you’re ever going to do any fishing in the saltwater make sure the spinning reel is rated for saltwater.
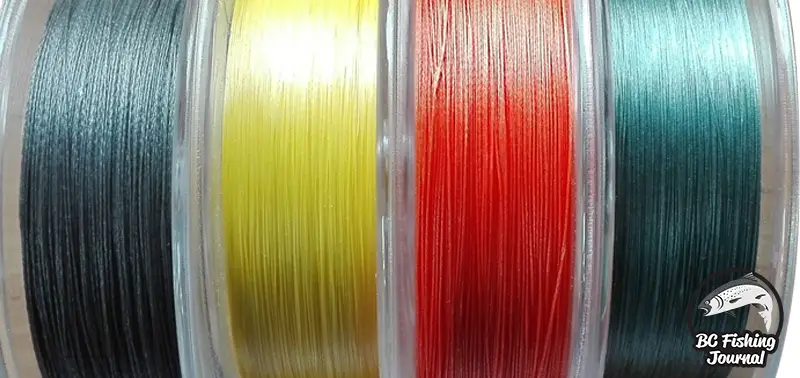
Braid Fishing Line: Braid has no stretch in the line and this is important for this setup as we want direct contact to our lure when we set our hook. Braided line has a much smaller diameter than monofilament or fluorocarbon, so you can get a much stronger line rating with the same amount of line. E.g.150 yards of 8# monofilament is equivalent to 150 yards of 30# braid. That said, for a starter braid line, I’d recommend using 30# (that’s rated for 30 lbs) in a green moss or dark grey color. Don’t go all flashy with the colors, keep it simple. Here’s a breakdown of my favorite braid brands.
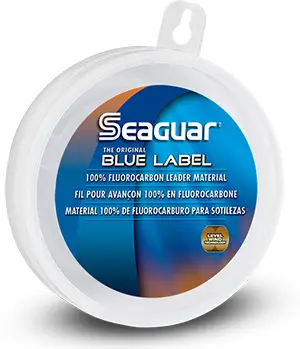
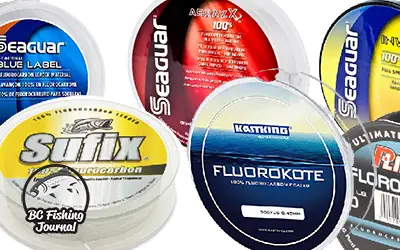
Fluorocarbon Line: This is a small piece of line that connects to your mainline braid on the top end and ties to your lure on the bottom end. Fluorocarbon is best known for being almost invisible in the water and has very little stretch. This leader line can also be referred to as a “bumper line” or “shock line”. Typically, I like to use 3′ to 6′ long of this fluorocarbon line, but this can depend on water clarity, if the water is dirtier (less visibility) a shorter leader line is fine, if the water is gin clear (high visibility) I like a longer piece of leader line. This leader line weight should be less than the mainline. Meaning, if you have 30# braid, you’ll want a leader line less than 30#. Because Fluorocarbon has a larger diameter, I’d recommend 8# to 15# line rating. If you’re fishing for smaller salmon in a clearer water, the 6#-10-# is best. If you’re fishing for big Chinook or Chum salmon, you’ll want the 12# to 20# lines.
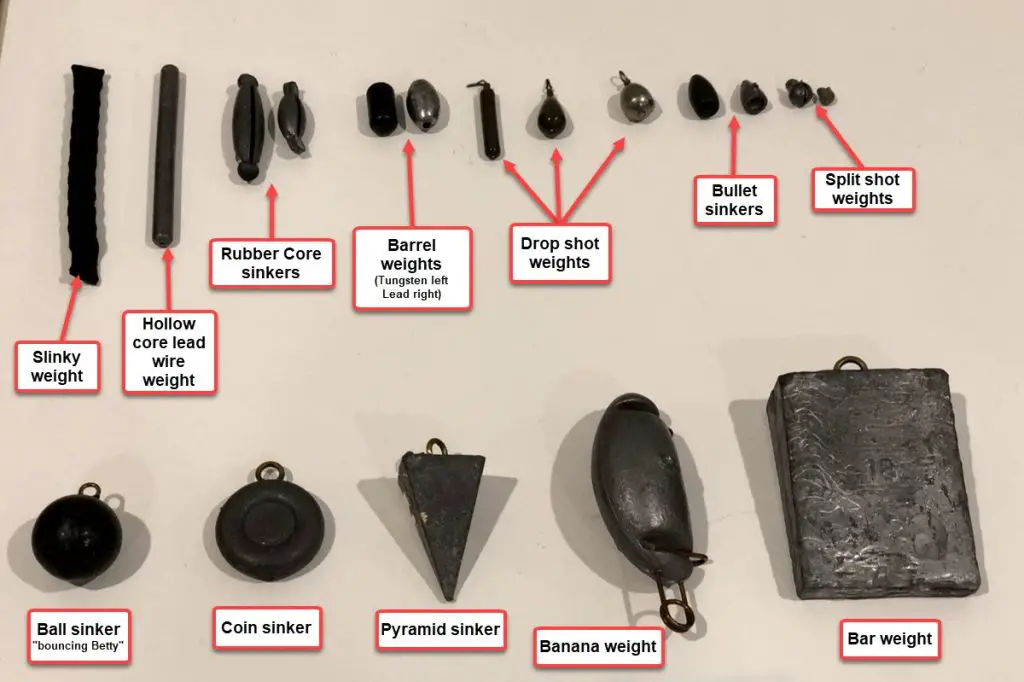
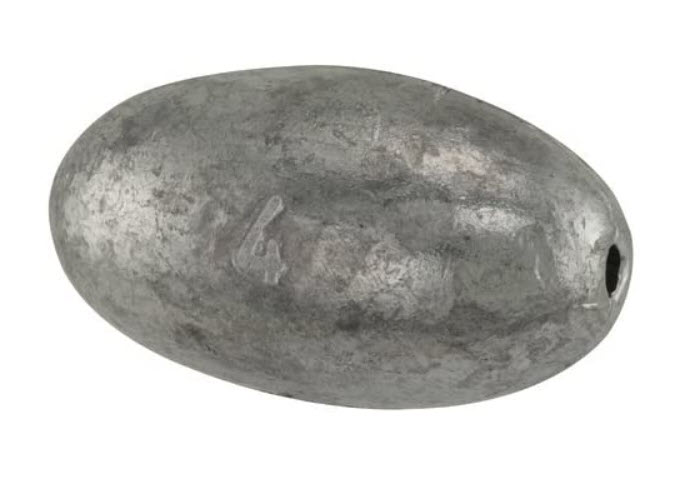
Weight: This is optional but I really like to add weight as it allows me to cast further (especially when the lure is very small or light). You can use barrel weights here that slide up and down the mainline, inline beach chain weights, split shots or whatever weights you feel comfortable with. I’d say start casting without the weights, but if it’s too challenging to get any distance, then start adding a little bit (e.g. 1/16oz to 1/4oz). If you want to learn more about types of weights see this page.
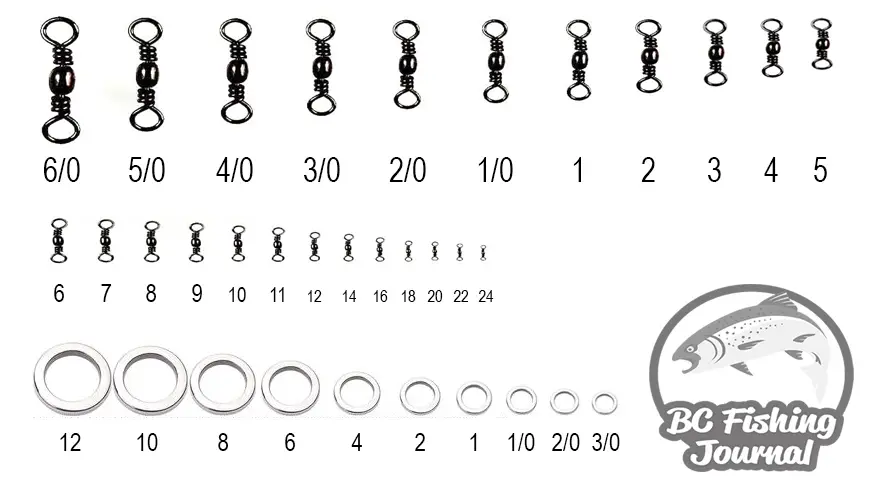
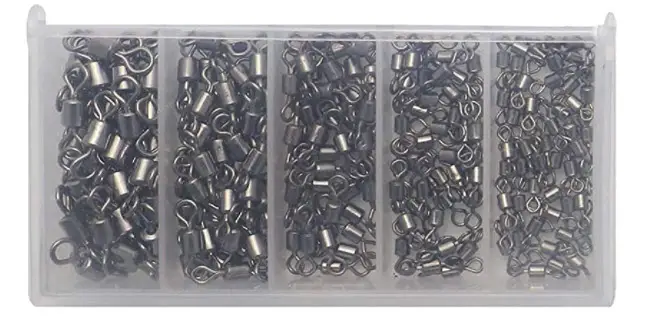
Swivel: This is small piece of metal that connects the mainline to your leader line. It’s an optional piece as you can connect your mainline and leader line with a double uni knot, but I like have some sort of swivel as it removes line twists that can occur between the lines. The biggest con of having a swivel is that it often can’t go through the first eyelet on your rod tip which can make casting a little more challenging depending on how long your leader line is.
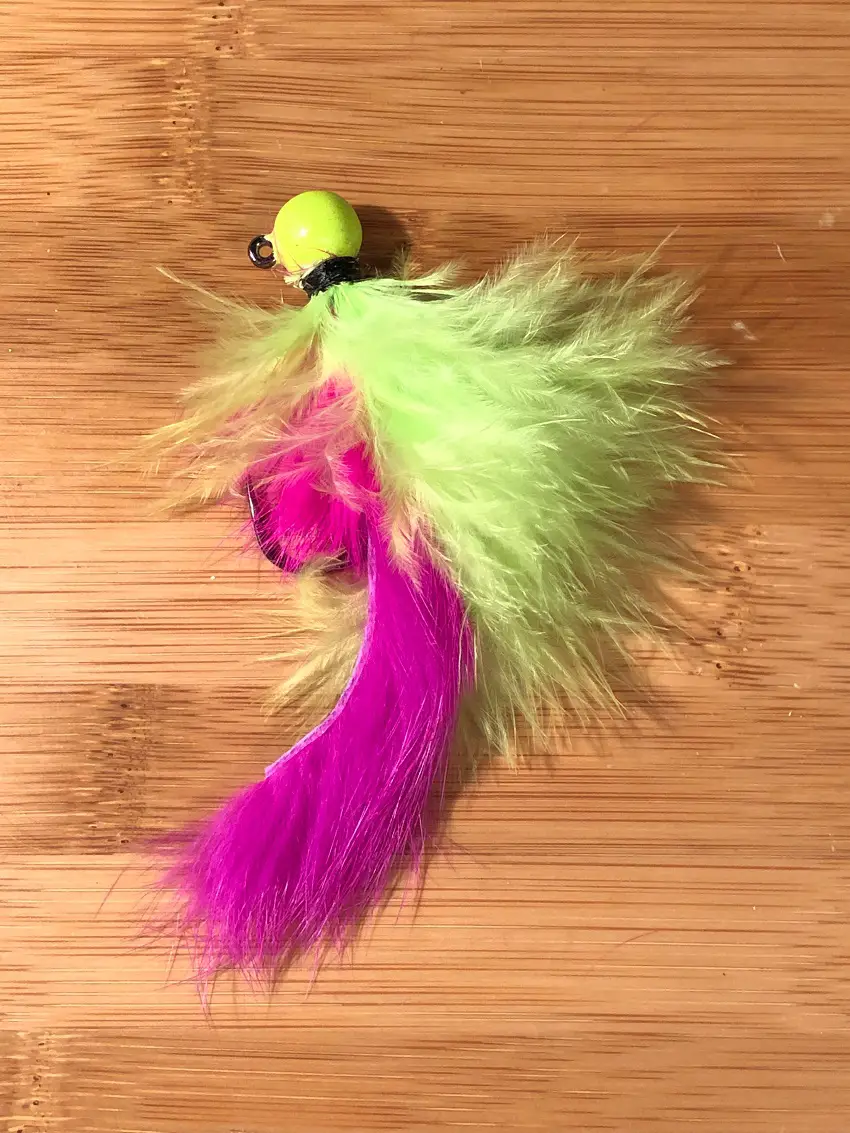
Twitching Jig / Spinner / Spoon: These are the lures on tied onto your leader line. These days twitching jigs are becoming very popular and they’re a lot of fun to fish and are pretty dynamic in how you can fish them. They can get down into deep holes or you can fishing them shallower, they come in a variety of different sizes 1/4oz and 3/8oz are the most common sizes for these twitching jigs. If your new to fishing, I probably wouldn’t recommend you start with these as they can be easy to snag and cost a pretty penny. Wait until you feel comfortable casting and managing your rod/setups then expand into these twitching jigs.
Spoons and Spinners will always be classics, they’re cheaper to buy and come in a million combinations. The purpose is to mimic little minnows or smolts in the water. It’s hard to recommend a specific spoon or spinner for this article, but for Salmon I typically like to have a combo of these colors in my spoons/spinners: silver, copper, blue, pink and chartreuse.
Setup #2 – Drift or Float Fishing
The casting rod is my favorite to use for drift and float fishing while targeting salmon and steelhead. You can drift and float fish with the spinning setup but I’d like to make a case that for the best and smoothest drifts of your float the casting setup is the way to go (see Casting Reel section below). Before that, let me quickly talk about the difference between a casting and spinning setup. If you haven’t noticed from the diagrams, the casting rod has the rod eyelets pointing to the sky (up) while the spinning rod they point downward (handing downward). Similarly the reel is located on top of the rod housing, while the spinning rod has it hanging below the rod.
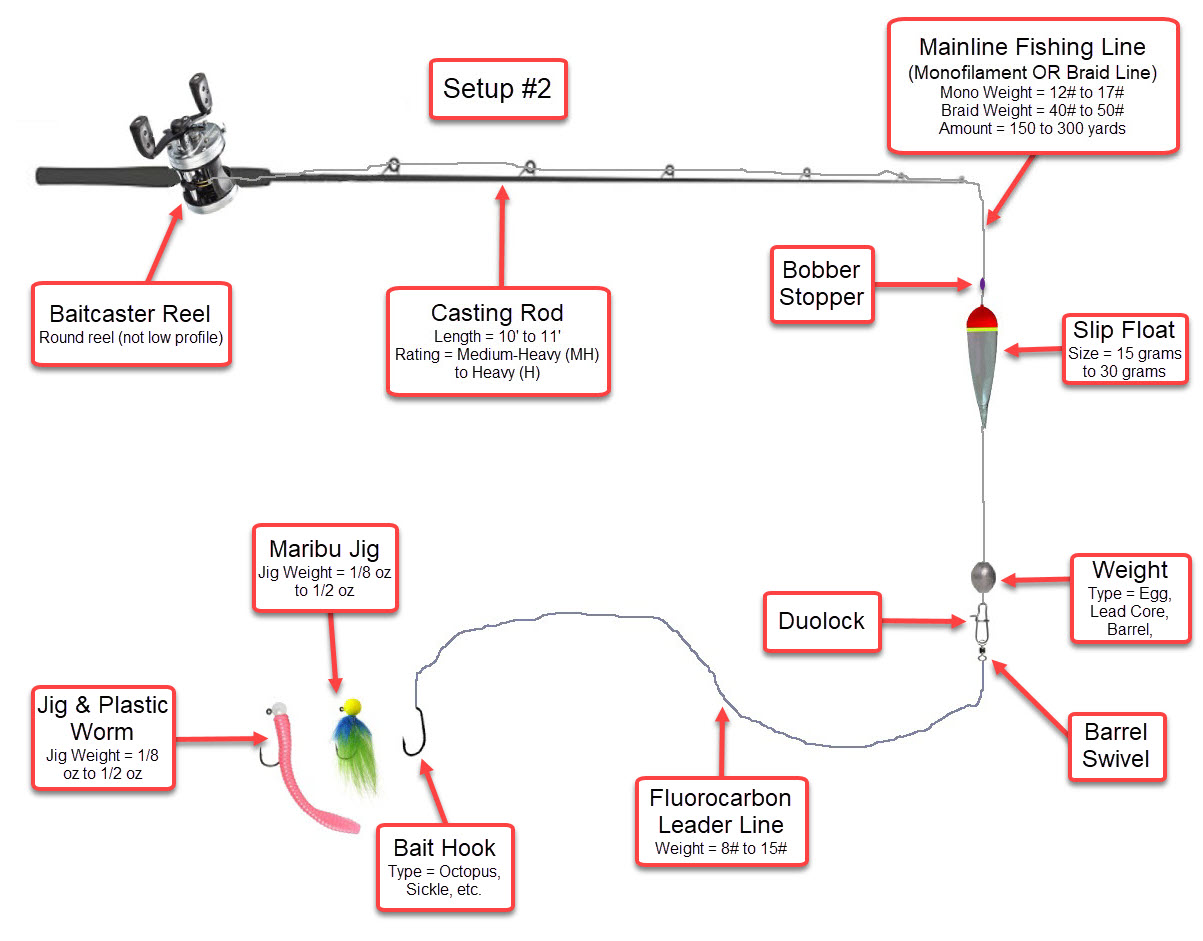
Casting Rod: For salmon it needs to be longer and will often have a little more backbone than setup #1. I would recommend getting a casting rod between 10′-11′ long if you’re starting out. 10’6 is a common size for many manufacturers and I’d say that’s a great starter size. As you become more comfortable with casting rods you can go longer. The weight or power rating on the rod should be Medium-Heavy (MH) to Heavy (H). If you’re starting out, I’d recommend this higher end rating as you’ll have more control over your fish and less bend in the rod. That said, as you become more familiar with fighting salmon/steelhead you may want to go down to Medium rating as it can be more fun to fight the fish.
Casting Reel: The first thing to point out, is look closely how the fishing line comes off a casting reel vs. a spinning reel. The casting reel turns inline with your rod so the line comes off straight off the reel in the direction of your rod tip. This is the biggest advantage the casting rod has over the spinning reel in creating that “smooth drift” I mentioned above. Here you can feed line off the reel with a controlled spool drag system. The spinning reel line comes off coiled and can come off the spool at inconsistent speeds. Sometimes you’ll have to pull line from the spool with your hand to create that natural drift speed of your float. It’s tough to explain this in writing to be honest.
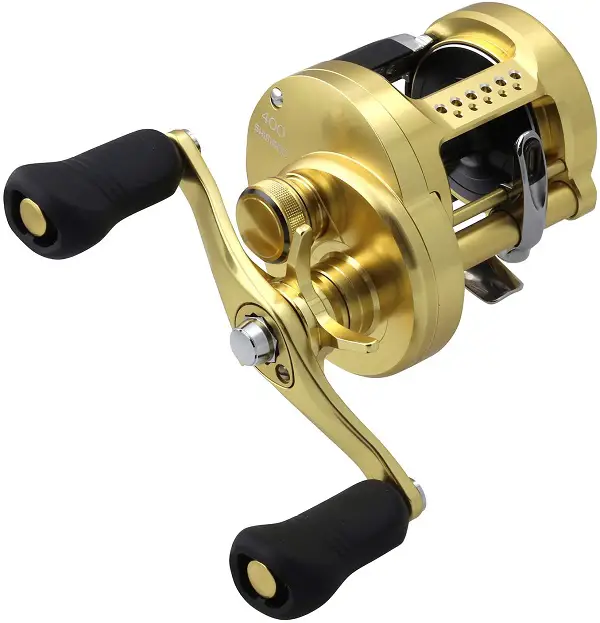
On recommending an intro casting reel, I’d say start with something like an Abu Garcia C3 (model sizes within 5500 to 6500). This size of reel is on the larger side BUT it will fish excellent for all sized salmon and steelhead. So if you’re fishing 6# Coho (Silvers) or 25# Chinook (Kings) it’ll work just fine. The Abu Garcia reel is on the lower price point, if you want to step it up check out the Shimano Calcutta or the Daiwa Luna. These are higher quality reels, but will be double the price (or more).
If you’re looking for a smaller baitcaster reel, a lot of anglers are starting to use low profile baitcasters as well. These are absolutely fine, but for an intro angler starter kit, I wouldn’t start with these reels. They don’t have the same line capacity as I’d recommend having a reel that can house at least 225 yards of 30# braid. Additionally, the low profile reels need to be paired with a smaller rod so not inline with what I recommended above.
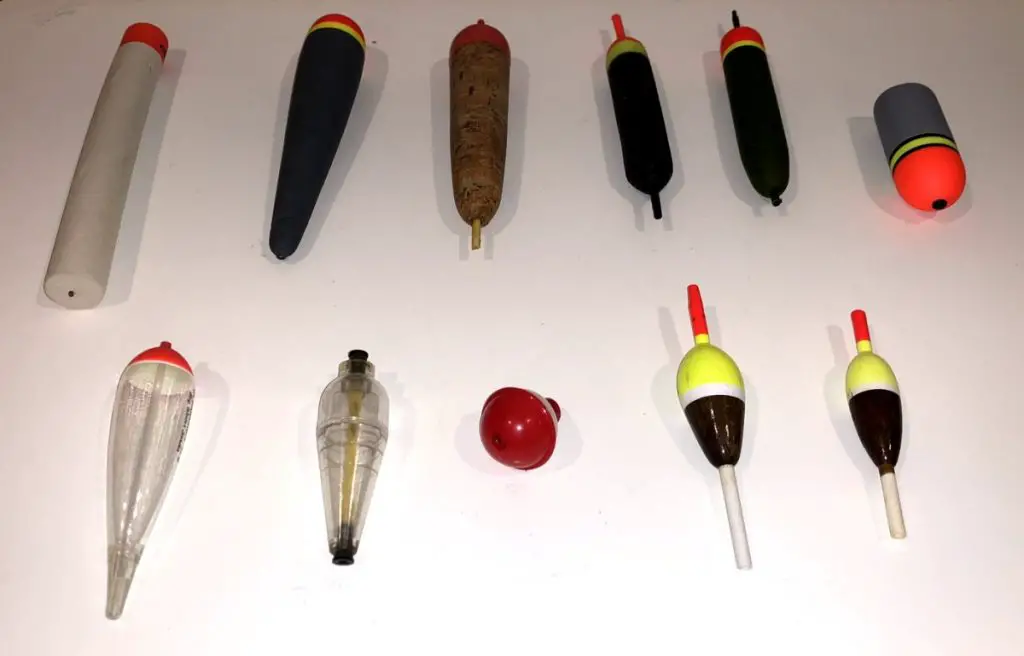
Float: These are typically made from plastic, foam or a balsa wood. They come in many shapes and sizes the most common are: round balls, teardrop and cigar shaped. Each float should have a buoyancy rating on it, in other words how much weight can the float take before it sinks below water surface. This rate should be put right on the float. For teardrop style floats which are very common in rivers, a typical size would be 20 grams to 30 grams. If your starting out, I’d recommend starting with 25 or 30 gram floats so you’re setup will be a little heavier to make casting easier.
Floats can be put onto your line in a number of ways, there are little line cinches to hold it in place, you can wrap the mainline around foam cigar floats to hold it in place, some floats are hollow in the middle so they can slide up and down the mainline (aka. “slip floats”). My favorite are the floats that slide up and down the mainline and held in place by bobber stoppers (see below).
Bobber Stopper(s): These are small little beads that go onto your mainline that acts as a stopper for your float. I like to have one above the float and below the float, so the float is stationary on the mainline and I can see the exact distance between my float and gear below (meaning I can tell how deep I’m fishing). You can also get string bobber stops that can be tied directly onto the line as well.
Mainline: Is the primary line on the reel. For the casting setup my favorite line to use is Braided Line. I will typically use 30# to 50# braided line. There are a number of different brands and colors on braided line, personally I like PowerPro braid and usually get it in a moss green color. One important thing to remember, whatever braid you get make sure it’s stronger than your leader line, I’ll detail more in the leader line section below.
Weight: This is the weight that balances out your float above. The weight will be on the mainline of the setup and they can come in a variety of styles (see weight types image in setup #1). My favorite weights are the simple barrel weights that slide up and down your mainline. You have to remember that whatever the size of your float is will dictate how big the weight you use. E.g. If you have a 25 gram float, you’ll likely want a weight that’s around 15-20 grams.
Note: Now keep in mind if you are using a heavy jig or lure, that’s additional weight so then you wouldn’t need as big as weight on mainline.
Duo-Lock or Connector: This is not mandatory, but I find duo-locks to be incredibly helpful in doing quick change outs of your leader line setups. This duo-lock ties to the braided line (your mainline). It has a clip system that connects to a swivel (see below). Duo-locks come in variety of sizes are often rated by the weight they can handle. You don’t want anything giant or flashy here, you’d be surprised that even though small these things can handle a lot of weight.
Swivel: This connects your mainline to your leader line. Again, these aren’t mandatory but are very useful to tie onto the top of your pretied leader lines so you can quickly change them and snap onto your duo-lock. Another important feature of a swivel is its twisting ability, they “swivel” in the water to ensure you don’t get any line twists. This is important to keeping your bait and setup floating naturally down the river. As for sizing, the swivel is rated on weight, you don’t need giant swivels they should be a little smaller than your duo-lock. Similar to duo-lock the small swivels can handle a lot of weight, so don’t buy massive flashy ones.
Leader Line: Here you can use 2 types of leader lines: fluorocarbon or monofilament. For me, 95% of the time I use fluorocarbon line. It has less stretch is invisible underwater and all around better quality line IMO. If you’re focusing on salmon or steelhead these fish can be finicky (especially in clear water or highly pressured rivers) so would highly recommend getting high end fluorocarbon leader line. Don’t cheap out here, this is the line that you’re using to tie to your hook/lure.
The leader line should have a lower weight rating than your mainline. For example, if you’re using 30# braid for you main line, you should use a leader line that’s much lower than 30# (e.g. 15#). This is very important, so that if you ever get a snag you’ll break your leader line not your mainline. Typically, I use 10#-15# fluorocarbon leader line for almost all my salmon and steelhead fishing. There are exceptions here but if you’re starting out, I’d recommend getting some 12# fluorcarbon leader line to start.
Leader line length should be 18″ to 36″. The length of the leader line is related to the water clarity. In clear water (high visibility) you want a longer leader line, in dirtier water (low visibility) you want a shorter leader line. The big idea here is to hide the rest of your setup (duo-lock, swivel & mainline) from the fish as it makes the presentation look less natural and can spook the fish.
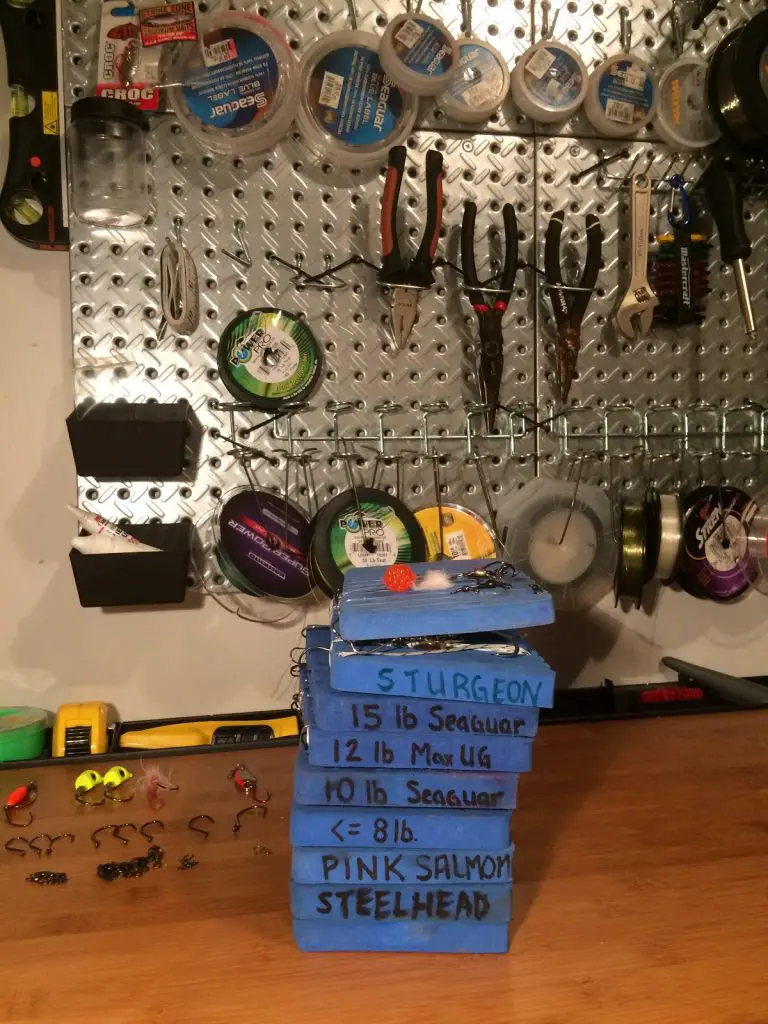
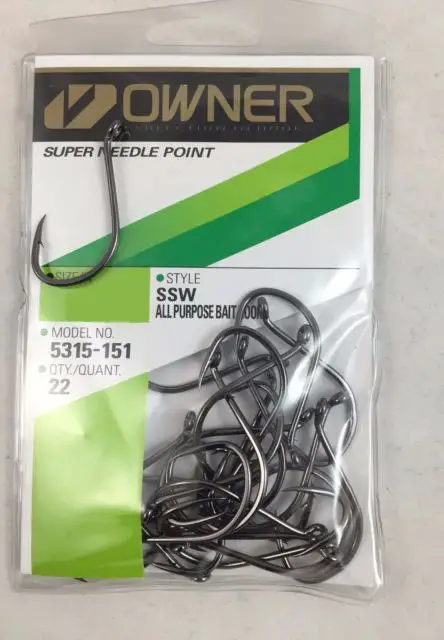
Jig / Bait Hook / Plastic: Here it’s tough to give a starting suggestion on what to start with. That said, I’d start with the basic bait hook, get a Octopus hook sized 2 or 1 and learn how to tie an egg loop knot to it with your leader line. E.g. cut a 36″ piece of fluorocarbon leader line and practice tying to the Octopus hooks, pre-tie 8 leaders and you can wrap them on a blue cork board (see image) so they’re easy to switch out.
The reason I recommend the egg loop knot is because it enables a loop to cinch bait like roe, yarn or anything else you’d like to the hook for bait. It’s an incredibly tough knot as well so if tied correctly won’t fail. When starting out, having good bait like roe, shrimp, etc is probably the best place to start (ensure your fishing regulations allow it). It’s tough to beat!
How to Fish Setup #2
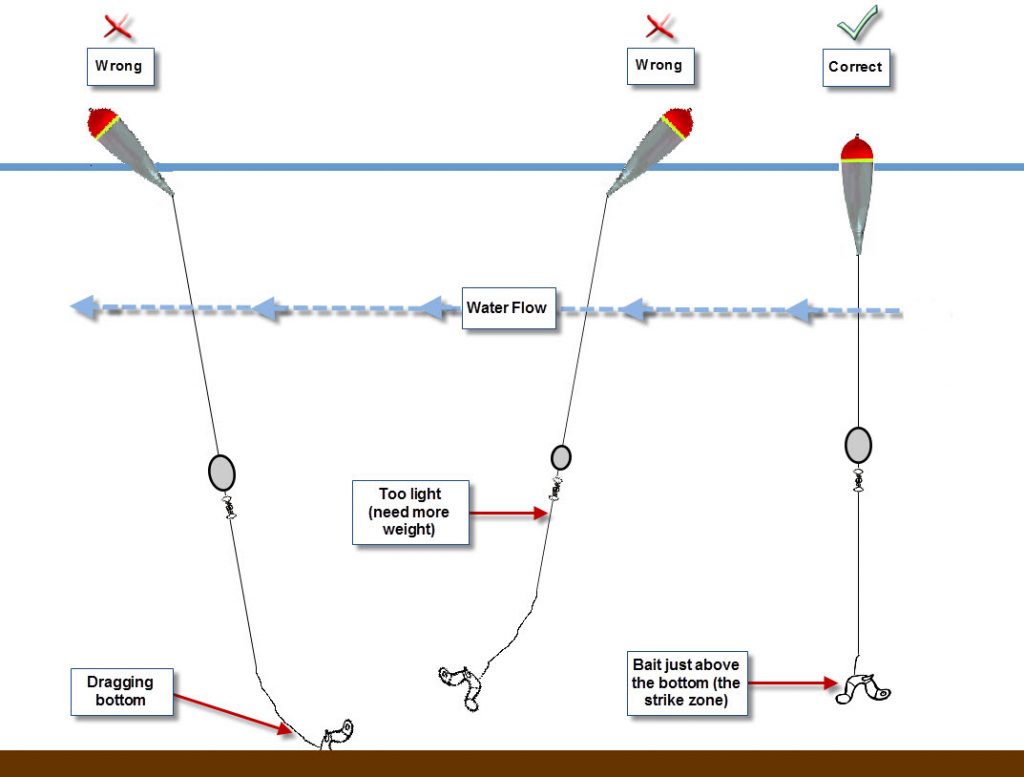
I’ve got another tip page that outlines some of the strategies on how to fish this drift and float fishing setup. You can see a preview of it in the diagram below, for full details check out the tip page here.
Salmon Fishing with Setup #2
This video is me and my buddy Will fishing on the Vedder River for Chinook and Coho salmon. In this video I’m using the float setup with a bait hook and roe (fish eggs) as bait.
What in my river fishing bag?
A fishing starter kit has to have some sort of gear storage part, so here’s what I use. It’s a small sling or half backpack that’s light to carry and pretty inexpensive to start! In this video below, I break down all the components and why they’re important, also I’ve included these items in the gear section at the bottom of this page.
