How to Smoke Salmon & Trout
Smoked Salmon is one my favorite ways to eat salmon. And Chum Salmon (to me) is the best smoking Salmon there is! This How To Tip provides a simple and fantastic brine recipe and tutorial on how to prepare and smoke Chum Salmon. See written steps/photos and the video is at the very bottom. Enjoy!
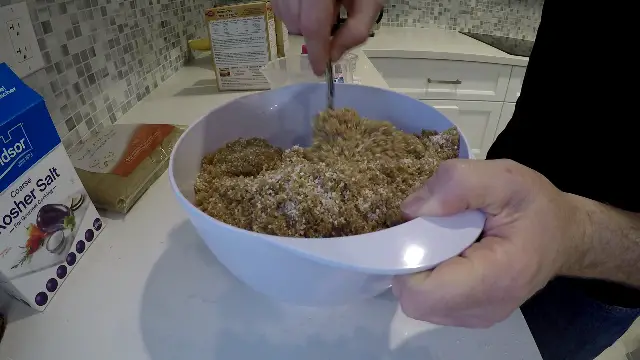
Step #1 - Prepare the Dry Brine
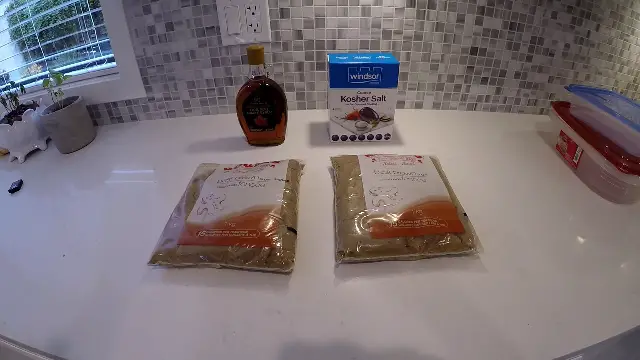
This is both an easy and terrific brine recipe! Add the brown sugar and salt parts to large plastic bowl and mix well. Do not add maple syrup at this point.
- 4 parts Brown Sugar
- 1 part Coarse Salt (non-iodized salt)
- Optional: Maple Syrup or Honey
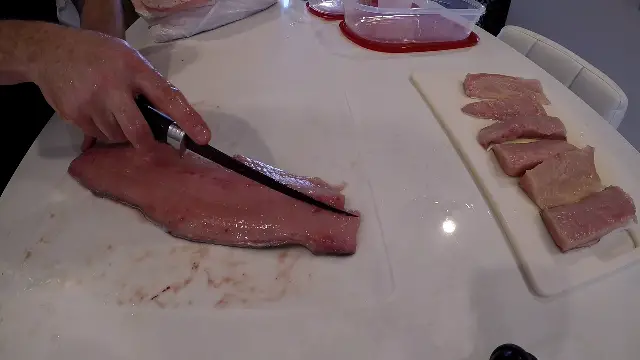
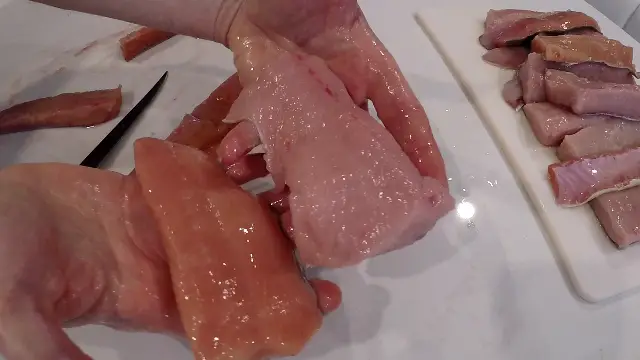
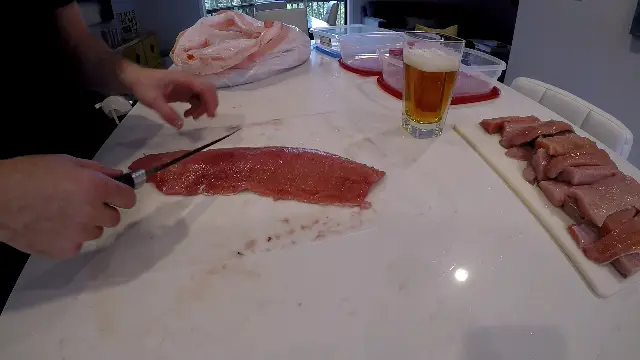
Step #2 - Cutting up the Fish
Need to prepare the fish by cutting them into small strips. The size of the strips is dependent on how you want the end product size to be. Also keep in mind that the smaller the pieces the less smoking time the salmon will need (and vice versa for larger pieces and more time).
To save time on this step I can't recommend enough having a good quality fillet knife. For further information, check out our gear guide on How to choose the best Fillet Knife.
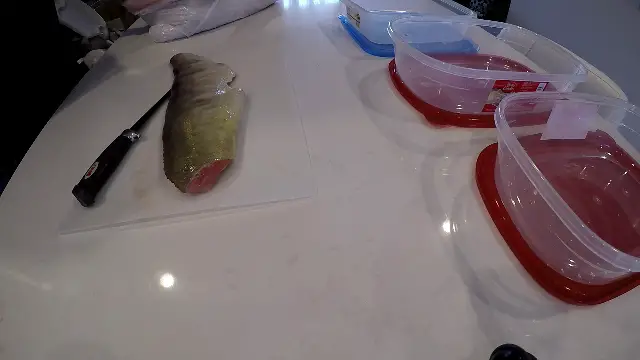

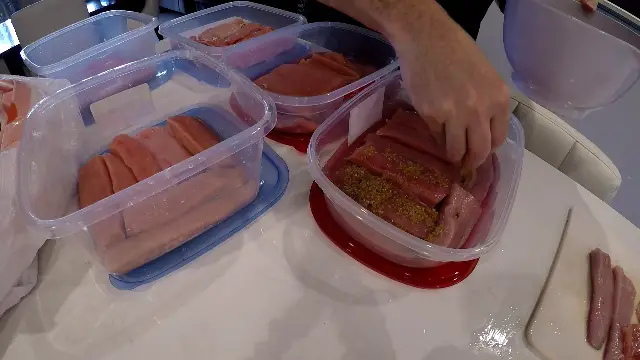
Step #3 - Place fish pieces into plastic containers
Place the cut up pieces of fish into the plastic containers (not aluminum). I recommend getting those large cheap plastic containers from the Dollar Store. Cover the bottom of the plastic container but do not place fish on top of each other yet.
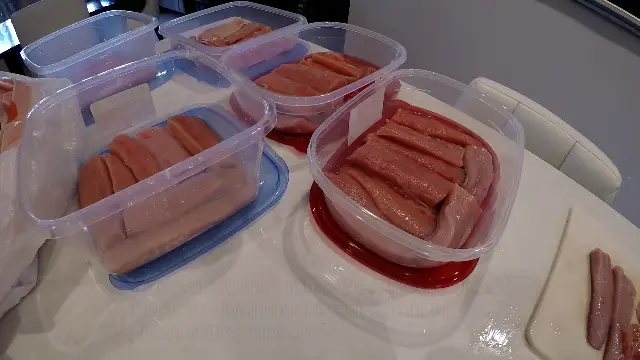
Step #4 - Add dry brine to the fish
Take your dry brine and cover the first layer of fish in the plastic bowls. Cover quite well and gently rub the brine along sides so the meat is getting fully coated with dry brine. Don't have to worry about the bottom of the fish at this point as we'll be turning the fish later.
Repeat step 3 & 4 by adding the next layer of fish on top and continue to coat that layer. You're plastic containers should have 2 layers of cut up fish and both covered with the dry brine.
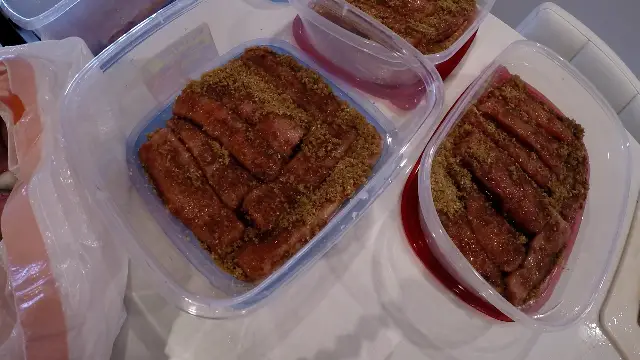
Step #5 - Brine fish in the refrigerator
Place plastic containers into the fridge. The brining time should be a minimum of 12 hours, but you can extend this to 4 days if you need want. Personally, I like to brine my Chum for 12-24 hours. Within the first few hours the dry brine will turn to liquid by absorbing the moisture of the fish.
Within the brine period, turn the fish over 2 or 3 times in the initial 12 hours to ensure the flesh/skin don’t stick together. If you're doing a longer brine period, I'd recommend turning the fish twice each day (after the initial 3 turns on the 12 hours).

Step #6 - Fish onto smoker racks and remove excess brine
After brine period, you'll be placing the fish on the smoker racks. Before you place the fish onto the rack use your fingers (or knife) to remove (or squeegee) the brine off as best as you can. The fish will be dripping with brine so take the time to ensure each piece is not dripping when you place onto rack.
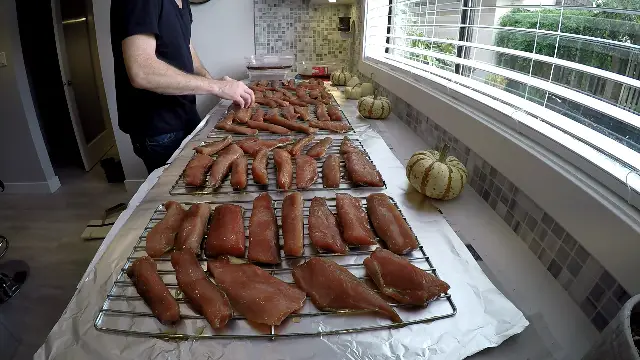
Step #7 - Dry the fish
Dry the fish for 2 hours. This drying time is very important as the brine will form a tight skin layer to keep the moisture in the meat when it's smoking. I recommend using a fan to help the drying process.

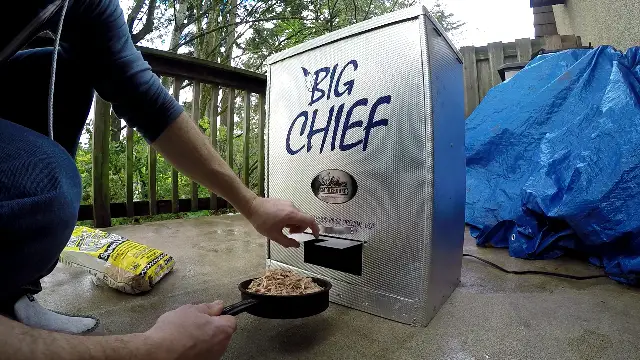
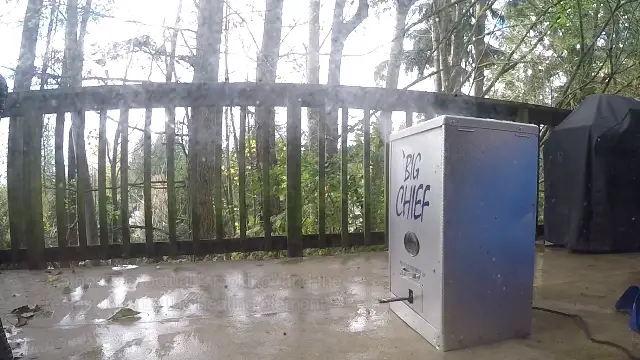
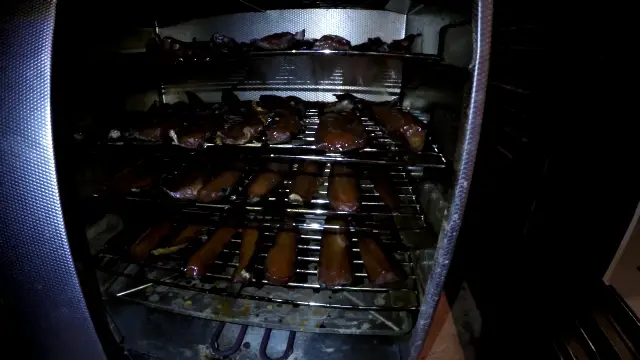
Step #8 - Lets start smoking!
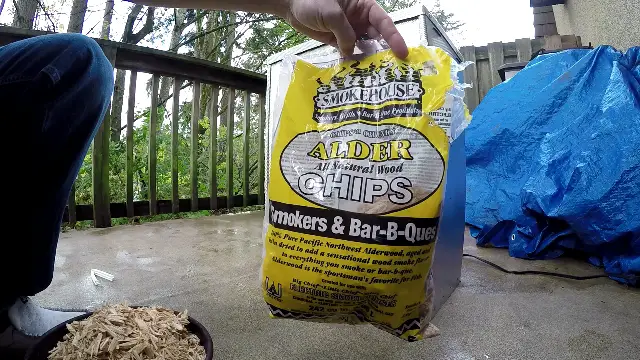
Place the racks with fish into your smoker. Pick your favorite flavored wood chips and fill the smoker pan. Place the pan on the element at the bottom of the smoker. Ensure your cover/lid is sealed and turn on (or plug in) your smoker.
Each pan of wood chips will smoke for approximately 45 minutes. After 30-45 minutes check the pan, once the wood chips are all burned up you remove them (for safety reasons put them into a bucket with water) and refill with the second pan of wood chips. Repeat the process after 45 minutes. I like to do all my wood chip smoking at the beginning of the smoking process (as the element will continue to heat the fish after the smoking is completed).
Based on your taste preferences you can do 1-3 pans of wood chips. Personally, I like to do 2 pans of wood chips. And don't feel like you need to use the same flavor for each pan, definitely experiment with different flavors!

Step #9 - Slow cook with no smoke
After the wood chip pans have run their course, remove the pan from the element. Continue to keep the element turned on as it will continue to slowly heat (and cook) the fish.
Important: The time left to slowly cook the fish is dependent on a few things: the size of the fish cuts and outside weather temperature. If you’re smoking in the middle of Summer it may only take 6-8 hours to complete the smoking process, if you’re doing it in the middle of Winter it may take 16 hours. If you're doing this for the first time, I recommend you keep checking on the fish every 2 hours after the initial 6 hours. Check by taking a piece off and opening it up.
The good thing about Big Chief Smoker's is that's almost impossible to over cook the fish because the element doesn't get that hot. And worst case scenario the meat turns more into a jerky, which is also amazing!
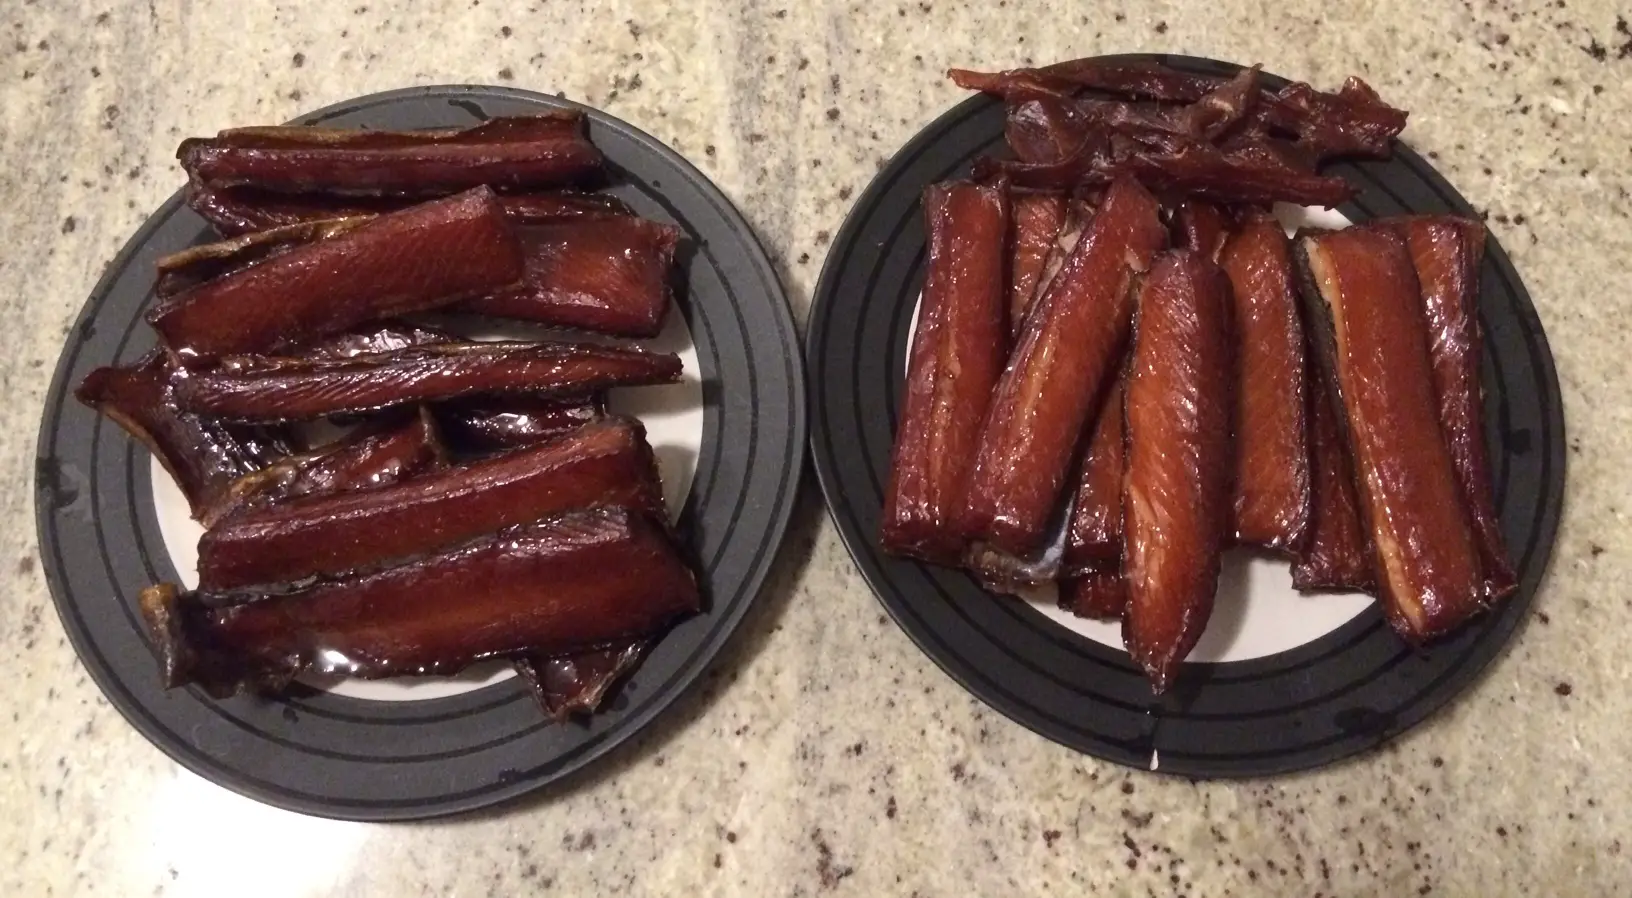
Optional: With a cooking brush you can add maple syrup, honey and/or peppercorns, etc. This optional extras should be added in the final 2-3 hours of the smoking process.
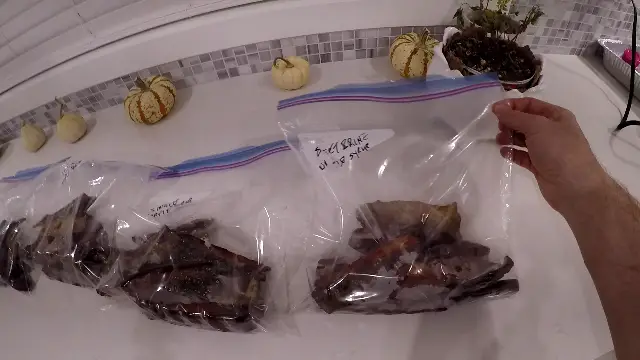
Step #10 - Final Step & Cleanup
After the smoking process remove the fish from the racks and place into containers or zip lock bags.
At this point you've put in a ton of work in for this smoked salmon, but I would highly recommend you take the time to clean the racks and smoker now. Put the smoker racks into the sink with some soapy water and clean as soon as possible, this will save you a ton of time than trying to scrap the brine/fish off later.
Video Recipe: How to Smoke Chum Salmon
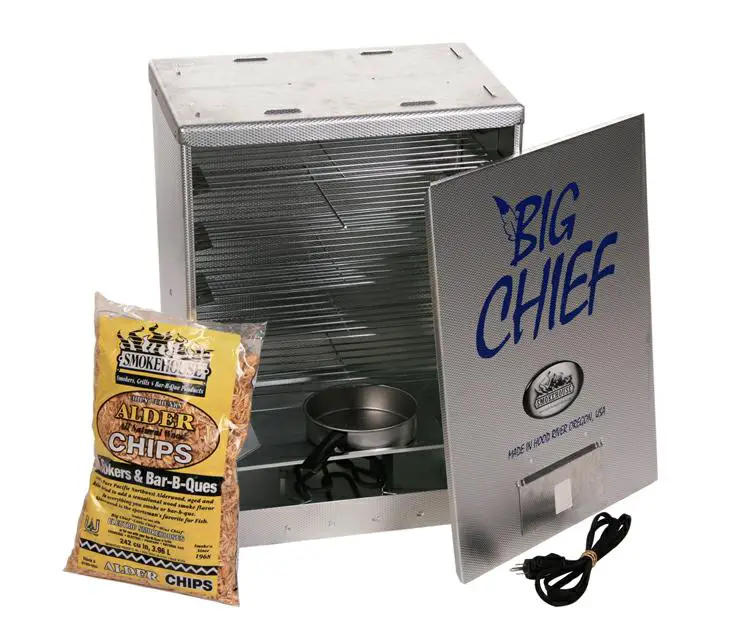
Gear Recommendations: Best Smoker and Wood Chips
Here is the smoker, wood chips and other gear I used in the video and continue to use when smoking my fish.
Preview
Brand
Gear
Check Best Price


Additional Tips


")


")


