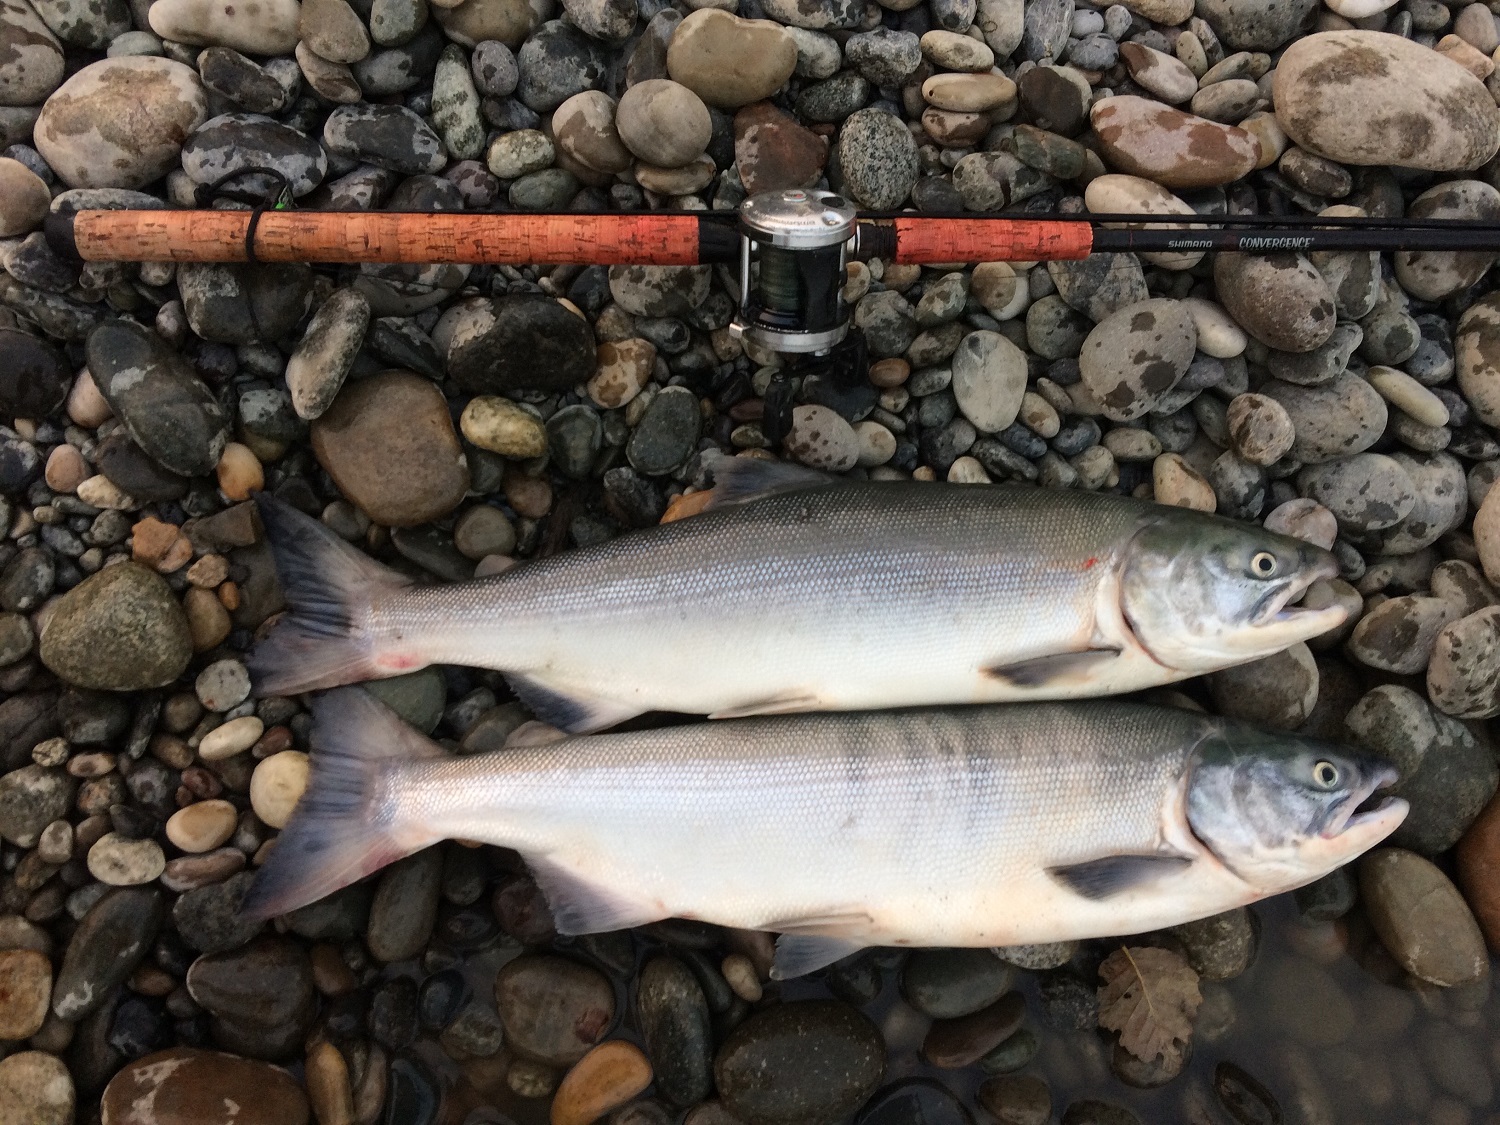
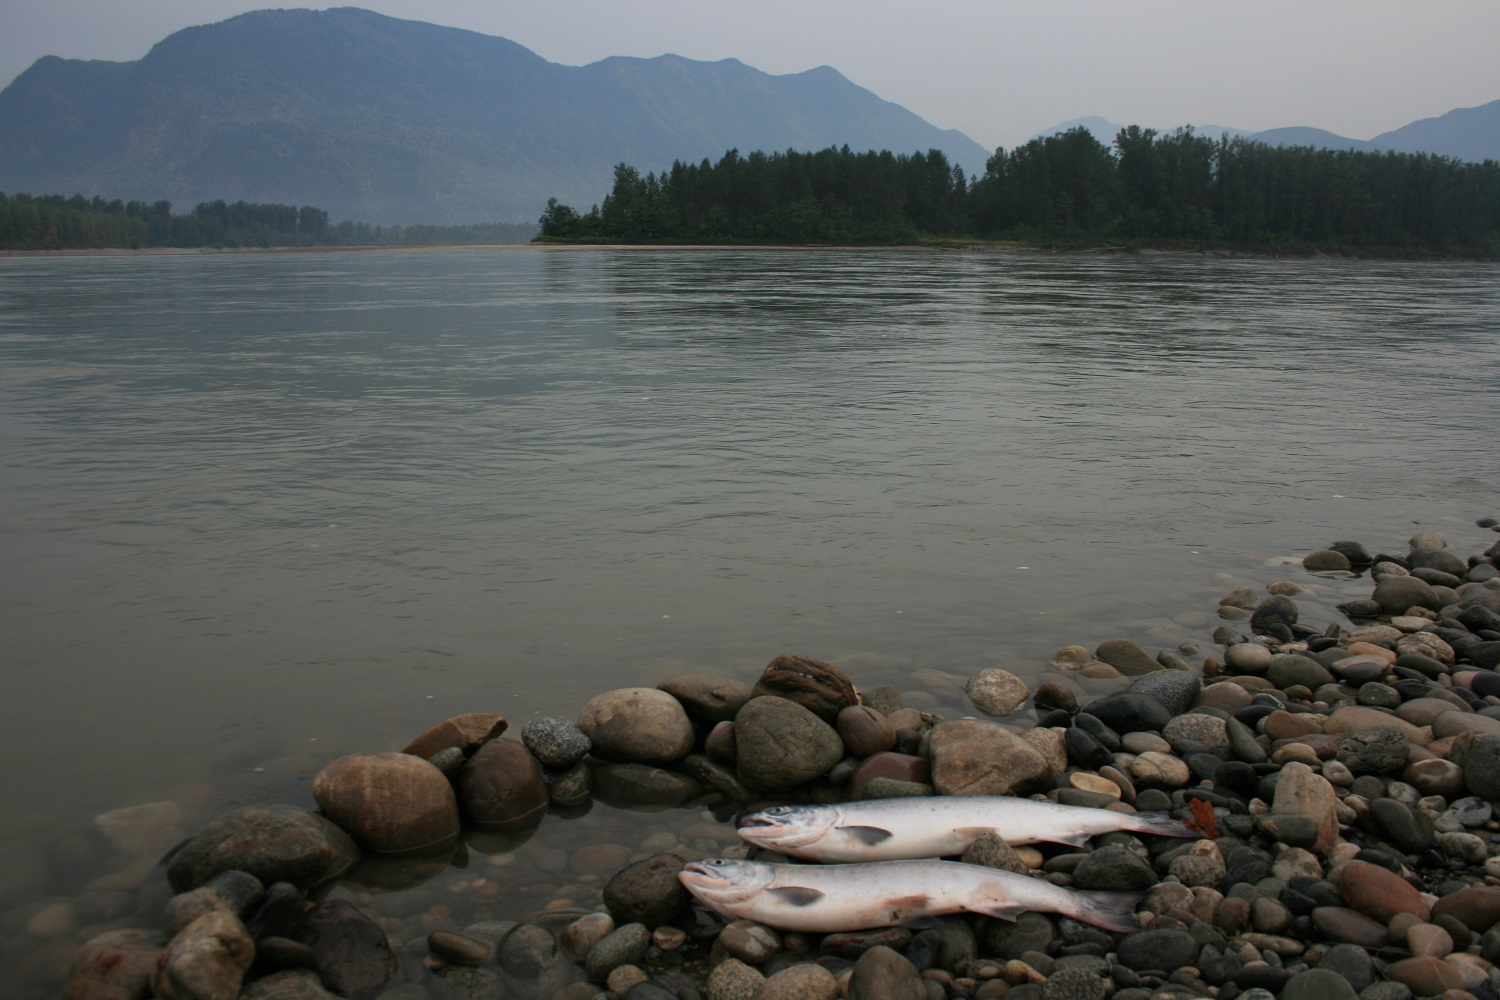
Sockeye salmon fever has hit the northwest! Typically, this fishery only opens once every four years on the Fraser River. This iterative 4-year cycle has continued to bring in the largest return of Sockeye so the Fisheries open it up for recreational anglers. For me here in the greater Vancouver area I'm intercepting these fish in the Non-Tidal section of the Fraser River (for fishing locations see tip page).
To target these fish I use a controversial technique called "bottom bouncing" (also called "flossing"). It's a technique I hesitate to write about as I believe outside of this fishery it's an unethical way to fish. The reason I say it's an "unethical way to fish" is because I don't really look at this as a true sports fishery but more of a harvest fishery.
Harvest Fishery vs. Sports Fishery
The reason I consider the Sockeye fishing a harvest fishery is because the fish are being capturing by snagging them. Bottom bouncing the fish is NOT biting the hook but the long leader lines are sliding through their mouths and the hook gets caught on outside of the mouth. In fact, the second sockeye I catch in the video below this was evident to me and I mention on the camera "the hook is on the outside". Whereas, a sports fishery is where you trick the fish and they bite the hook. And the hook will be on the inside of the mouth for the most part. In a sports fishery if you hook a protected/sensitive fish on the outside of the mouth or body ("fowl hook the fish") you should always release these fish.
The bottom bouncing technique should only be used for these harvest fisheries. These are usually in waters with extremely low visibility and species that do not bite ("lock jawed") in the fresh water. In these type of situations the species are usually abundant to make this fishing method viable. The big takeaway is to only use bottom bouncing technique in these harvest fisheries and never your clearer rivers as a standard technique.
Note: I do realize there is a viable fishing technique called "bottom bouncing", but for this articles definition I'm referring to the technique that includes a leader over 6' long.
Bottom Bouncing Setup & Gear Requirements
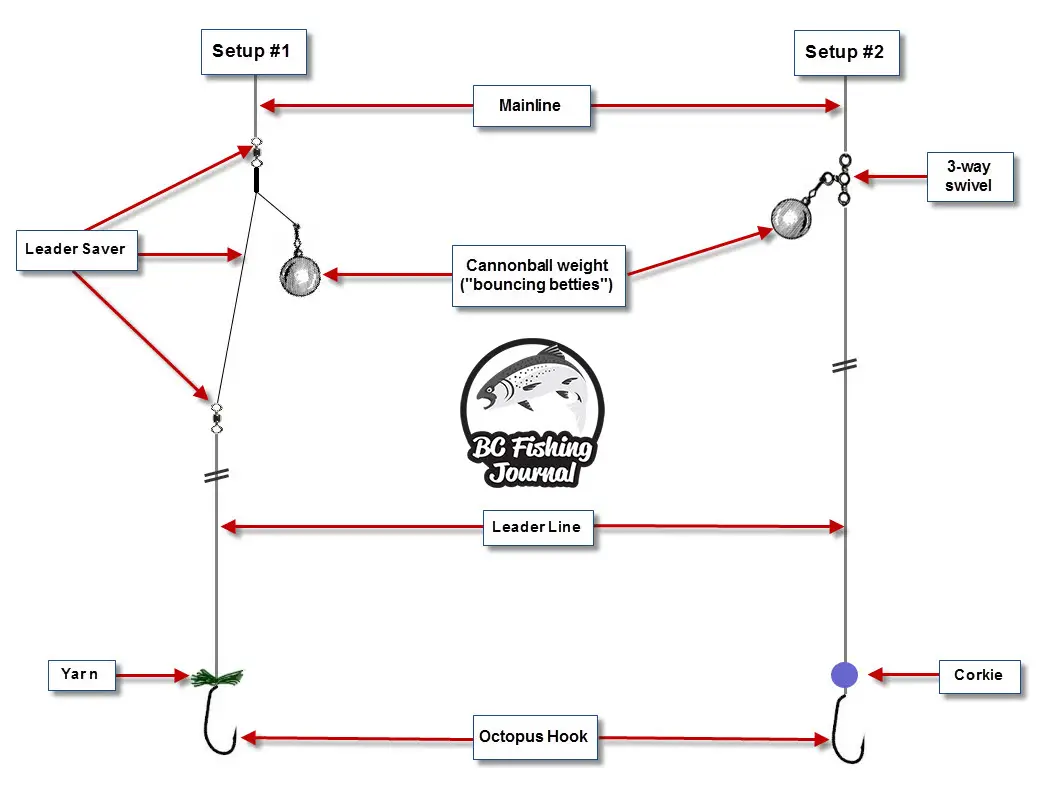
In the diagram below I've put together 2 setups, these can be interchangeable. Meaning, you could use yarn with 3-way swivel, etc. I'm sure there are many other setups, these are the ones I've used and have been successful with over the years. Setup #1 is my personal favorite with the leader saver as it means less risk to your main and leader lines. If you want the specific brand or products that I use, see the bottom of this page in the recommended gear section. Bottom bouncing gear requirements.
Rod
- 8' to 11' rod (I recommend a casting rod)
- Weight rating should be Medium Heavy - Ultra Heavy, you need a rod with a strong back bone.
- Spinning rods can also be used, but they'll need to be at least 9' long and have a strong backbone. Personally, I use a 10'6 Medium Heavy casting rod that works like a charm!
Reel
- Bait casting reel (large round reel, not a low profile reel)
- Should be rated for to hold >= 200 yards of 15 mono (although you won't be using that line strength)
- You can use a spinning reel as well, line control isn't as great as baitcaster but ensuring you have the necessary line size & capacity it'll work fine. On this note, if you're new to fishing a spinning rod & reel might be a good option as it's easier to cast and won't have to deal with as many bird nests.
Fishing Main Line
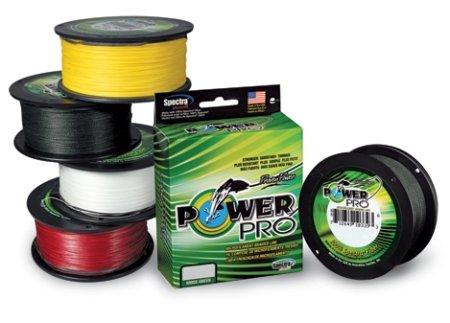
- Braid 50 - 65 pounds
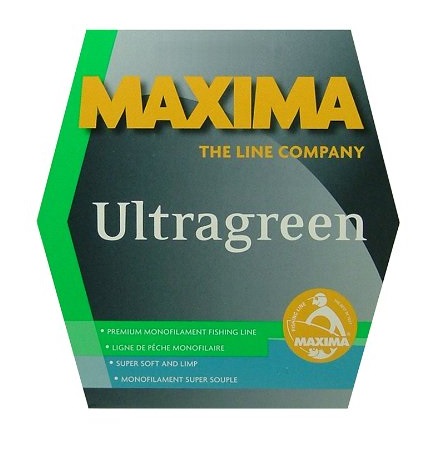
- Monofilament 20 - 30 pounds
Weights
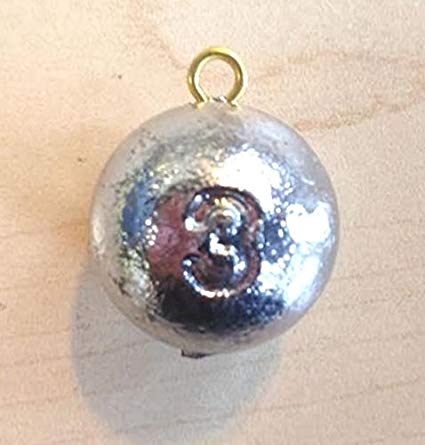
- Cannonball bouncing weights ("bouncing betties") 1oz - 4oz
- The most commonly used weights are 2 oz - 3 oz weights
- Choose weight based on the speed of the water, if you're weight is not continually bouncing down the run you may need to add a heavier weight. If you're continually getting hung up with no bounce, try a lighter weighted ball. If you continue to run into snags (aka. "a snaggy run") and you may want move up/down the run or new spot entirely.
Leader Line
- 10' - 12' monofilament line, it's not necessary to use longer leaders as it makes it harder to cast
- If you want to spend more money and use a fluorocarbon leader that's fine, the only slight benefits of a fluorocarbon line in this fishery is the low stretch of the line as that could provide better hook sets. The lines invisibility underwater doesn't matter in this type of fishery as the water is very colored up. All this to say for the price point fluorocarbon is not necessary.
- If you're adding yarn, ensure you tie an egg loop knot onto the hook
Hooks & Terminal Tackle
- Leader savers (connects the mainline to the leader line and holds the bouncing weight). These are super important in my mind as they protect the integrity of your main and leader line. When fishing off the bottom your line is continually getting compromised so these are worth the few bucks.
- 3-way swivels, if you don't have leader savers you can use these. However, these won't protect your mainline and leader line like a leader saver. I'd continually check your lines every 20 minutes to ensure they don't have any major nicks or damage.
- Yarn (wool) and/or Corkie. This is totally subjective and optional. For me, I use a small piece of wool (color does not matter) to help it float somewhat. However, if you think the fish are higher in the water column a corkie might be worth trying as it will elevate your hook off the bottom. Experiment on different runs. If you're new to this type of fishing I'd say keep it simple and avoid the corkie.
- Octopus Hook styles are my favorite. Any size between 2/0 - 4/0 will work great. If you're buying one size go with 3/0. Don't cheap out on hooks in this fishing technique.
Others - IMPORTANT!
- Hook sharpener! I rarely see guys on the water bringing/using this but a hook sharpener is super important in my opinion in this style of fishery. Bottom bouncing your hook along the rocks will quickly remove the point or dull your hook. I check my hook point every hour (maybe more) and give it a quick sharpen to always ensure the point is there. Trust me on this one and take it to the bank.
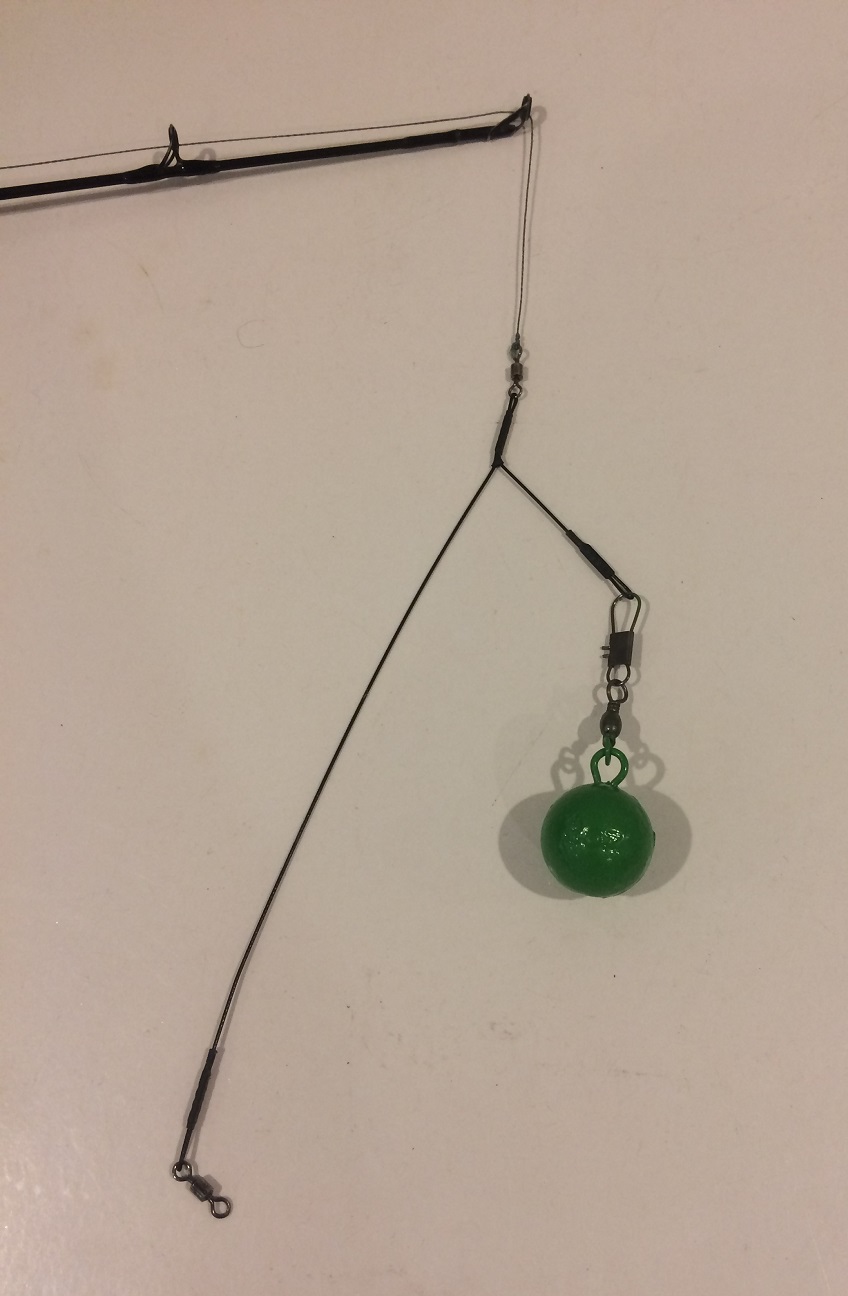
Image Description: Braided mainline tied onto the leader saver. The shorter end of the leader saver holds a 3 oz bouncing betty weight. The longer end of the leader saver ties to the leader line (not shown).
How to Bottom Bounce for Salmon on the Fraser River
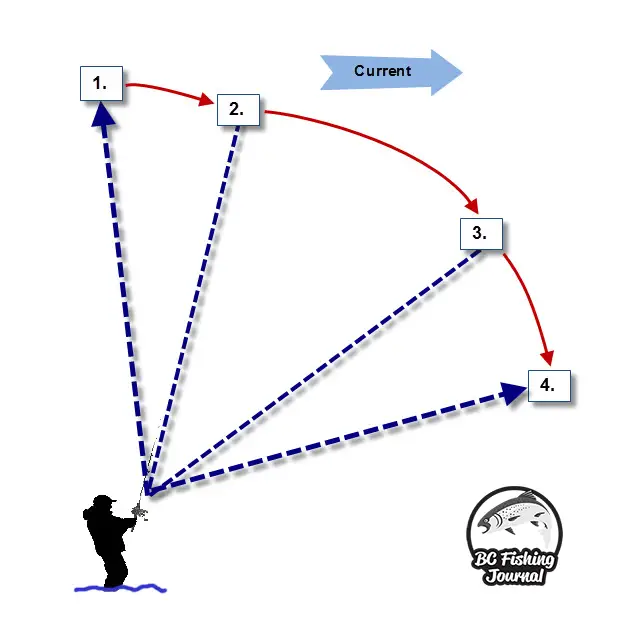
Here are the details on the diagram positions and how to cast and run your bottom bouncing setup. If the current is moving from left to right cast to position 1 (11 o'clock). Once your ball hits the water don't let out any more line, close the bail or put your finger on the spool. Letting out additional line here is commonly a mistake as will get you snagged up the bottom.
At position 2 you should begin to feel the cannonball bounce along the bottom. Your rod tip will do quick "tip tip tip" as the weight ticks bottom. Here at position 2 we're not letting out any line.
Between position 2 and position 3 we should have consistent ticks along the bottom. If you don't hit bottom between these positions you need a heavier cannonball weight as the current is too strong and/or the water is too deep. Again we're not letting out any line between position 2 and 3 but we're looking for that consistent bouncing tick off the bottom.
Between position 3 and Position 4 your bouncing will begin to slow down as the setup is getting into slower water. This is where you'll hook into most of your fish. Once again you're not letting out any line here but keeping the line tight and waiting for the rod tip to bend over with some weight. When you feel the weight give your rod a quick lift (mild hook set). If you feel that weight it's typically one of two things: the cannon ball is getting held up in the shallower water or you're hooked into a fish. At position 4 (around 2 o'clock) give your line another mild hook set (regardless of whether you feel anything) and begin to retrieve your line as quickly as possible to prevent the cannon ball from snagging up.
Quick Tip: Because you're not letting out any additional line the distance of your initial cast determines the arc or bouncing area you're fishing. Experiment with different cast distances. However, if you're fishing around other anglers be aware of their lines and that may impact your flexibility on casting distances.
Video: Bottom Bouncing for Salmon on the Fraser River
Here is a short video of what bottom bouncing looks like for Sockeye Salmon on the Fraser River. A few quick notes that I don't discuss well to consider, you'll notice that I'm dragging the fish onto the bank. This is not common practice but for this fishery with a 10'+ leader it's much easier to land the fish by walking back up the bank. Get ready for the "Sockeye Shuffle" when it's on land. Please note, before you walk your fish back ensure you identify it's a legal fish to keep.
At the end of the video I give a somewhat lengthy opinion on the controversial topic of bottom bouncing. I'd love to hear your thoughts and comments. Feel free to leave a comment at the bottom of the article or contact me via the Contact page it has all my contact details there.
Video Note: This video was not made public on the BC Fishing Journal YouTube channel but only made exclusive to this article. The reason is because I don't want to promote this type of fishing practice. I myself am not against a harvest fishery but am concerned to see the practice carried onto other systems. As mentioned earlier, I articulate all of these thoughts towards the end of the video.
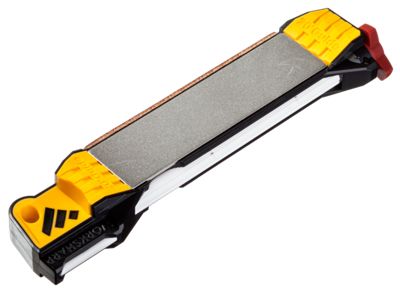
Recommended Bottom Bouncing Gear
Preview
Brand
Tackle
Check Best Price


Additional Tips


")


About the Author

My name is Jesse, I’ve been obsessed about fishing since I was a toddler trying to catch fish with my minnow net in any type of water. Today I have a passion to promote fishing in an educational, fun and respectful format. More on Jesse
You know… I am a fishery biologist and this whole thing about flossing is crazy… I am not opposed to it at all IF there are sustainable stocks to support it. Yes, it is not as sporting as hooking a fish but in many cases lockjaw happens when salmonids hit the freshwater and are there in harvestable numbers yet wont bite for anything… is it essentially a subsistence fishery at that point and what is wrong with that if stocks are OK? I would much rather see subsistence fisheries occur like this than a gill net… one of the fish in your video was previously run through a gill net and would likely have died prior to spawning due to the scale and slime loss as well as the cut on the leading edge of the dorsal fin. At least with flossing a non-target species (by-catch) would stand a chance at surviving if released… I used to gill net for many years and have been an observer on multiple gill net vessels and I can say with a high level of certainty that by the time one takes a fish to be released from a gill net, handles the fish, pulls it through the webbing or backs it out or untangles the teeth or kype that fish has about zero chance of survival to the spawning grounds. If all users were to floss their fish they would get a much better quality of fish (no cuts, bruises or scale loss from the netting) AND we would get better survival of released and non-target species to boot!
Appreciate your comment Wayne. I agree with your gill net thoughts and the horrendous impact on fish, especially the high mortality rates for those being “released”. As for flossing, I’m not a fan of anglers using it outside of these harvest (subsistence) fisheries and thinking it’s a technique to be used elsewhere. This is an important point for me and part of the reason why I wrote this post (and video) as I wanted people to hear that. I figured by offering educational information on both sides of the flossing debate it would ring louder than simply writing a DO NOT BOUNCE post. Anyway, thanks again for the note.