My Kayak Fishing Gear in the Ocean Pacific Northwest
In this article I’m outlining all my kayak FISHING gear that I use in the pacific northwest. The focus is on saltwater where I am bottom fishing and trolling. This gear is near identical to ocean boat fishing gear as well. However, I’ve tried to focus the aspects that are important to kayak anglers.
Bottom Fishing Gear on Kayak
My bottom setups are designed to get my lures/baits to the ocean bottom to jig or simply sit. For this I prefer heavier duty spinning setups. I know many kayak anglers that like their casting reels and rods but I really think it comes down to preference. Whatever way you go, there are some important factors to have with each setup.
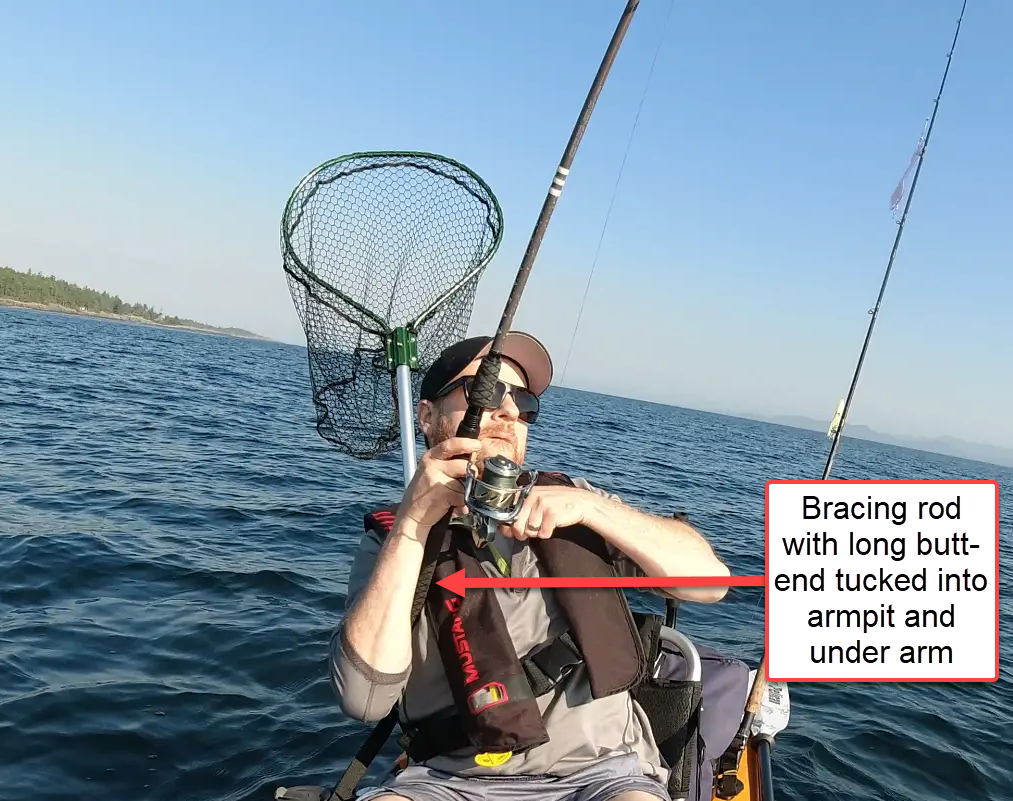
Long Rod Butt end for bracing rod
When kayak fishing you’ll often only have 1 hand/arm holding your rod. This could be because you’re handling the net, realigning your rudder (steering), grabbing a gaff, whatever! When your handling a rod with one arm you need a brace for those larger fish, this is usually done by tucking the butt end of the rod under your armpit.
Even if you are using both hands to hold the rod your still going to want to brace the rod under your arm or post the butt end into your belly. Regardless the big idea here is a long butt is needed to brace or post the rod on the kayak. Remember when your in a sitting position in a kayak you can’t use your legs and back to sturdy yourself when fighting a fish like you would in a boat.
Braided line for no stretch and hard hooksets
Braided line is a must for your mainline and bottom fishing. The primary reason is to provide a solid hookset when you’re jigging or letting a fish take your bait. Braided line has the least amount of stretch. A stretchy line like monofilament is NOT your friend here! Important note, for most of my bottom setups I do NOT tie braid directly to my lures, but use a fluorocarbon or monofilament leader. Usually a 3′ to 4′ leader. Fluorocarbon leader has a few pros as it’s invisible underwater which gives your presentation a little more stealth and it too has less stretch than mono. But if you do choose a monofilament leader its largest pro is the price point as its typically cheaper.
On my spinning reel, I generally have 40# to 50# braided line for my mainline and 30# to 50# fluorocarbon/mono leaders. This is a general sizing but covers all the fish I’m targeting in the kayak in the ocean. For example, this covers all salmon species, rockfish, greenling, lingcod, pacific cod, flounder, sole, dogfish and small/medium sized Halibut. If you’re getting into Halibut over 50# or giant toothy Lingcod on a kayak, you may need heavier terminal gear but for me this is overkill.
My KastKing Spinning Rod and Reel combo for bottom fishing
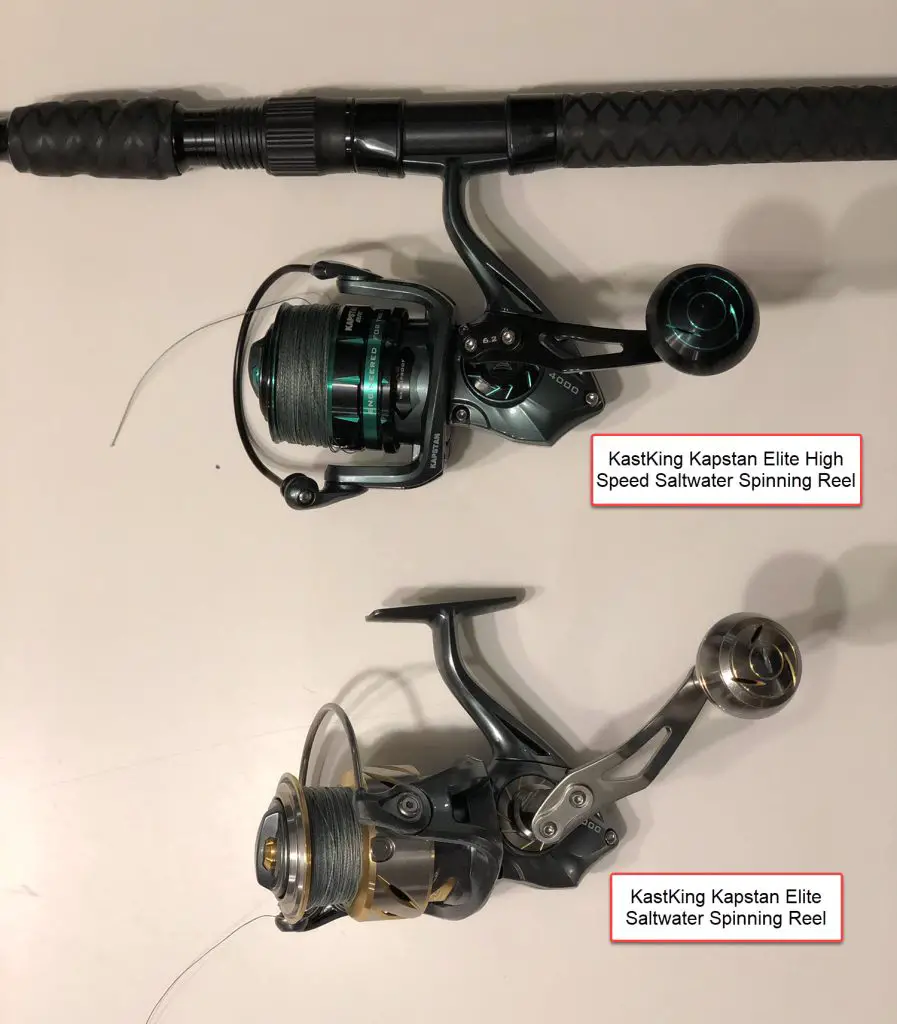
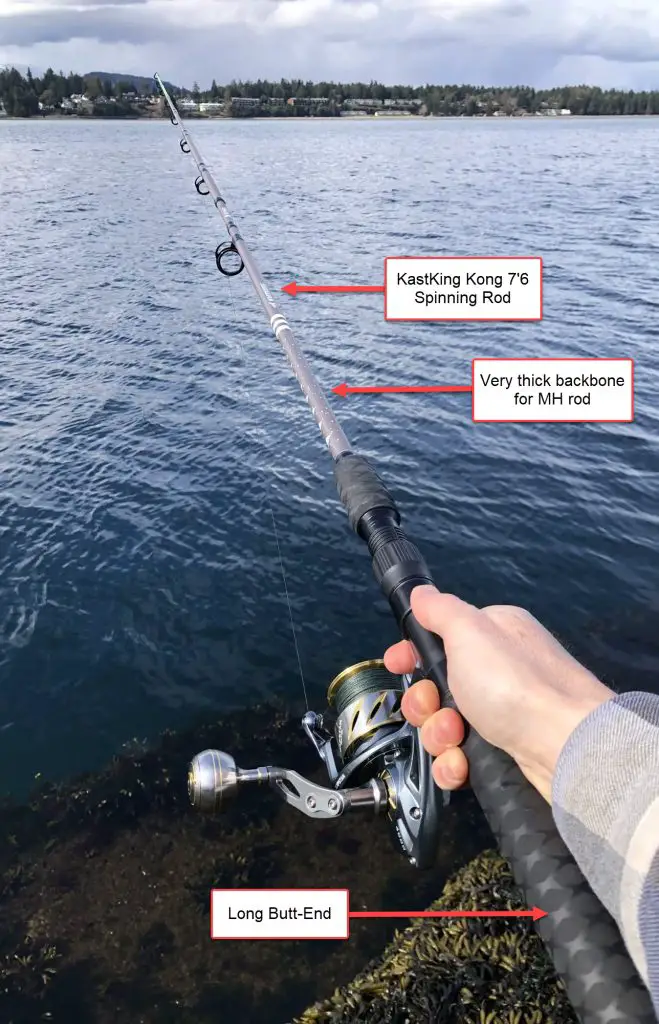
This season I’ve been using the KastKing spinning combo for all my bottom fishing. The reel is a Kapstan Elite saltwater spinning reel (4000 model size) and rod is the 7’6 Kong spinning rod.
I’ve loved the Kapstan reel on this combo as the components are built for saltwater. I use the 4000 model (spool size) so that I’m able to put on a substantial amount of 40# or 50# braid. The 4000 specs according to KastKing are (LBS / YARDS): 15/360, 20/260, 30/185. However, I put on more than the specs recommend with either 40# or 50# PowerPro with no issues. Braided spools often come in 150yards, 300yards, etc. I like to use up an entire spool, so I usually buy the 150 yards of 40# for the 4000 model and it takes the entire thing, aka 40#/150yds.
The reel itself is a little heavier because of the saltwater components but has proven itself with a great drag for those long salmon runs and fast line pickup when those fish are swimming toward me.
The Kong rod has a massive backbone (MH weight) and fast action tip, this rod provides plenty of strength for massive fish (bigger than I’m catching). I like using the shorter version of the rod 7’6 on my kayak I find the shorter rod when jigging is easier to manage, but that’s simply my preference! Regardless of the size, this rod is built to handle large fish, you’ll notice this by the size of its backbone. It’s super wide, but that enables it to put extreme pressure and torque on a fish, e.g. need to pull it out of rocks or reef. It also allow a lot of torque to pull my jigs out of the rocks when they get stuck!
This bottom combo is not only great on a kayak but would be perfect for any boat as well. All in all, I’ve been very happy with the spinning reel on my kayak for all the pacific northwest species and will continue to use next season!
Bottom Fishing Jigs and Lures
There are a million bottom lures out there, so to keep it simple here are my 3 GO TO bottom lures that I use almost every trip.
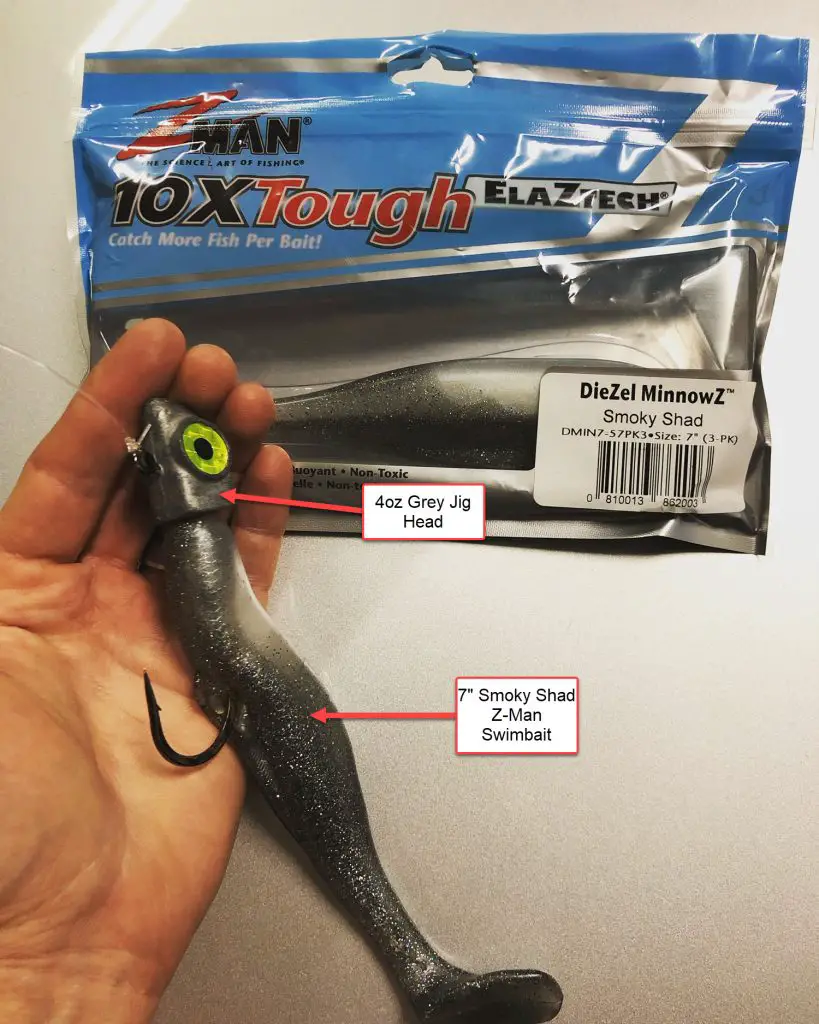
- 4oz Jighead with eyes, paired with a 7″ Smoky Shad Swimjig. This is a Lingcod slayer.
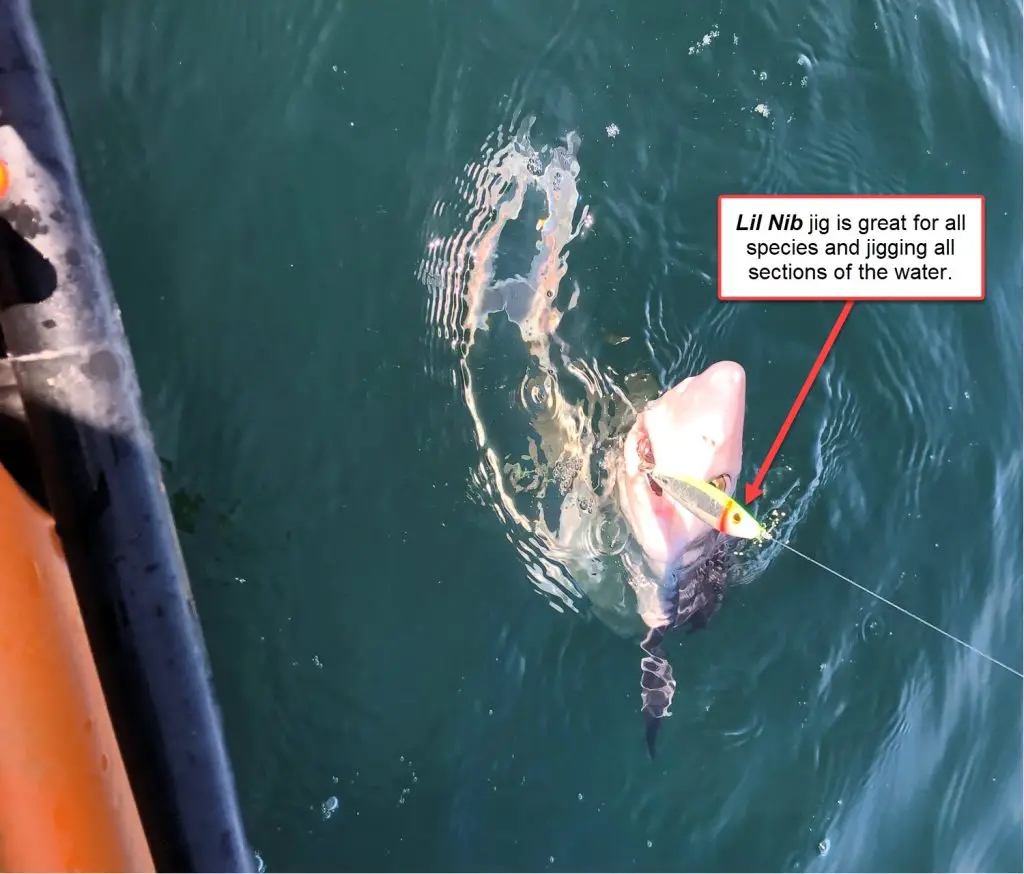
- Lil Nib Jig. I really like the Irish Mint (silver). They come in variety of sizes (.75oz, 2oz, 3.3oz and 5oz) for deeper water or faster tides, use a heavier jig. This has caught all species of Salmon.
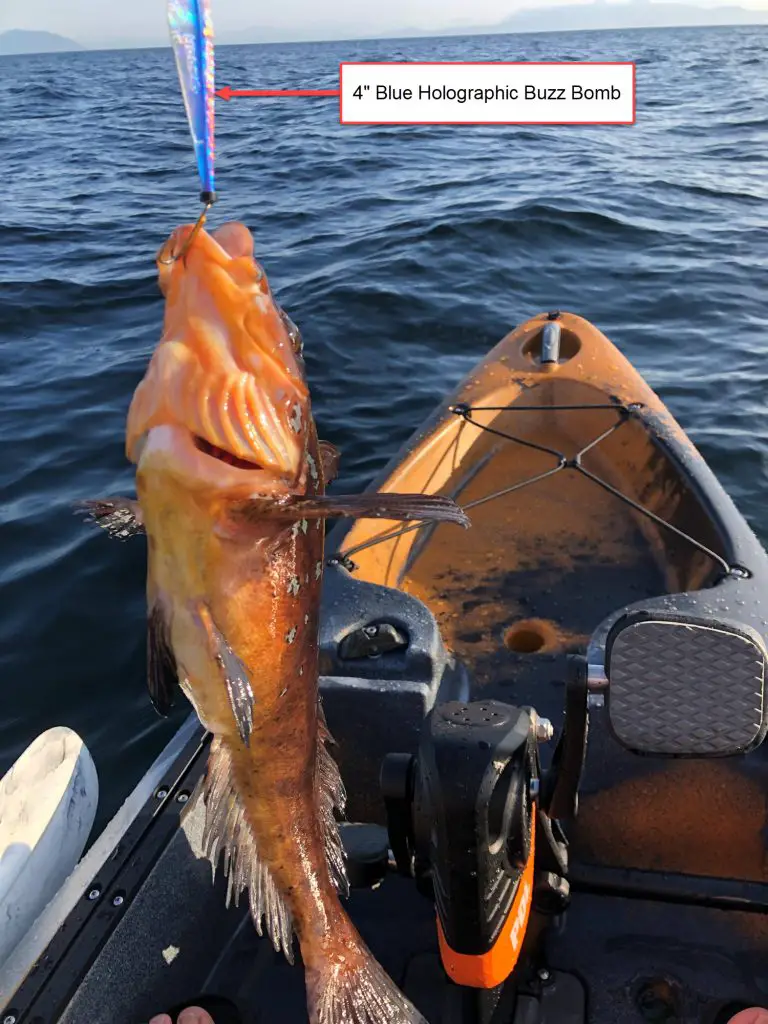
- Buzz Bomb. This lure is an old classic! It catches all species of fish. On my favorite 4″ Blue Holographic buzz bomb I have caught most of the local fish. They are not only great to vertically jig but also to cast from shore and jig.
Bottom Fishing Jigging Technique
If you want more information on how to bottom fish, check out my article here. Not only does it have a write up of tides, jigging technique but also has a video of me jigging off my kayak.
Trolling Fishing Gear on Kayak
Without giving a paralyzing amount of detail and options, I’ve included my most commonly used gear. And I’ve focused more on the foundational elements like the rod, reel and lines. The lures, spoons, flashers and other terminal gear I’ve put a smaller focus on.
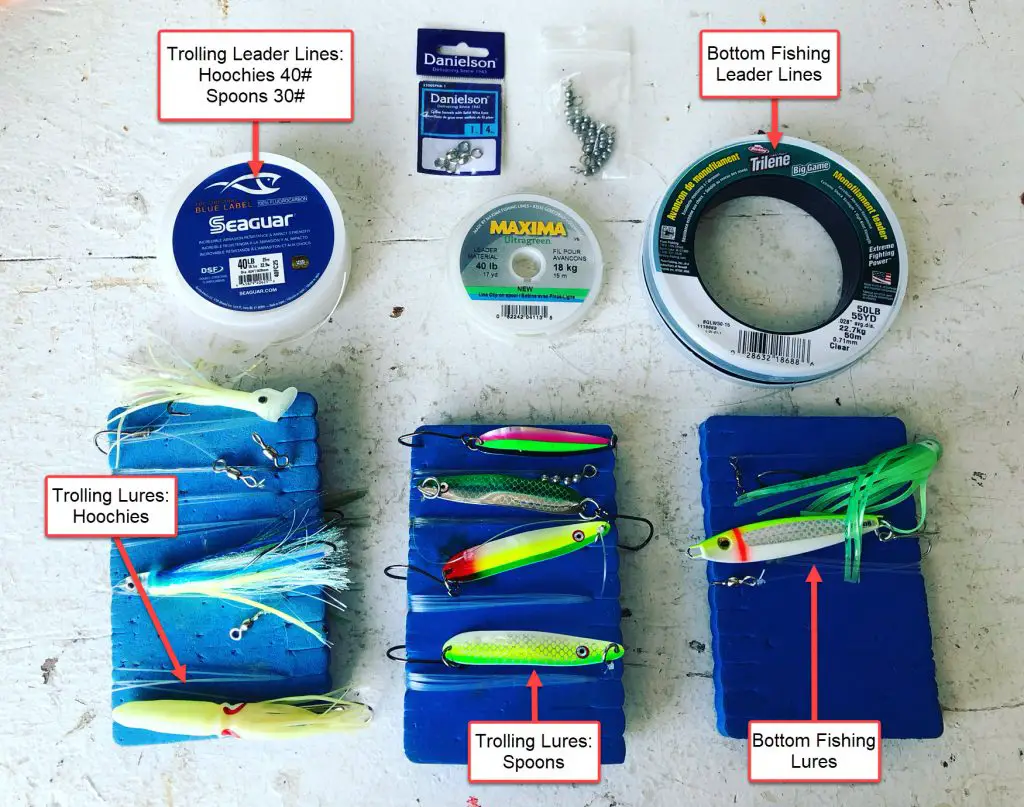
Two types of Trolling Reel Setups
To keep this simple, I’ll give you two popular saltwater trolling reel and line setups. There are other options but these are the more popular ones here in the pacific northwest and this applies for boat or kayak trolling.
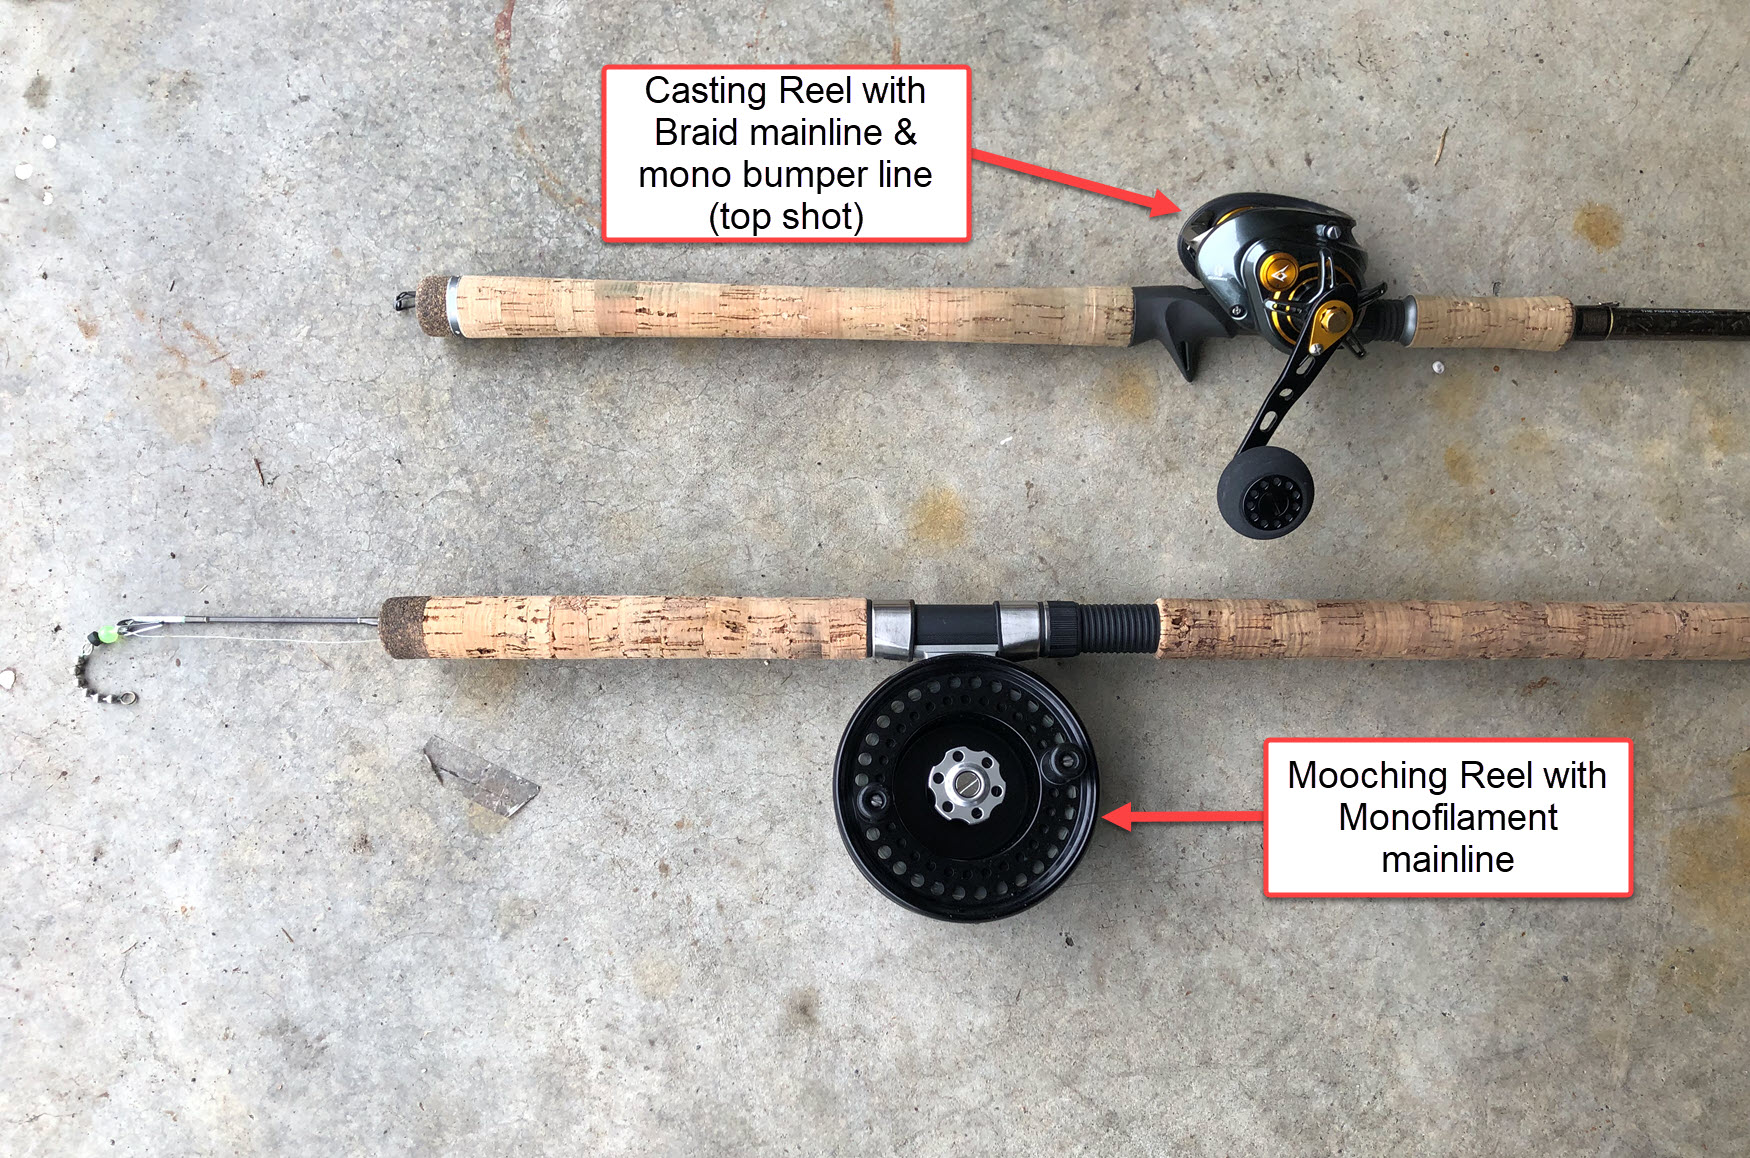
Setup #1 – Monofilament mainline
Mainline: 30# monofilament
This is an old classic and offers the most stretch on the line and least pressure on the fish. It It also has more drag in the water than braided line (as it has a wider diameter). Also is usually the cheaper option.
Setup #2 – Braided mainlined with a bumper line (top shot) of monofilament
Mainline: 40# to 50# braid
Bumper Line (Top shot): 50′ to 100′ of 30# monofilament
This is a combination of 2 lines but with most of the line being braided. Usually a 40# braided mainline and 50′ to 100′ feet of 30# monofilament. This setup is a little more complex setup (requiring double uni knot to tie 2 lines together), it doesn’t have as much stretch as the 1st setup, and has less drag in the water (thinner diameter of braid). Lastly, because there are two lines its more expensive.
What is a bumper line or top shot?
To answer that, consider the 2 options I provided above – why isn’t there a full braided mainline setup? The reason is because braided line has zero stretch. If you used all braided line while trolling, you would be tearing fishes mouths off or loosing fish left and right. Trolling speed naturally creates a bit of a hook set when the fish bites so you don’t need that added pressure on the fishes mouth when setting the hook. In fact, a little stretch in your line will help you when trolling as its offers a little forgiveness and acts like a second drag system, especially if your trolling too quick or putting too much pressure on the fish. This may sound complicated but the big idea is, stretch = greater drag (aka forgiveness).
So essentially, the bumper line is a shorter section of stretchy monofilament that’s connected (usually by double uni knot) to your mainline. This section of line will depend on spool and reel size, but for my ocean purposes of trolling it’s a 30# between 50′ to 100′ long.
Final Thoughts on Kayak Fishing Gear
I hope this article was helpful for you. If you were looking for more detail on my kayak setup itself or finer details you should check out my kayak gear and accessories article OR you can see my YouTube review video where I outline all my gear and each items costs.
If none of the above helps, feel free to email me with any questions: [email protected].
Cheers! Jesse
