How to make Chinook Salmon Gravlax
I've got a ton of Salmon in the freezer from last seasons run. I've been making all types of dishes and recently saw a video on how to make Salmon Gravlax, so I wanted to try it out. The results were fantastic that I had to share. Here is the most simple salmon gravlax recipe you'll ever find.
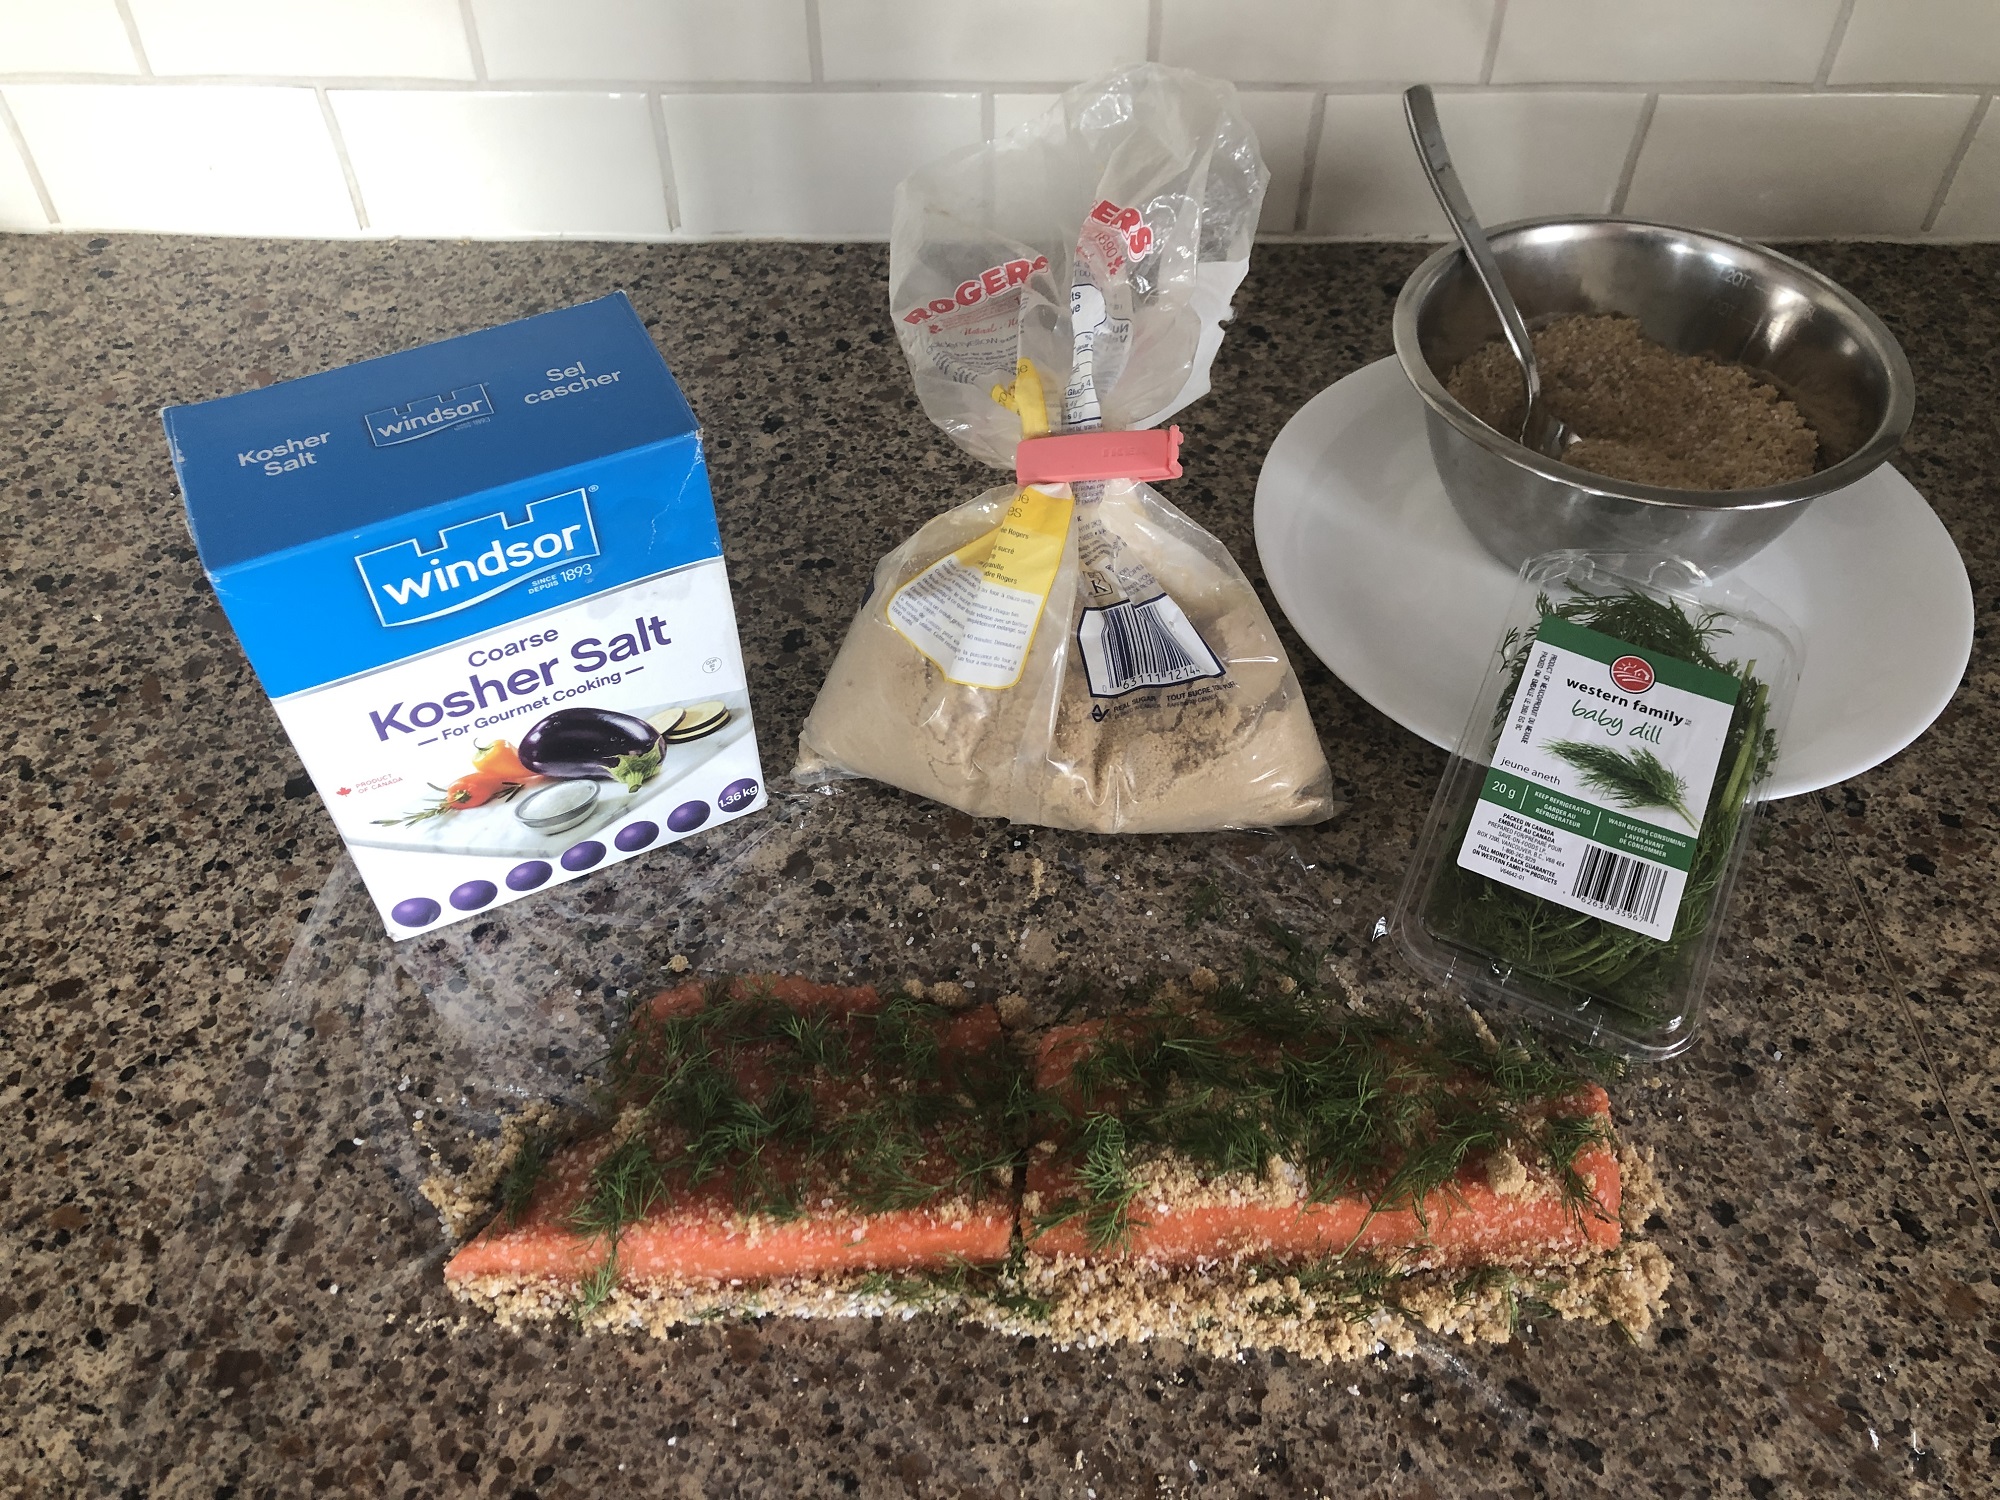
The ingredients are so simple all you need is: Salmon fillet (half or full fish, or whatever amount you want), Kosher Salt, Brown Sugar and fresh Dill Weed.
Important Note: The Salmon should have been flash frozen or been in your freezer for at least 12 days. This ensure any parasites or worms are dead before consuming.
Step #1 - Mix up your Cure
This cure is similar to the brine cure I make when smoking Salmon. It's so simple, it's 3 ingredients:
- 2 parts - Brown Sugar
- 1 part - Kosher Salt
- Fresh Dill weed
Make sure to use Kosher or a coarse salt. I used a lighter brown sugar but I'm sure using Demerara (darker style) would be fine as well.
Ensure the parts are 2 to 1 from sugar to salt, the actual amount is subjective to the size of your salmon piece. It doesn't take much, for example 2 cups of brown sugar and 1 cup of salt will do an entire large Chinook Salmon.
The 2:1 ratio is certainly something you could experiment with based on how solid (dry) you want your final product. For example, if you want a very firm salmon you could increase the salt and do a 1-to-1 ratio between salt and sugar. For me, I like a softer finished product so found the 2 to 1 ratio was perfect! The dill weed is fresh and chopped into thumbnail sized pieces.
Mix up your salt and sugar into a separate bowl. Do not mix your dill into the bowl as it will be placed on top of the rub.
Step #2 - Prepare Salmon Fillet
In my example, I used a small fillet of a Chinook Salmon. Remove the skin and pin bones from the Salmon fillet. You don't want to have pin bones in a soft gravlax! I've heard some people like to remove the skin after the curing process, but I prefer to do it before the curing process. Seems to make the entire thing easier to manage.
Lay the prepared salmon onto a large strip of plastic-food wrap (aka. Saran wrap). The wrap should be able to wrap up the entire salmon fillet. But before we wrap it up, take the mixed cure (salt and sugar) and generously coat the entire fillet. I coat both sides and even rub some on the sides as well. Then place your fresh cut up dill and cover one side of the salmon, depending on how strong of a dill flavor you want, use at your discretion. I love dill so see how much I used in the photos.
Now you are ready to wrap up the salmon in the plastic-food wrap. Wrap it up fairly tight and place on a large flat tray or plate. The photo I've included shows a white plate that's a little too small. Place the wrapped up salmon into the Fridge.
Step #3 - Curing Process for 3 days
The curing process will take approximately 3 days. The longer you leave the cure on the firmer the salmon will be as the salt continues to draw out moisture from the meat.
During the 3 days of curing, there are a few things to keep doing. I like to flip the salmon over 1-2 times each day. Also, I keep something heavy on top of the salmon to press the salmon flat against the plate.

Step #4 - Rinse, Cool and Eat!
After the 3rd day in the fridge, I removed the salmon from the food wrap and rinse it off in very cold water. The rinse I'll use my hands and ensure all the dill and cure is off the salmon. This stops the curing process of the fish.
At this point you can eat the Gravlax but it might be a little soft or mushy, making it difficult to cut. If this is the case, I put back into the fridge for 1 day to cool and settle. This will firm up the meat and be ready to serve/eat on the 4th day of the entire process.
My favorite way to eat it is on a salad, the soft gravlax texture compliments salads so well! Plus, I love dill in my salads and having it in the salmon is incredible. Eat it solo by itself is never a bad idea, or on a cracker with cream cheese.

Final thoughts and tips
If you bought salmon from the grocery store, typically the Salmon has been flash frozen BUT this is not always the case! If the butcher or salmon source is uncertain if its been flash frozen, you should freeze the salmon in freezer for 12 days.
Thawing out Salmon slowly in the fridge will give you a better product! What I mean by that is I like to "cold thaw" my salmon in the fridge for 2 days before using. So from freezer to fridge for 2 days. I've found the salmon stays firmer when using this thaw approach vs. putting salmon into water or room temperature to thaw out.
Anyway, I'd love to hear your thoughts on how you like to make or eat Salmon Gravlax. Let me know in the comments below. Thanks for checking out my site. Cheers! Jesse