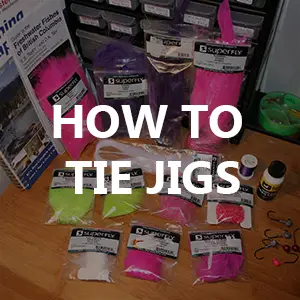
How to Tie a Salmon Jig
Jigs, Jigs, Jigs! I love Jigs, Jigs under a float, Twitching Jigs, Micro-Jigs, with so many different styles, sizes, materials and colors they are an incredibly dynamic lure. For this Tip page, I’ll be focusing on jig materials and step-by-step instructions on how to tie a jig. I’ll outline the tools required as well as the different materials like Threads (types and sizes), Marabou, Schlappen, Flash, lead sizes, hook styles and so much more.
What Components Are Needed To Build Salmon Jigs
The following are some starting components you’ll need to begin creating your own jigs. Things like the vise, bobbin, etc are mandatory but when we get into the materials these are completely subjective and optional.
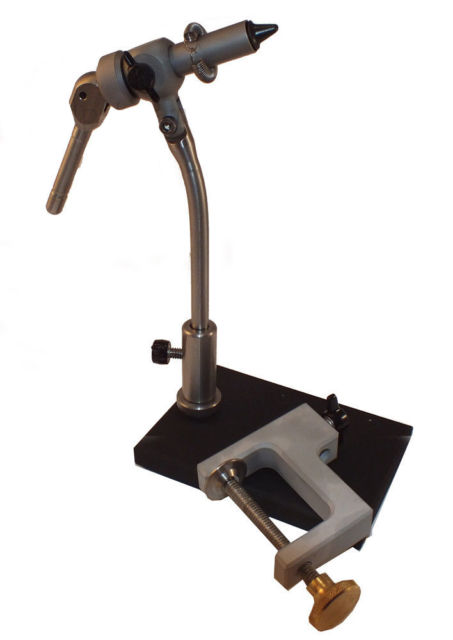
Jig Tying Vise
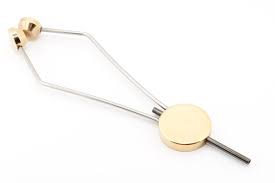
Bobbin
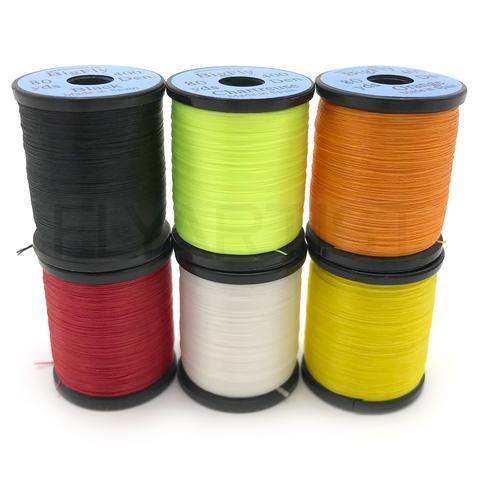
Thread
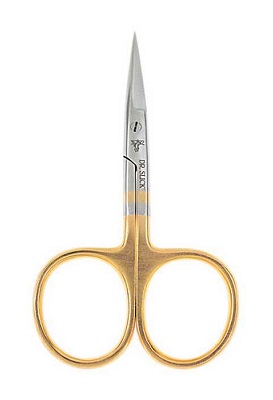
Scissors
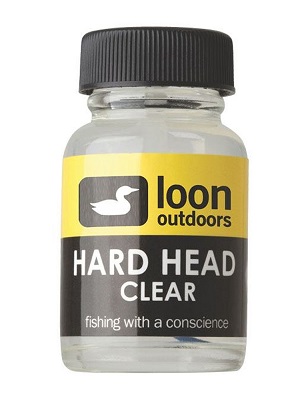
Head Cement
Jig Tying Vise – the structure that holds the hook in place. The 2 most common vises are the C-Clamp vise (clamps onto bench, more permanent) and the Pedestal vise (not attached to anything, very easily moved).
Bobbin – Tool that holds the thread spool securely by keeping tension on the spool. There are different sizes (length and width) of bobbins which are linked to the size and material of the thread. E.g. a shorter and narrower bobbin is used for tying smaller flies. There are also different materials for the bobbin tube like metal and ceramic. The tube material may be impacted by the type of thread. E.g. A metal tube tip may be scored (damaged) by highly abrasive threads like Kevlar or GSP, so you’d want to use a ceramic material or glass/ruby.
Thread – This is the line used to connect the jig/fly materials to the hook. See thread section below on types and sizes.
Scissors – Clipping away excess thread and materials, it’s important to have a small sharp scissors to make sure you’re not leaving excess material on hook shank. Highly recommend getting a curved tip scissors as you’ll be able to make much closer (better) cuts.
Head Cement – A glue to strength thread and/or keep materials on the shank. These come with brushes or straight tubes to apply.
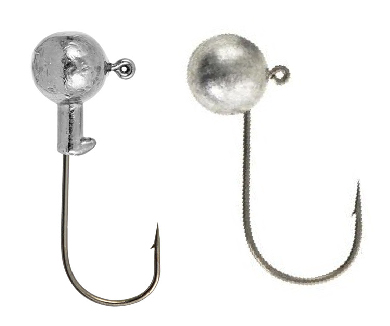
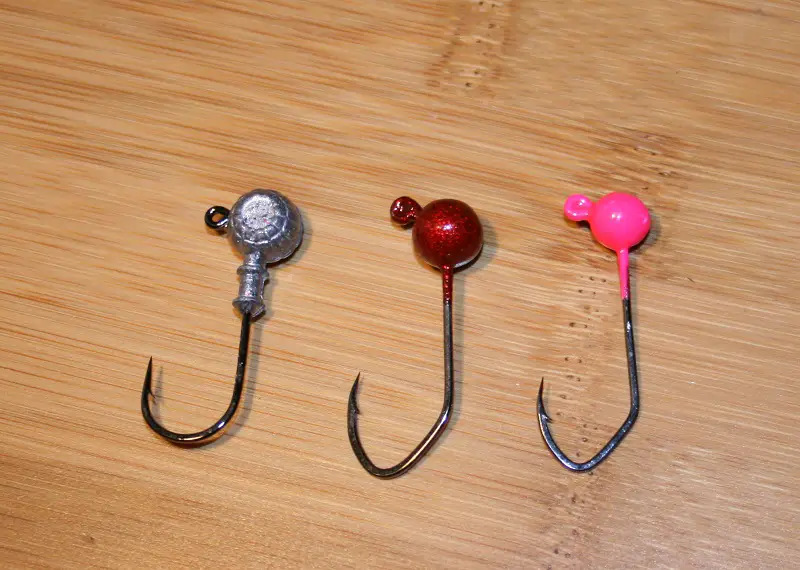
Jig Heads
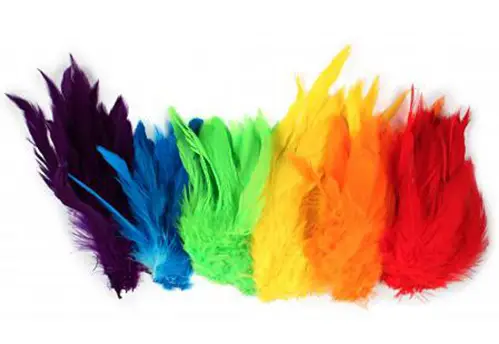
Feathers
Furs

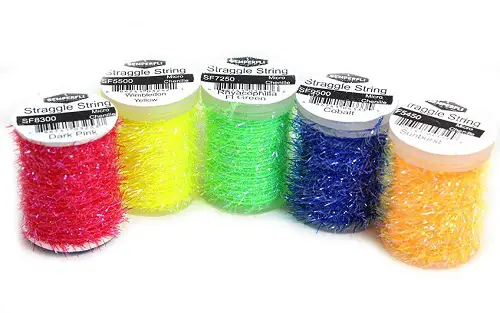
Chenille
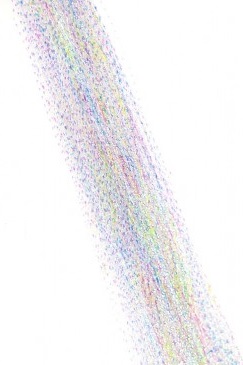
Krinkle / Flash
Jig Heads – These are the hook and weight foundation that the materials are being applied to. See Jig section below for weights and sizes.
Feathers – Feathers from a Turkey, Chicken, Bird and others, these are taken from the neck, body & butt of the bird. The feathers are prepared in a number of ways which I won’t get into here but most often color dyed. Popular feathers used in tying jigs are Marabou, Schlappen and Hackle.
Furs / Hairs – These furs can be natural or dyed and come from many species like rabbit, deer, seal, fox, muskrat, cow, squirrel and dozens more. Synthetic materials can also be used or blended with the natural furs/hairs. The most common fur used in larger salmon jigs would likely be Rabbit fur.
Chenille – It a fur like material that resembles a caterpillar body/look. Chenille is often used for bodies on popular flies like the Woolly Bugger and also on Marabou jigs.
Krinkle / Flash – This highly reflective strands are nice additions to the jigs to give it that extra flash underwater, a few strands go a long way. They come in variety of materials (synthetic tinsel, metallic flashabou, etc.) and comes in an unlimited number of colors.
What Thread Sizes for Tying Jigs
There are a number of different thread materials out there and they have different size systems. I’m not going to dive into extreme detail for “thread nerds” but will simply give you an overview of these thread size systems and which ones I use for my salmon jigs.
The most common thread sizes are outlined by the:
- Aught (“ought”) System. Example sizes (smallest to largest): 17/0, 8/0, 3/0, 2/0, etc.
- Denier System. Example sizes (smallest to largest): 30, 70, 140, 210, 280, etc.
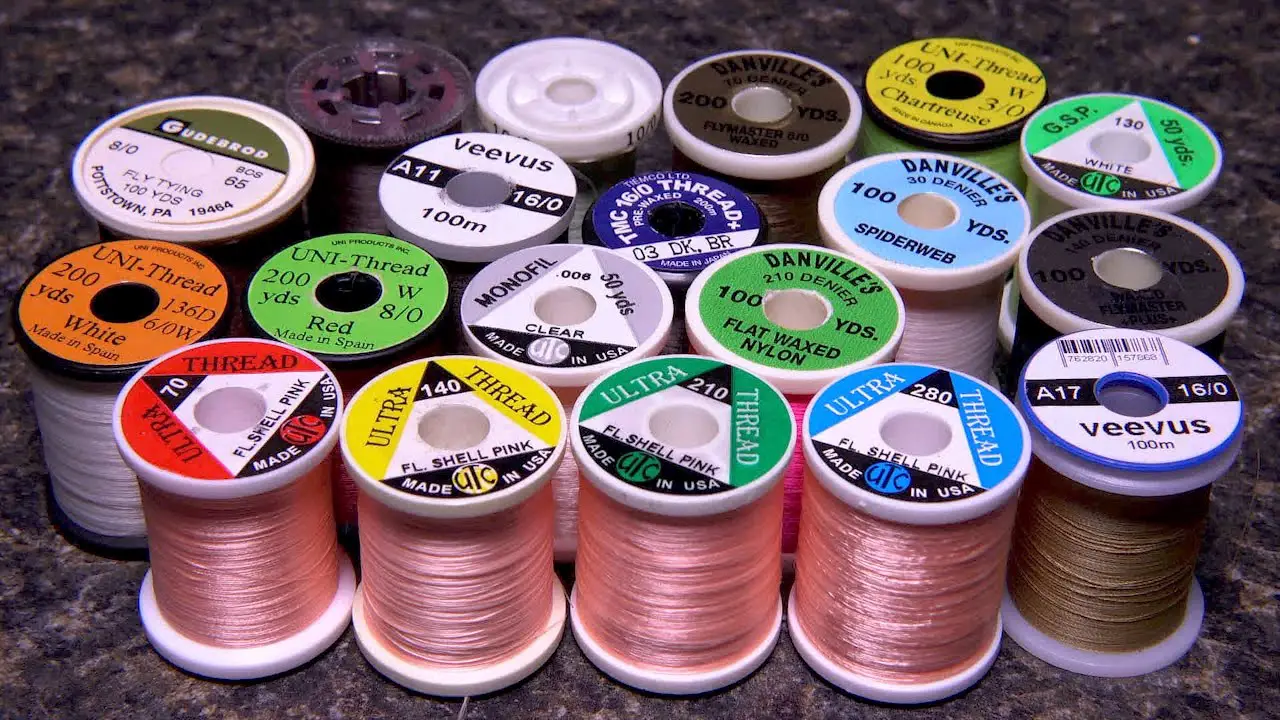
Aught System
This system of measurement should NOT be confused with the fishing hook aught sizes as the numbers work in the opposite way! In the thread aught system a larger number represents a thinner sized thread. For example, a 17/0 line is thinner than a 8/0 line, and 8/0 line is thinner than 3/0 line.
Denier System
This system is based on the thread weight in grams, the larger the number the thicker/stronger the line is. Common thread sizes for tying rugged salmon jigs is between 140 to 210 (140D – 210D), for smaller jigs or flies 70 to 140 (70D – 140D).
What Jig Head Sizes To Use
Jig sizes can come in a variety of sizes from the smallest micro jig around 1/32 oz to the large jigs around 3/4oz. Here are the typical size in ounces from small to large: 1/32, 1/16, 1/8, 1/4, 3/8, 1/2, 5/8, 3/4, etc.
If you’re tying jigs to be fished under a float the most commonly used sizes are 1/8 oz and 1/4 oz. I like to tie jigs in a variety of sizes to accommodate changing water conditions (water clarity and water speed). Here are a couple of water considerations when you choose your jig heads:
- Use a heavier jig for faster moving water, so it can get to the bottom
- Use a lighter/smaller jig for clearer water (high visibility) conditions
If you’re tying twitching jigs the heads are generally a little heavier than the ones fished under a float. The most common jig head sizes for twitching jigs are 3/8 oz, 1/2 oz and 5/8 oz. The reason for a heavier jig heads on twitching jigs is for cast-ability, as you’re only tossing the lure not the extra weight of the float and weight.
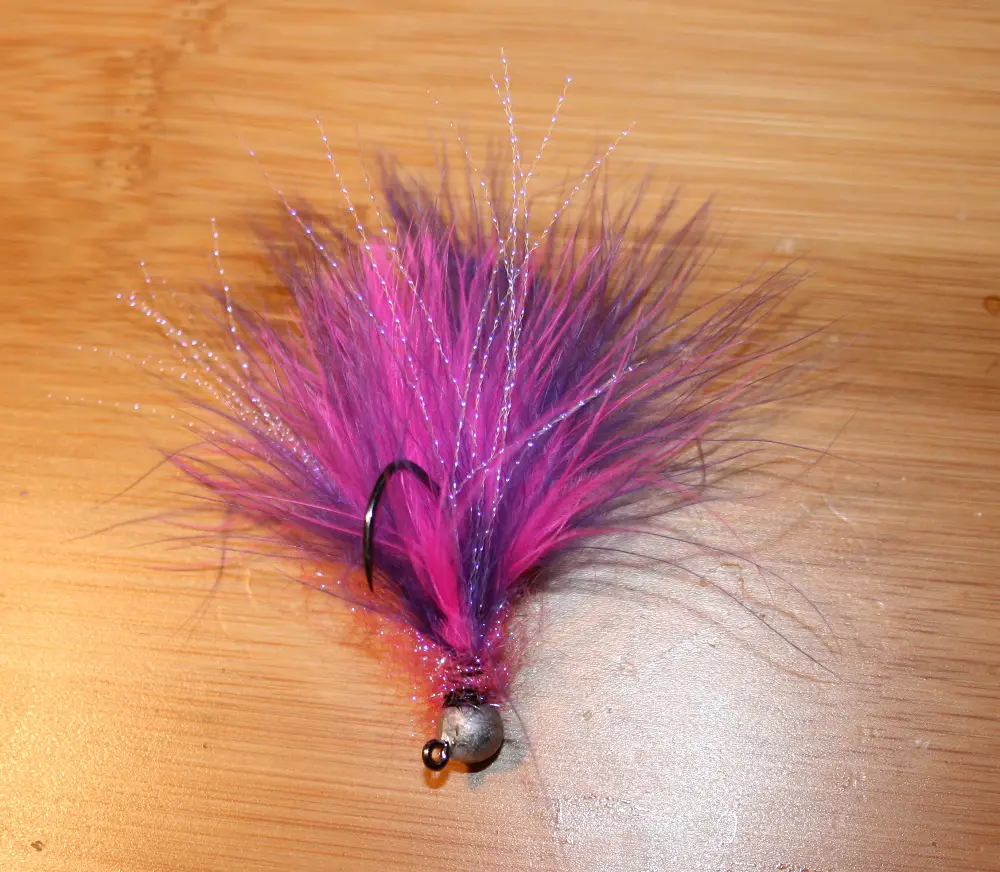
Step-by-Step Instructions on How to Build a Chum Salmon Jig
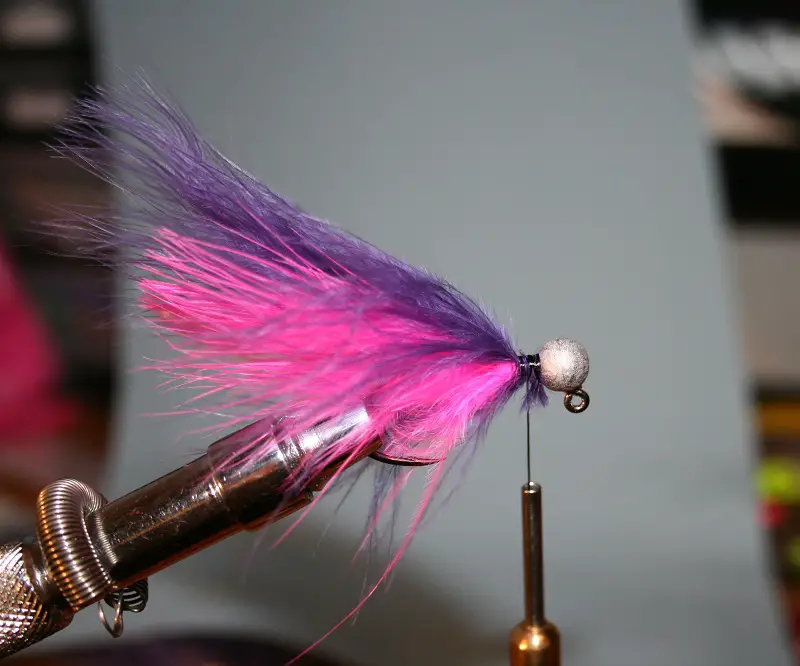
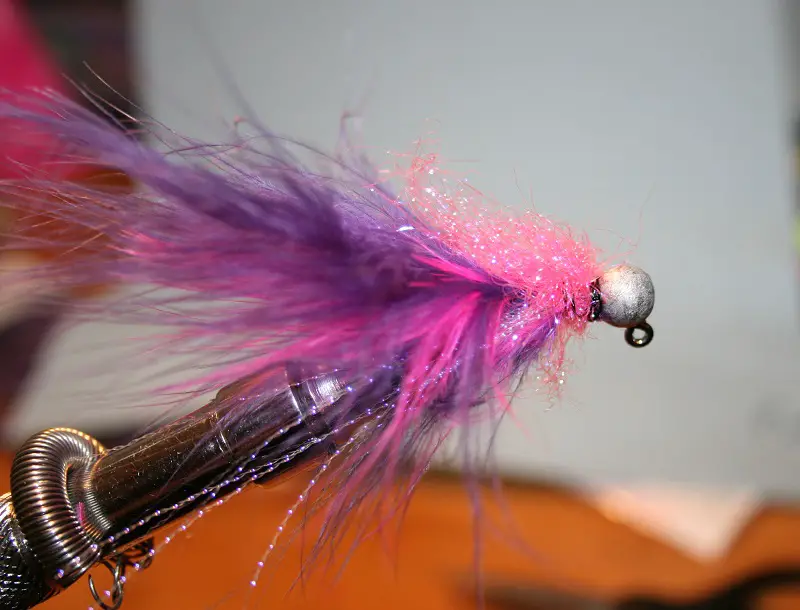
This is a simple purple/pink marabou jig that is designed for Chum Salmon. It’s not complicated or pretty, and purist fly tiers would likely scoff at this but for Chum Salmon its effective! I’m a big fan of the color purple in my Chum jigs. Purple on pink, purple on chartreuse, etc. That’s not to say other colors can’t be more effective, but lets simply call purple my “primary color” for these toothy beasts. This is a very easy jig to make and can save you a lot of money if you do a lot of Chum fishing as retail stores can range from $4-$8 / jig.
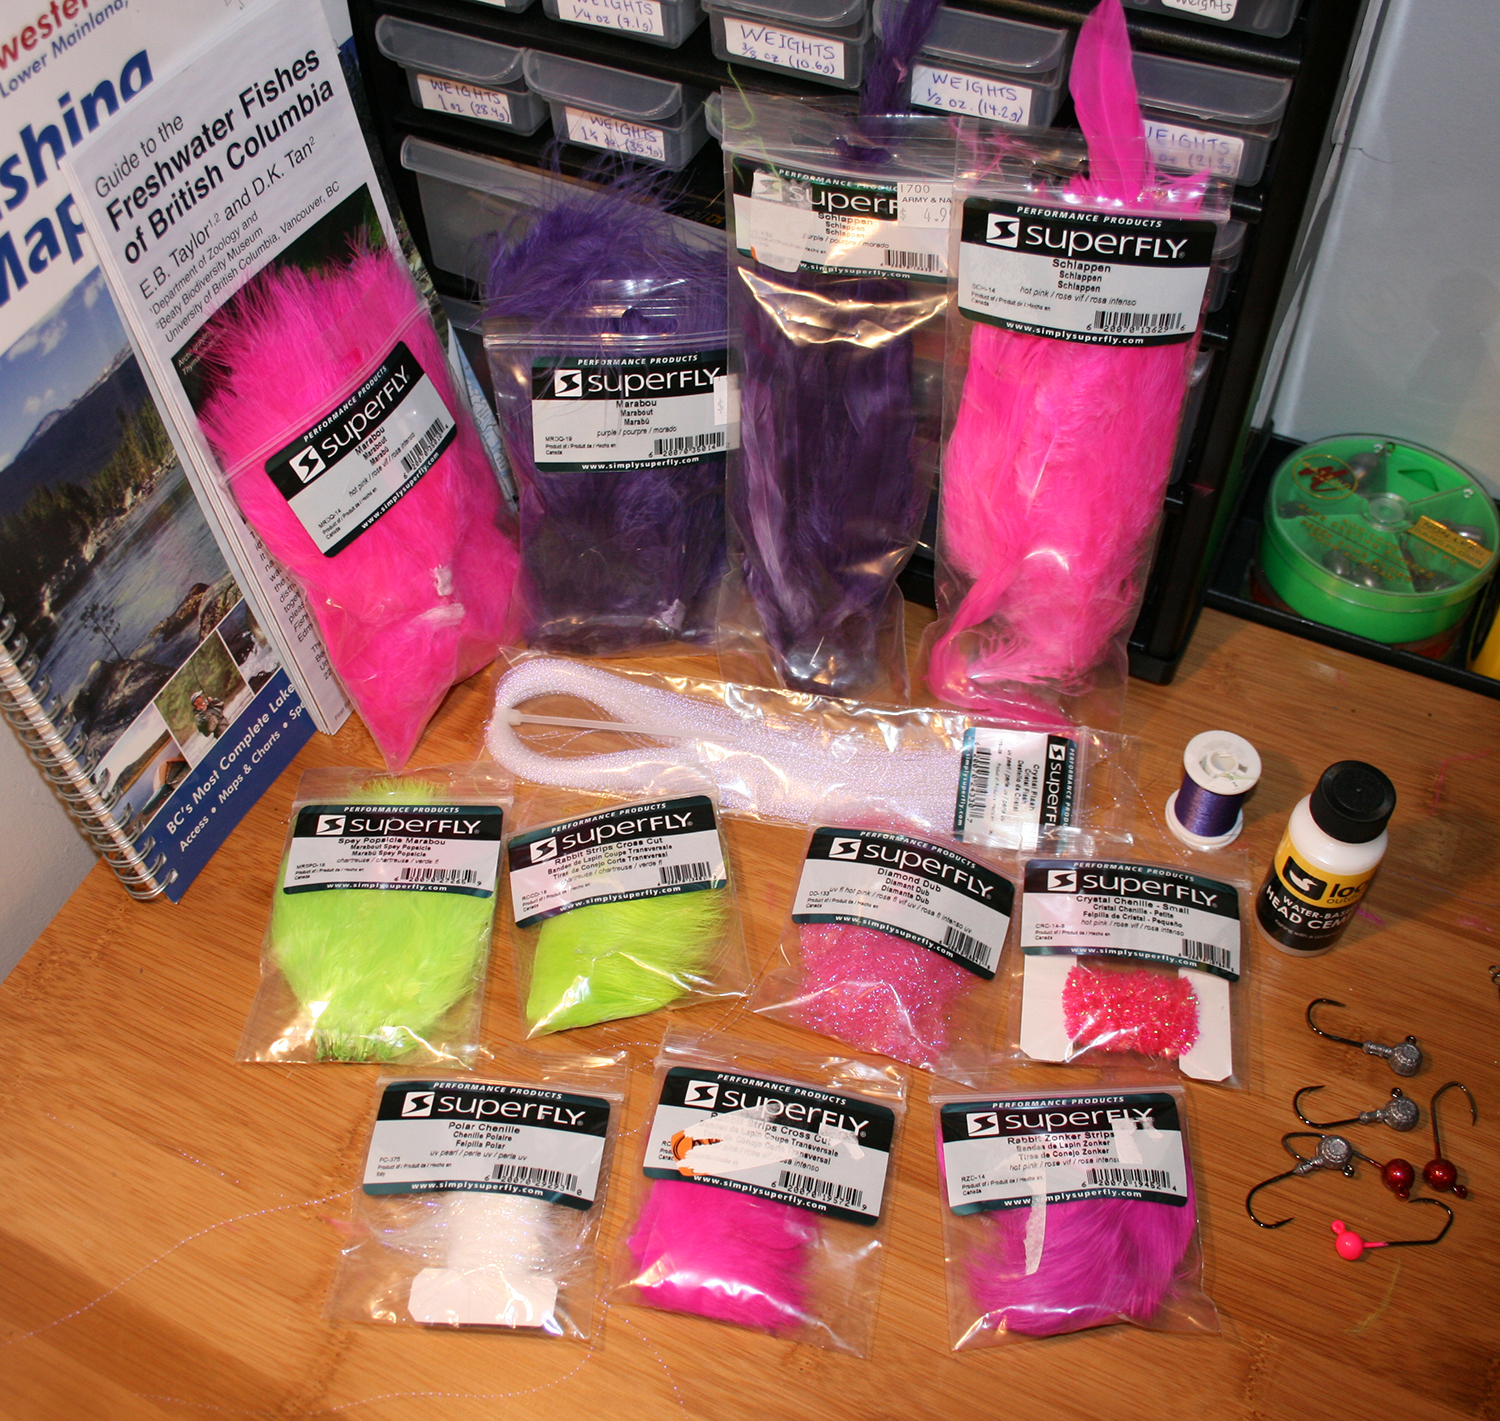
Materials used in this Jig
- 1/0 Sickle hook with 1/4 oz Jig Head
- 210D Black Thread
- Purple Marabou
- Hot Pink Marabou
- Optional: UV Pearl Crystal Flash (7-8 strands)
- Optional: UV Fluorescent Hot Pink Diamond Dub
- Optional: Head Cement
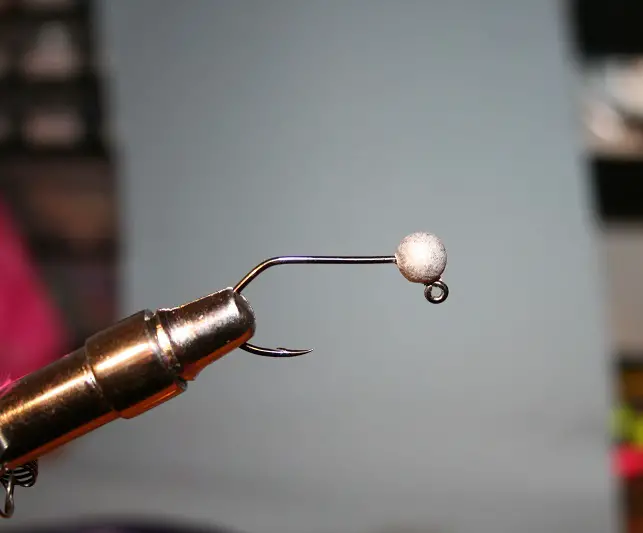
Step 1 – Put your jighead inside the vise, and lock the vise handle down. Ensure your jig is sitting horizontal (parallel with work bench or table) in the vise. Use your Bobbin to tie a layer of heavy thread line (201D thread) over the shank of the hook. Ensure you always apply your thread by going over the top. The reason being if you make a mistake you go underneath to remove the line. This is a very good habit to get into for all jig/fly tying.

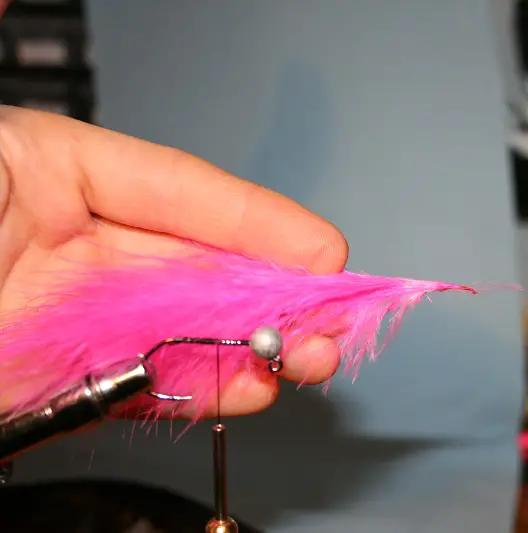
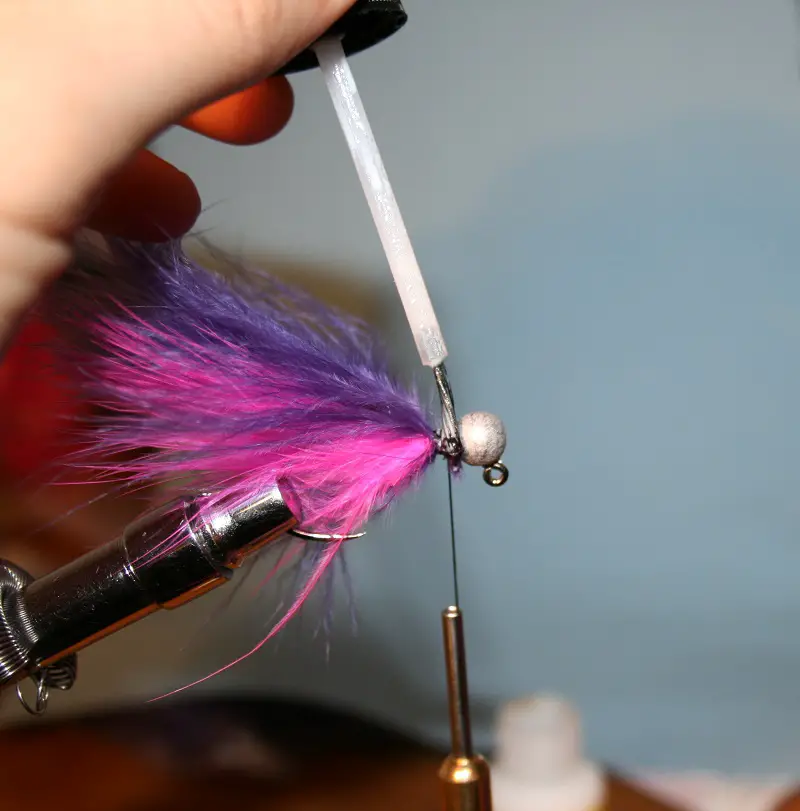
Step 2 – Take 1 piece of Hot Pink Marabou feather and place on the shank of the hook. Extend the end of the marabou feather approximately 1 shank length beyond the hook. This will hang below the hook when wet. Once the marabou is in place tie it on a just 2-3 mms below the jig head. A little space is needed as you’ll be tying more materials above. I recommend wrapping the marabou gently at first. Cut off the excess marabou feather as close as possible to the hook without clipping the good piece of marabou. Finally wrap the thread back to the top of the shank (directly beside jjg head).
Step 3 – Similar to step 2 above, take a single purple marabou feather and place on top of the pink feather. I like the purple feather being slightly longer than the pink feather, so place and hold the purple feather over the pink feather. Then tie the purple feather onto the shank of the hook. The previous step we left a little room to allow for the purple feather to be tied on here. It’s not a big deal if you’re tied the 2 marabou feathers together with a big knot. Once the purple marabou is tight, clip of the remaining feather.
Step 4 – This step is optional, but at this point I like to apply some head cement over the thread to solidify the marabou wraps. Chum Salmon have massively sharp teeth and this just gives it a little more strength to ensure i’ll hold up. Like I said earlier, it doesn’t necessarily have to be pretty, but it has to be strong!
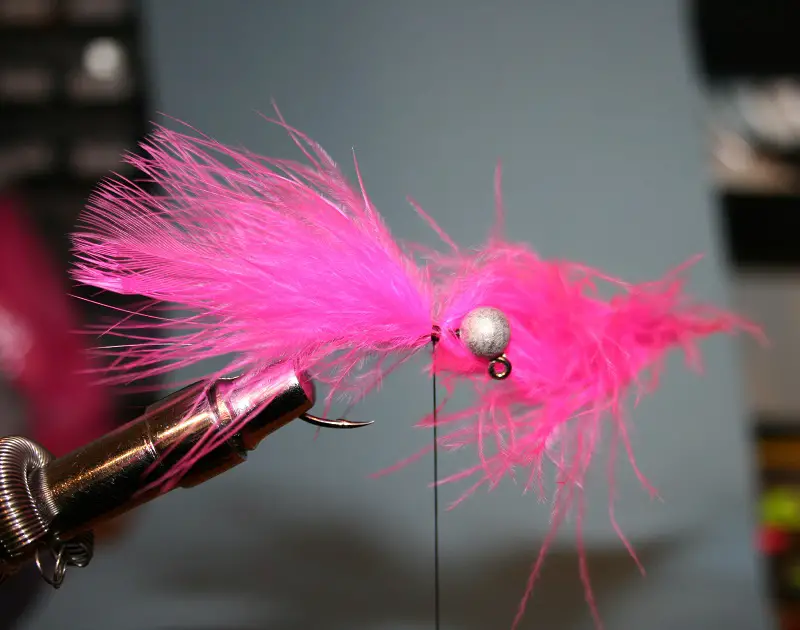
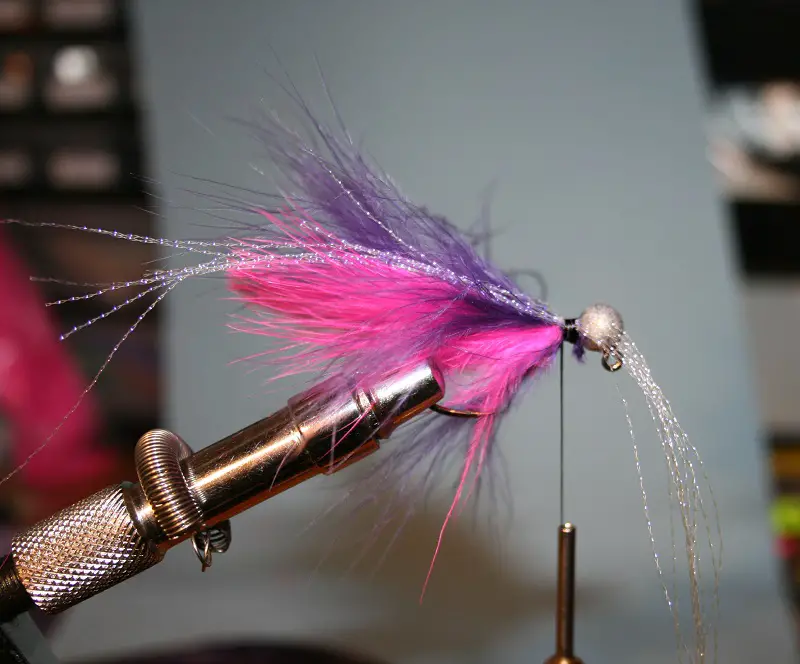
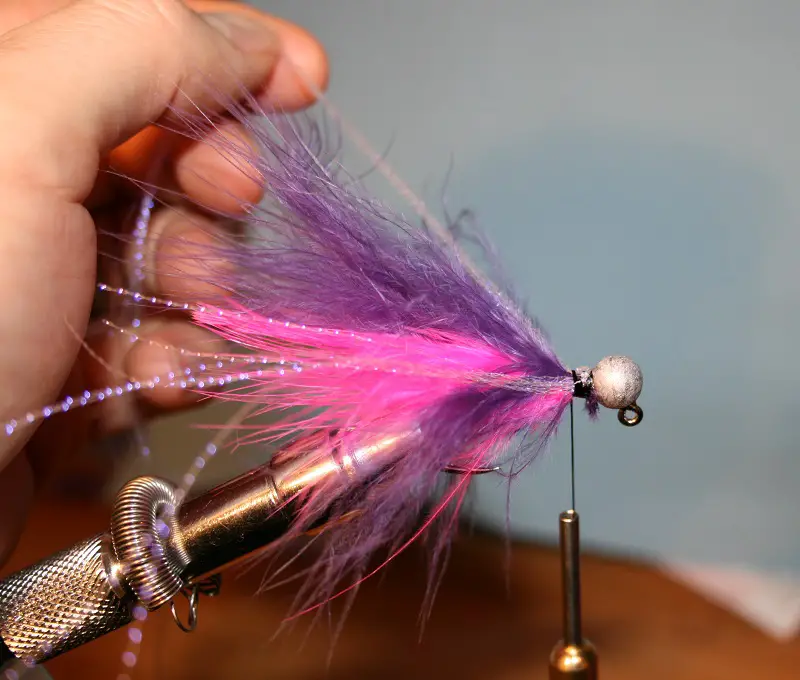
Step 5 – Grab 7-8 strands of UV Pearl Crystal Flash. Sometimes I apply Crystal Flash on the first step before the marabou, but that’s subjective. Measure out the crystal flash so that it’s 1″-2″ longer than the purple marabou (you can always trim this down). Tie down the crystal flash below the jig head with a 3-4 thread wraps. Now take the excess flash and do half a wrap around the shank and then continue to tie it down with more thread. That half wrap with the flash enables you to get the flash on the other (back) side of the jig, so now the flash is displaced around the jig and not in one place. This technique is called “center tying”. Lastly, grab all the flash and pull it below marabout and align the lengths, here you can clip the flash down to ensure they’re even (don’t clip the marabou!).
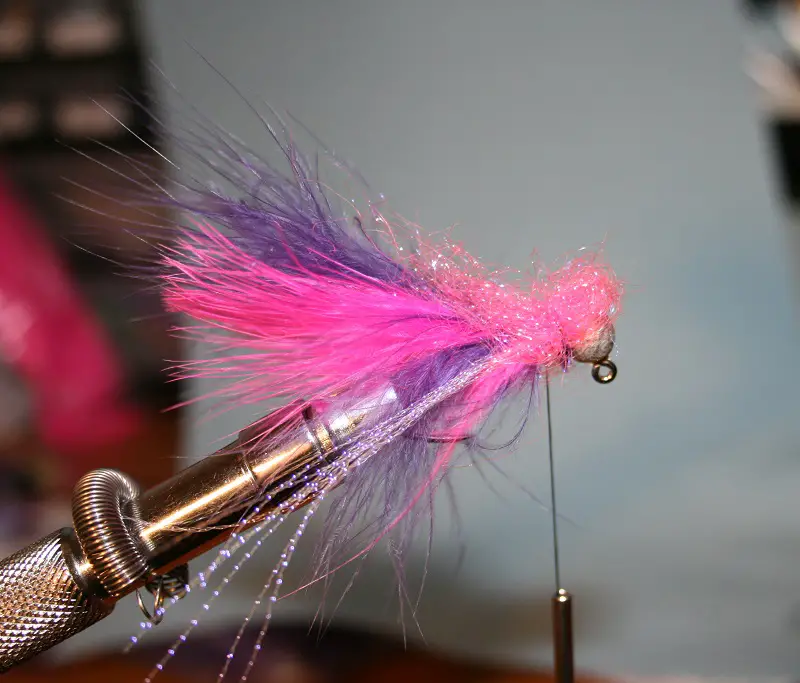
Step 6 – Take a small piece of the hot pink diamond dub, not much bigger than your thumbnail and place it below the jighead. We’ll use the with the same center tying technique we used to apply the flash. Aka. the dub gets tied on in the middle, then folded back and tied on some more. Dub can be finicky so you may have to work with it a little before the final wraps.
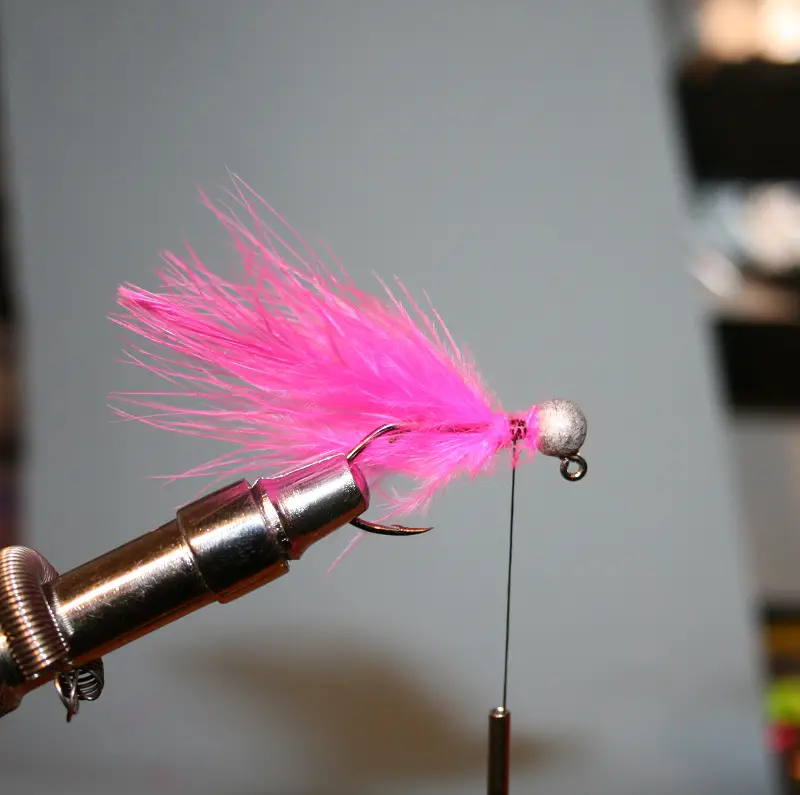
Before the final wraps, I like to apply the head cement onto the thread before wrapping it on. This provides an extra hold on these final wraps. Lastly, I do 2 half hitch knots (simple overhand knot). If you have a whip finishing tool to apply a whip finish that’s great as well. Cinch tight, then clip off the excess thread. Done!
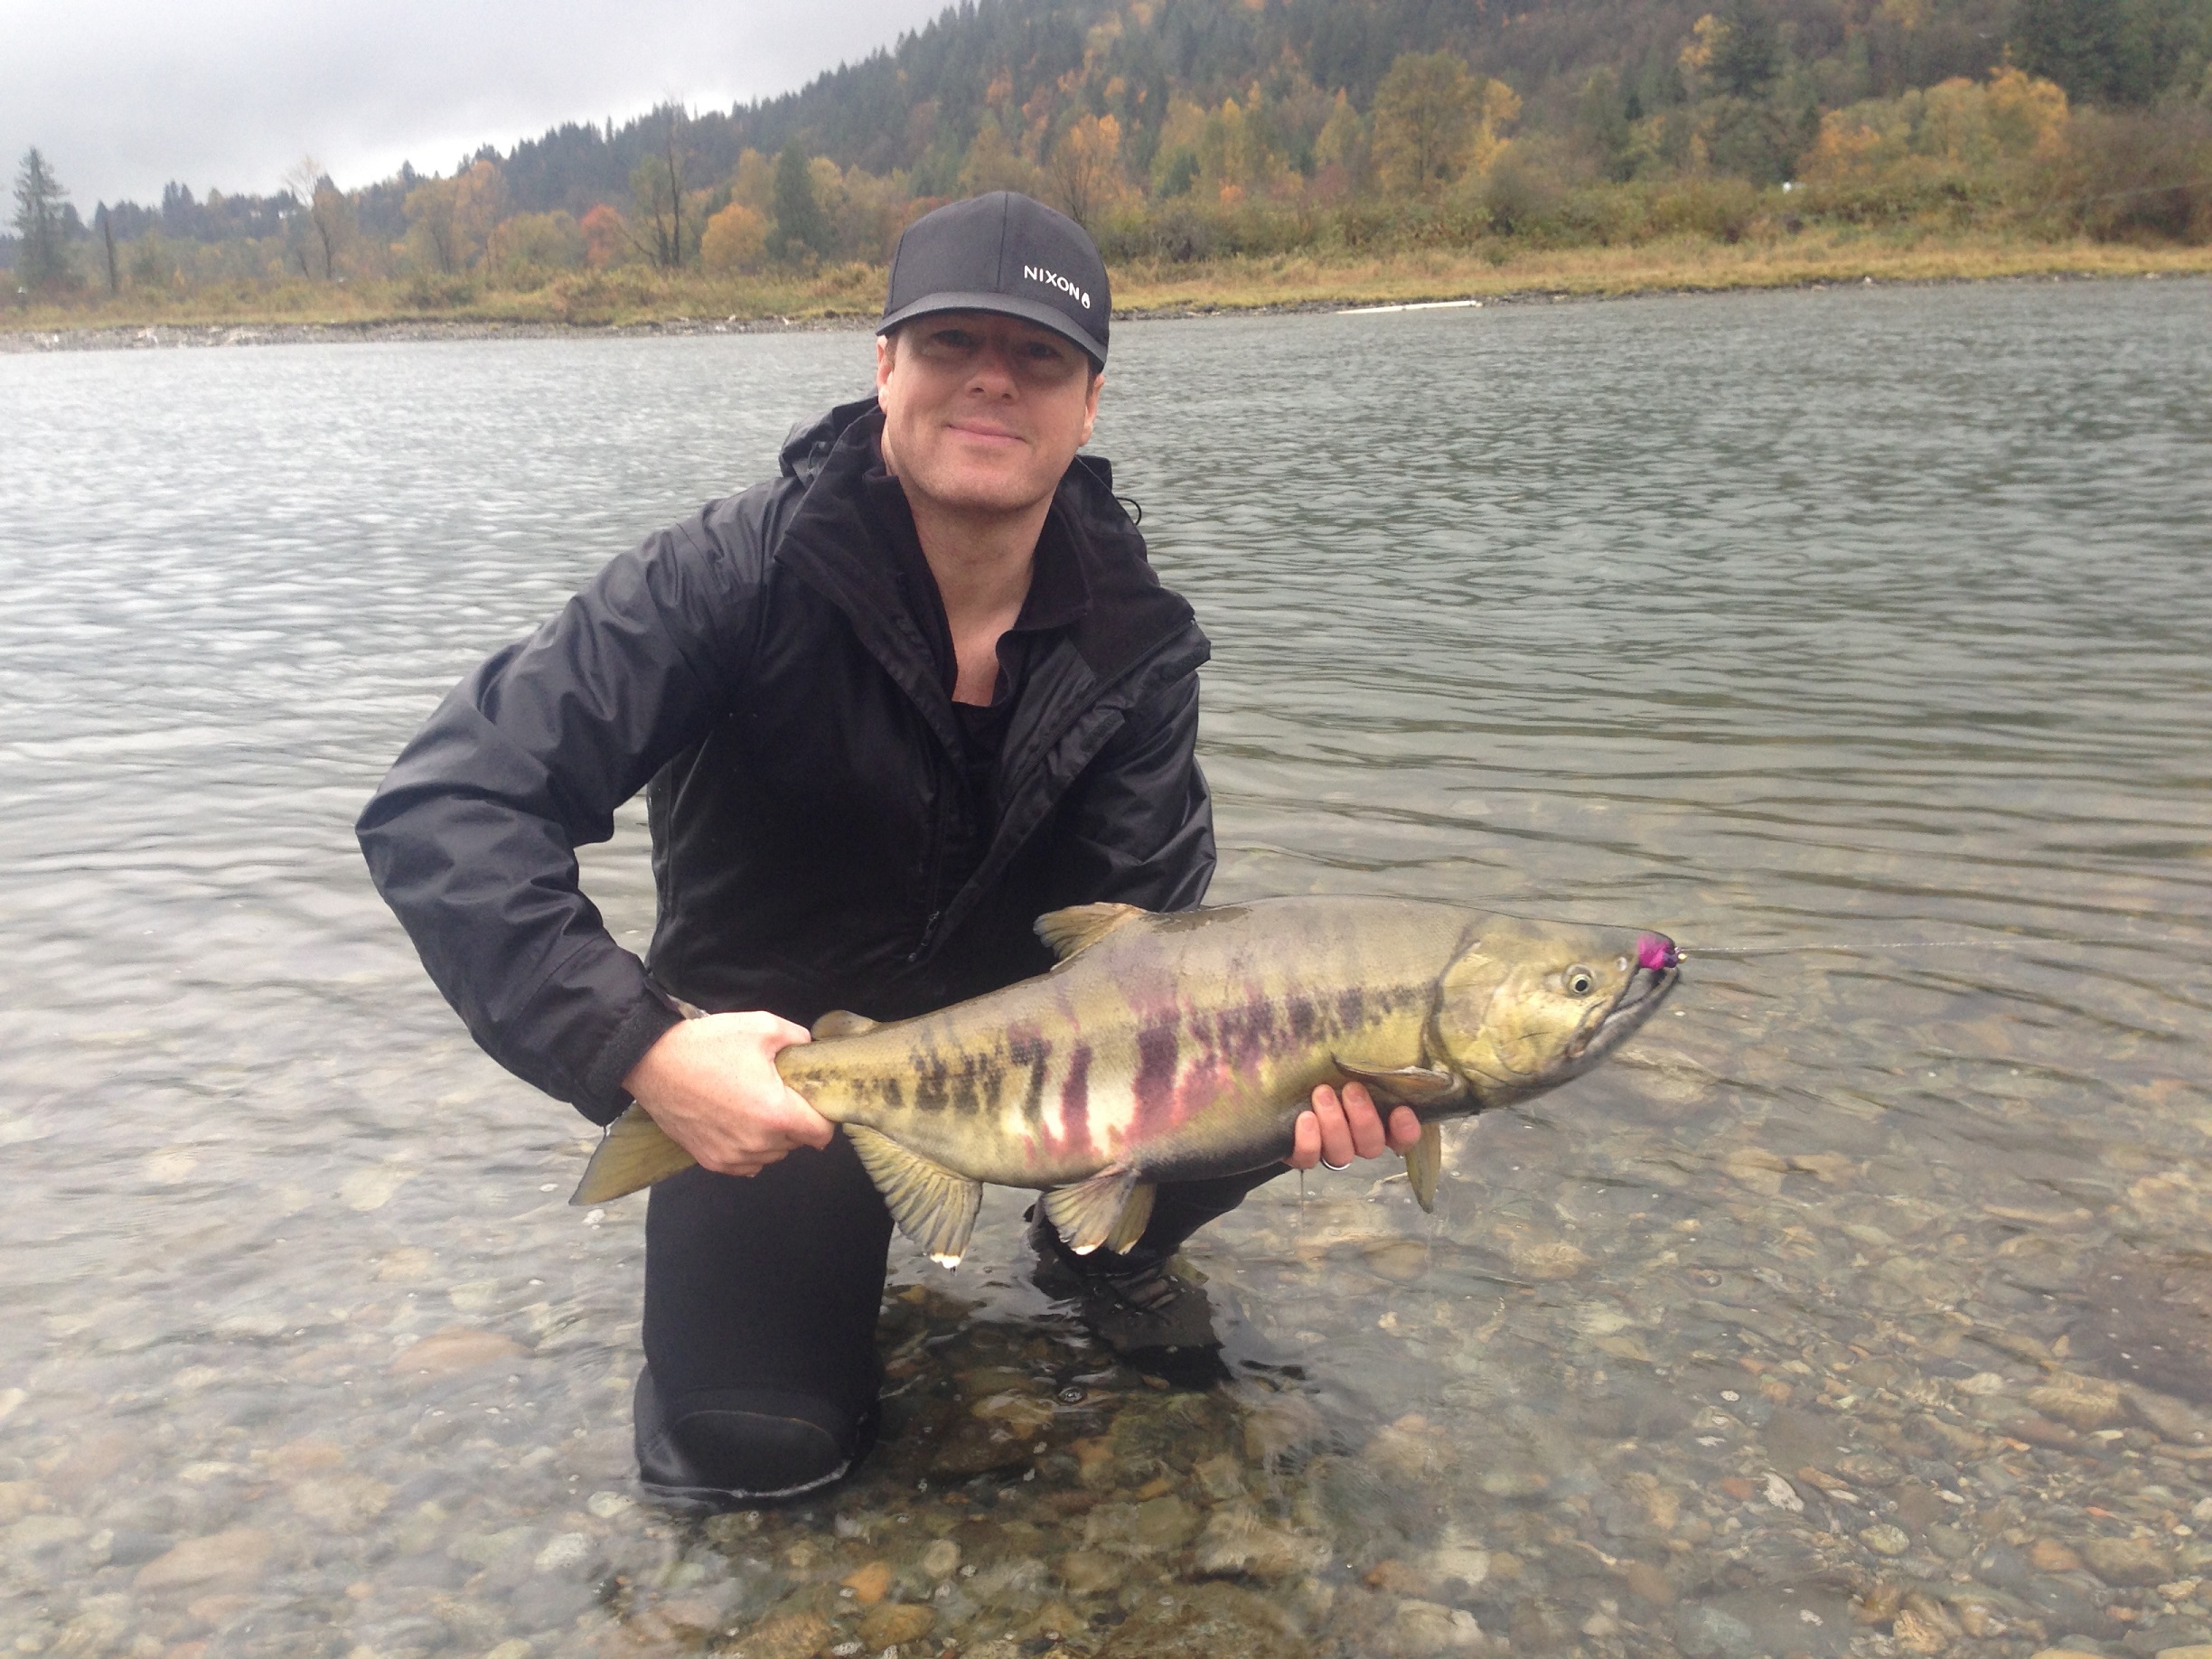
I’ve caught many many Chum Salmon on Purple/Pink jigs under a float, using an identical or close to the jig we created above. Here is a photo with one of these jigs hanging out of a Chum Salmon’s mouth.
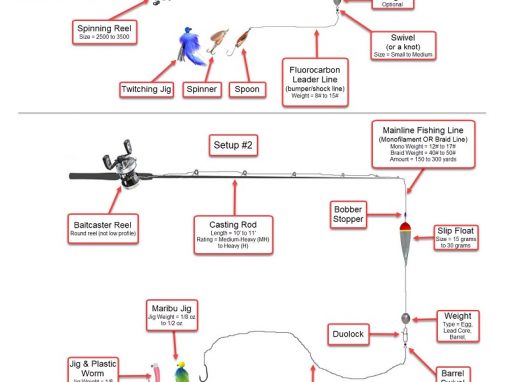
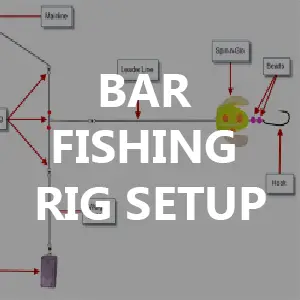
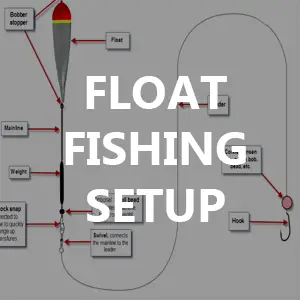
If you want information on how to fish a jig under a float or see a diagram on the entire float fishing setup see the Float Fishing Setup Tip page. Here I outline all the different components along with some helpful tips on how to effectively fish a float.
Additional Tips